Reseller Dashboard
Introducing a reseller dashboard for ContentStudio’s white-label solution, enabling resellers to brand the platform as their own fully. From logos and custom domains to themes and email settings, resellers can deliver a seamless, branded experience to their customers.
Beyond branding, the Reseller Dashboard serves as a centralized control center for managing customer accounts. Resellers can allocate social accounts, workspaces, team members, storage, and credit limits based on individual customer agreements — all from a single, dedicated dashboard.
In this Article:
- Getting access to the Reseller Dashboard
- White label configuration
- Managing customers
- Billings and payments
- FAQ's
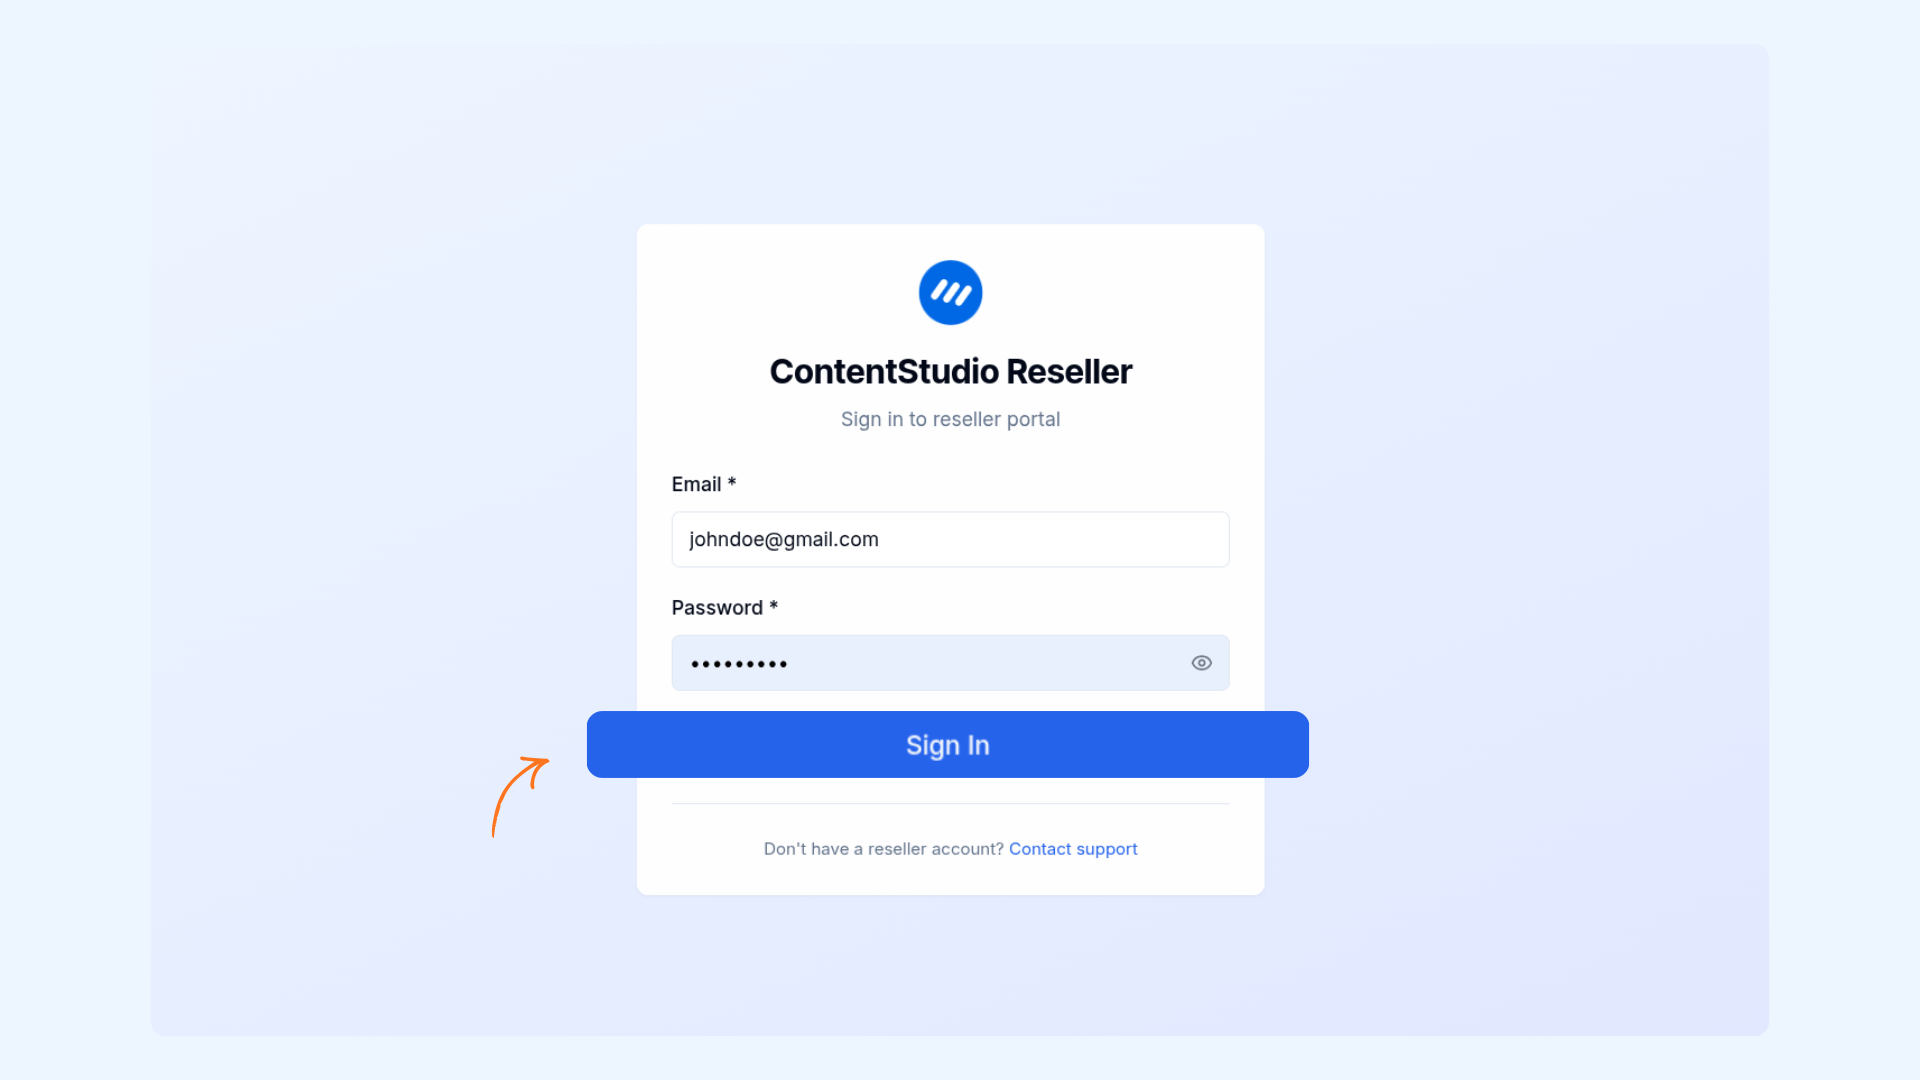
Getting Access to the Reseller Dashboard
Steps to Get Started
- Navigate to the Reseller Dashboard login page.
- Enter the credentials provided by the ContentStudio team.
- Click Sign In.
Billing and reseller sign-up are handled manually between ContentStudio and the reseller. There is currently no in-app purchase or automated onboarding flow for resellers.
White Label Configuration Overview
- General Settings
- Theme Settings
- Domain Settings
- Email Settings
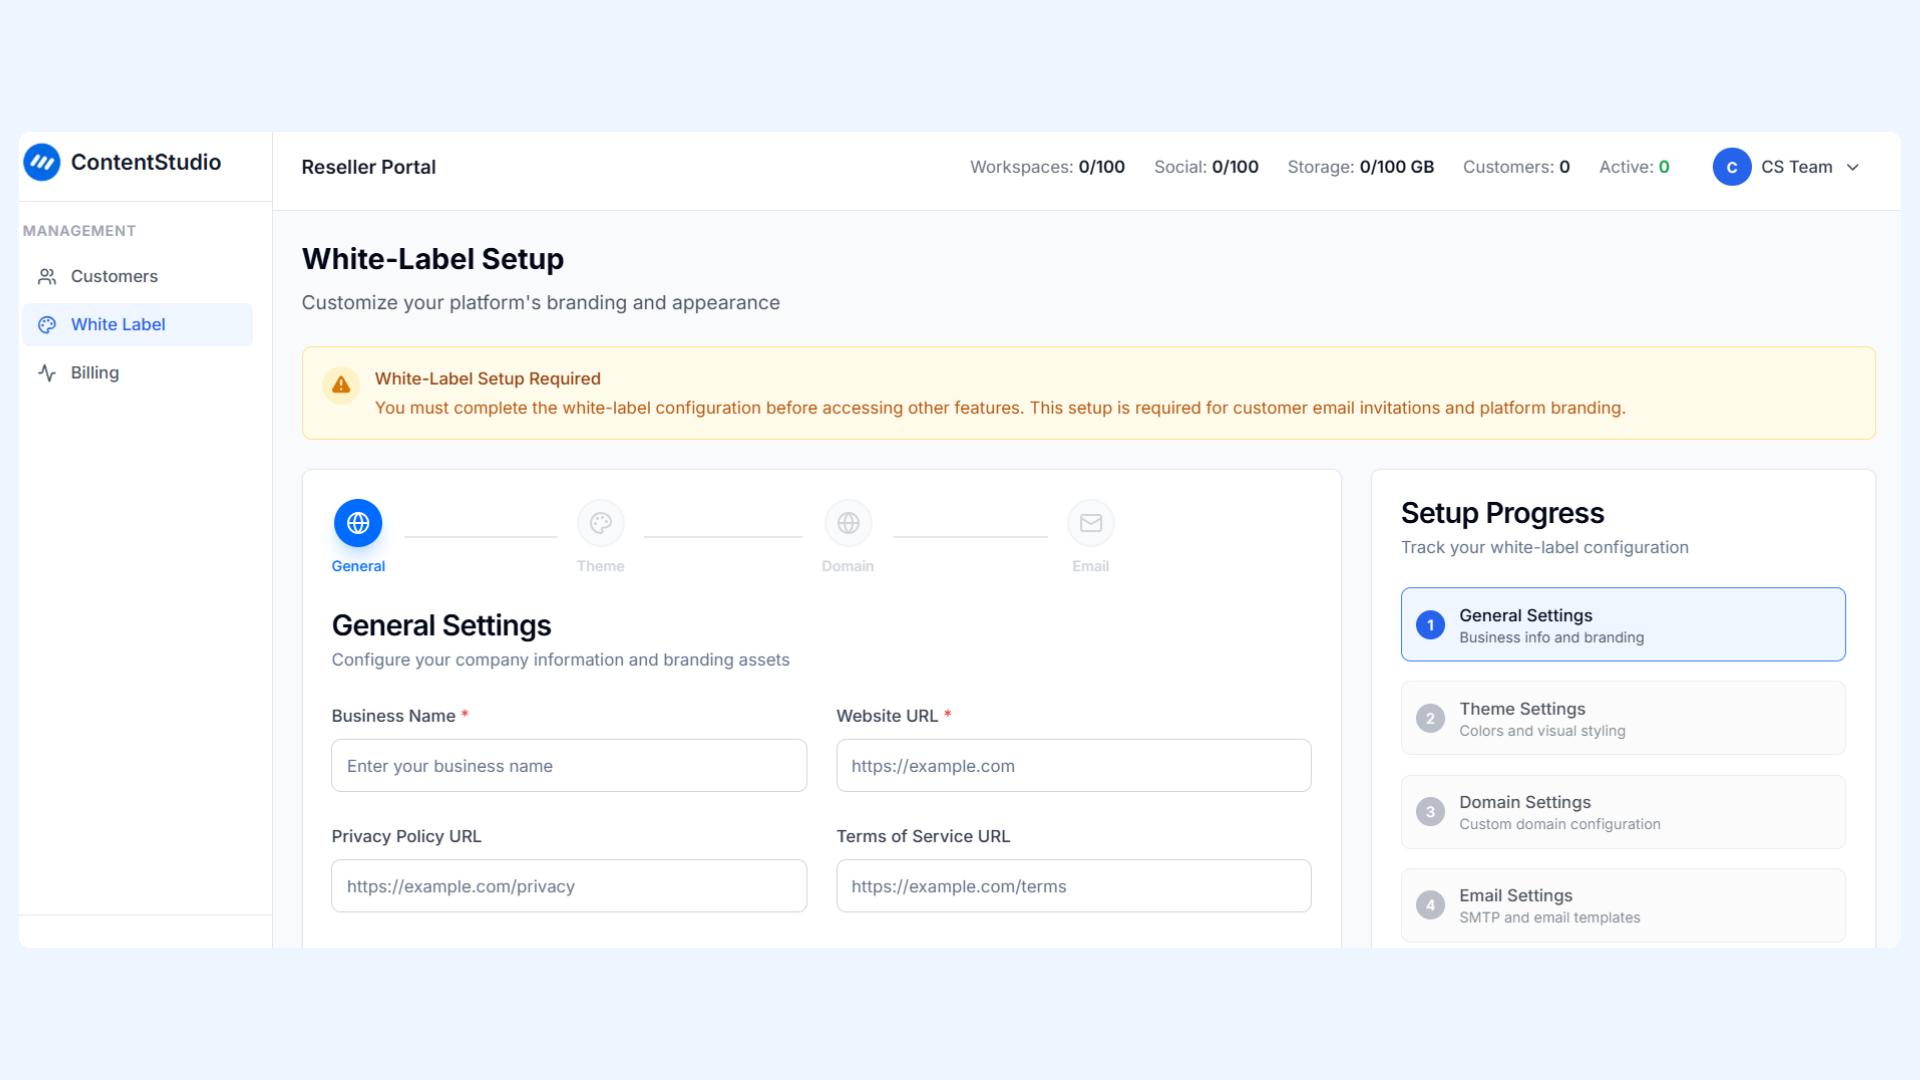
General Settings
General Settings define the core business and branding information visible to your customers. This section includes:
- Business Name
- Website URL
- Privacy Policy URL
- Terms of Service URL
- Company Logo & Favicon
These details help establish your brand identity within the ContentStudio platform for all invited customers.

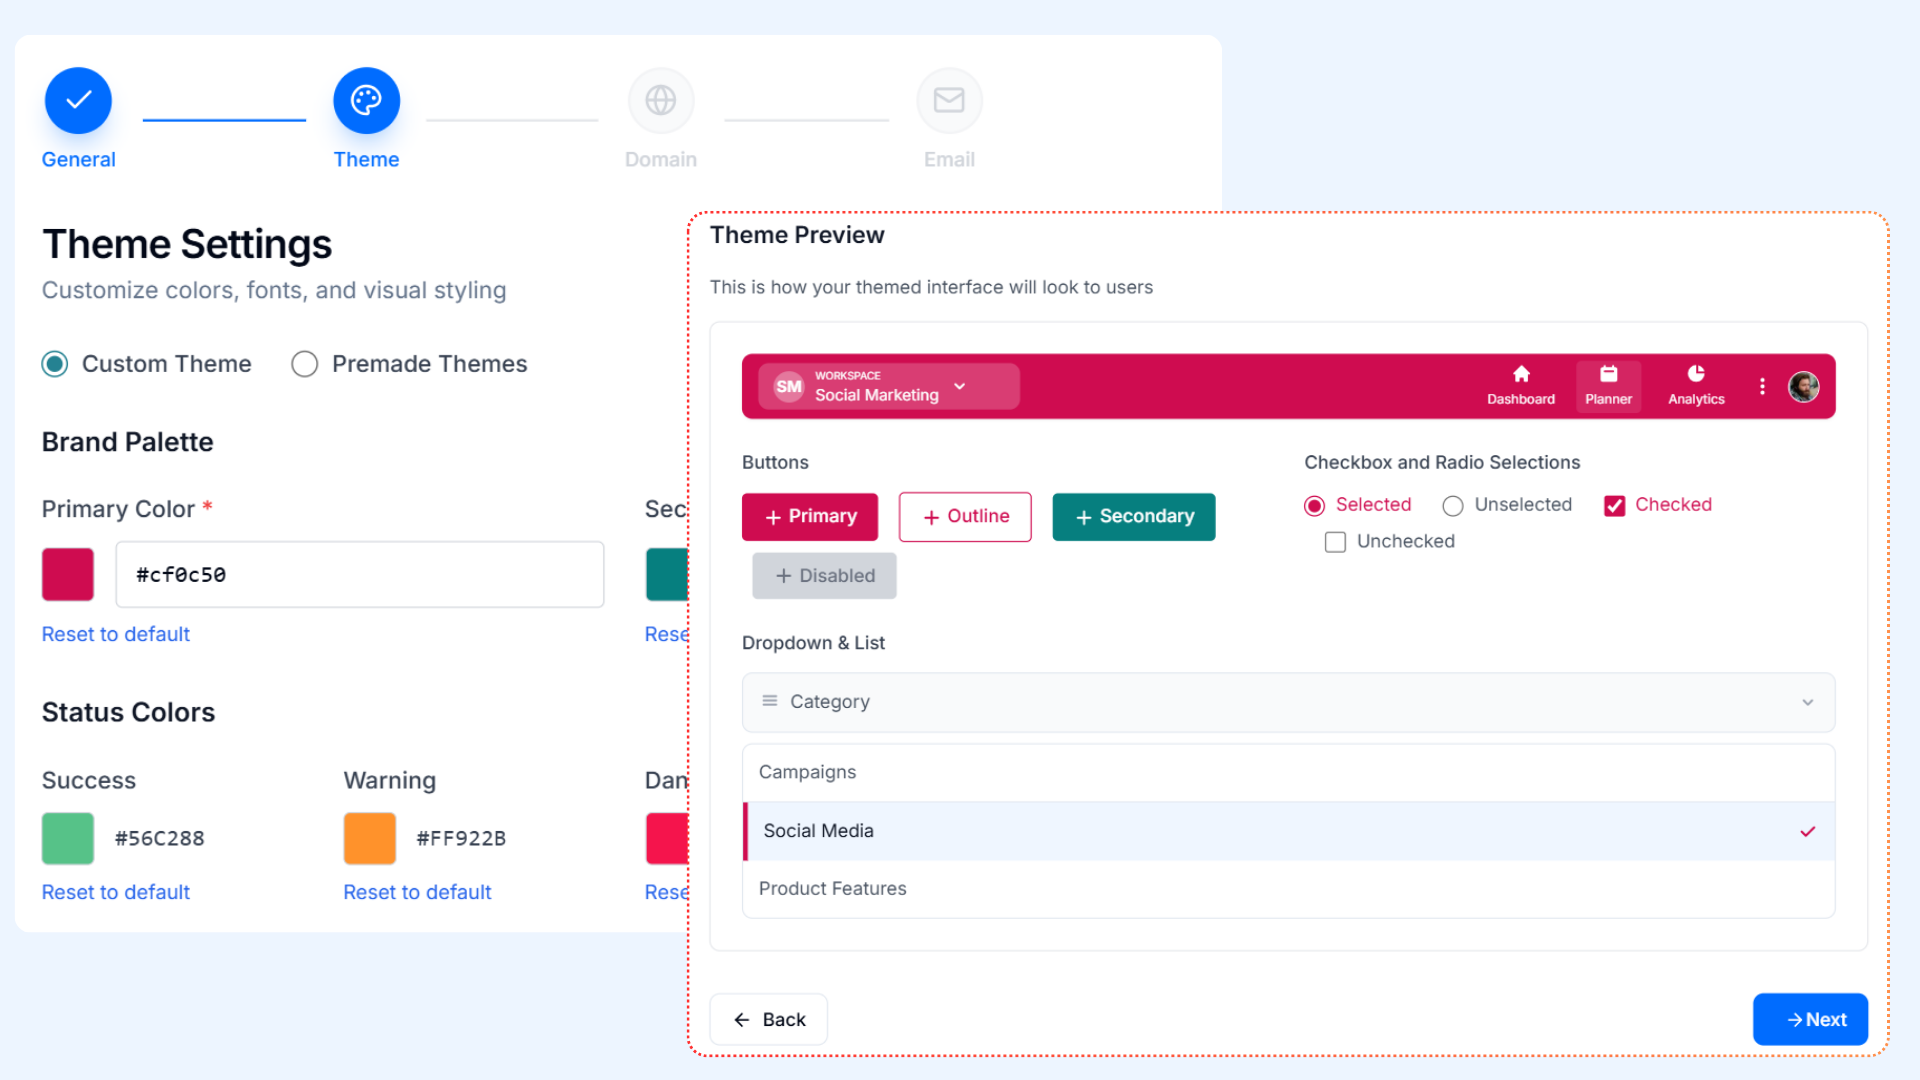
Theme Settings
Theme Settings allow you to control the visual appearance of the platform. You can:
- Choose from pre-made themes or create a custom theme
- Set your brand color palette and status colors
- Preview the theme before applying it
- Save and proceed to the next step
This ensures a consistent look and feel for customers under your brand.
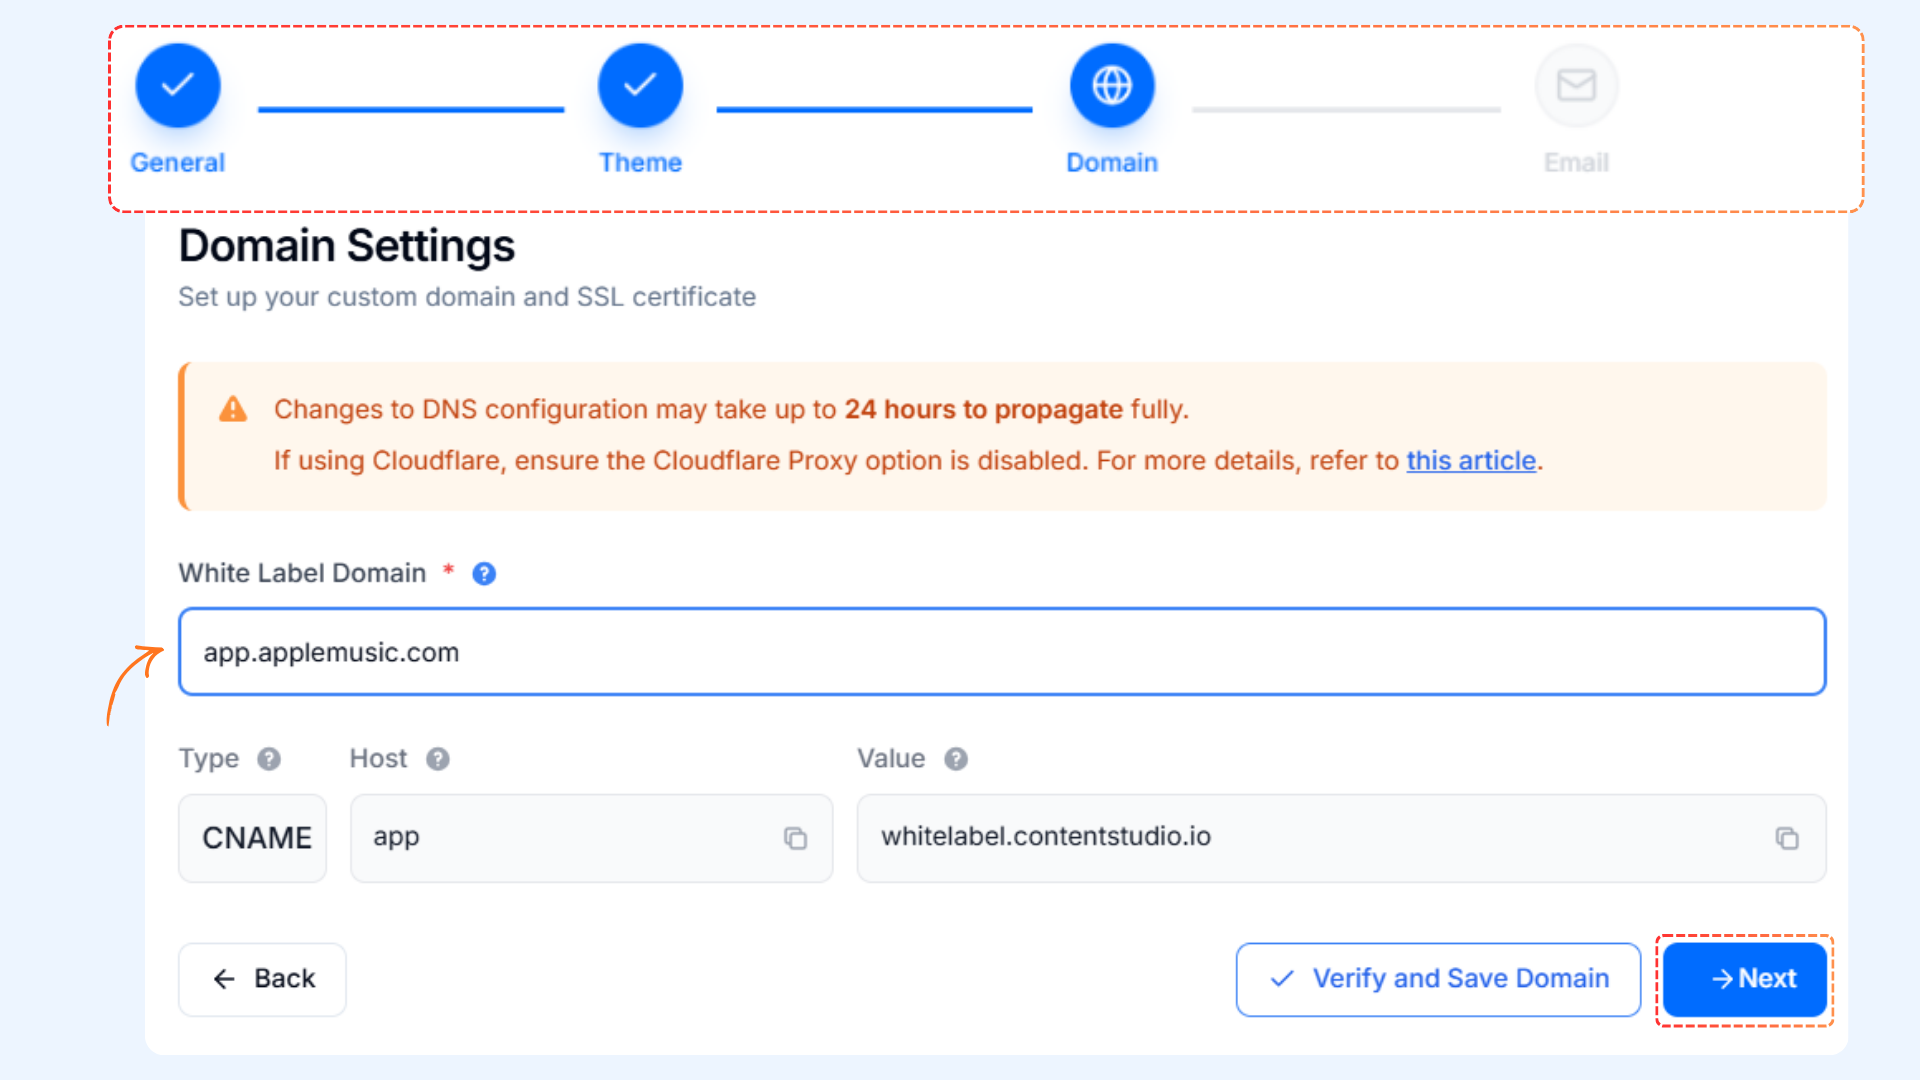
Domain Settings
Domain Settings allow you to configure how customers access the platform. This section includes:
- White-label domain setup
- Domain type, host, and value
- Enter your platform URL and save
After completing these settings, click Next to proceed.
Email Settings
Email Settings allow you to configure how platform notifications are sent to your customers. Key configurations include:
- SMTP Host and Port
- SMTP Username and Password
- From Email and Sender Name
- Encryption method (TLS or SSL)
After entering all the details, save your configuration to enable email functionality for your branded platform.

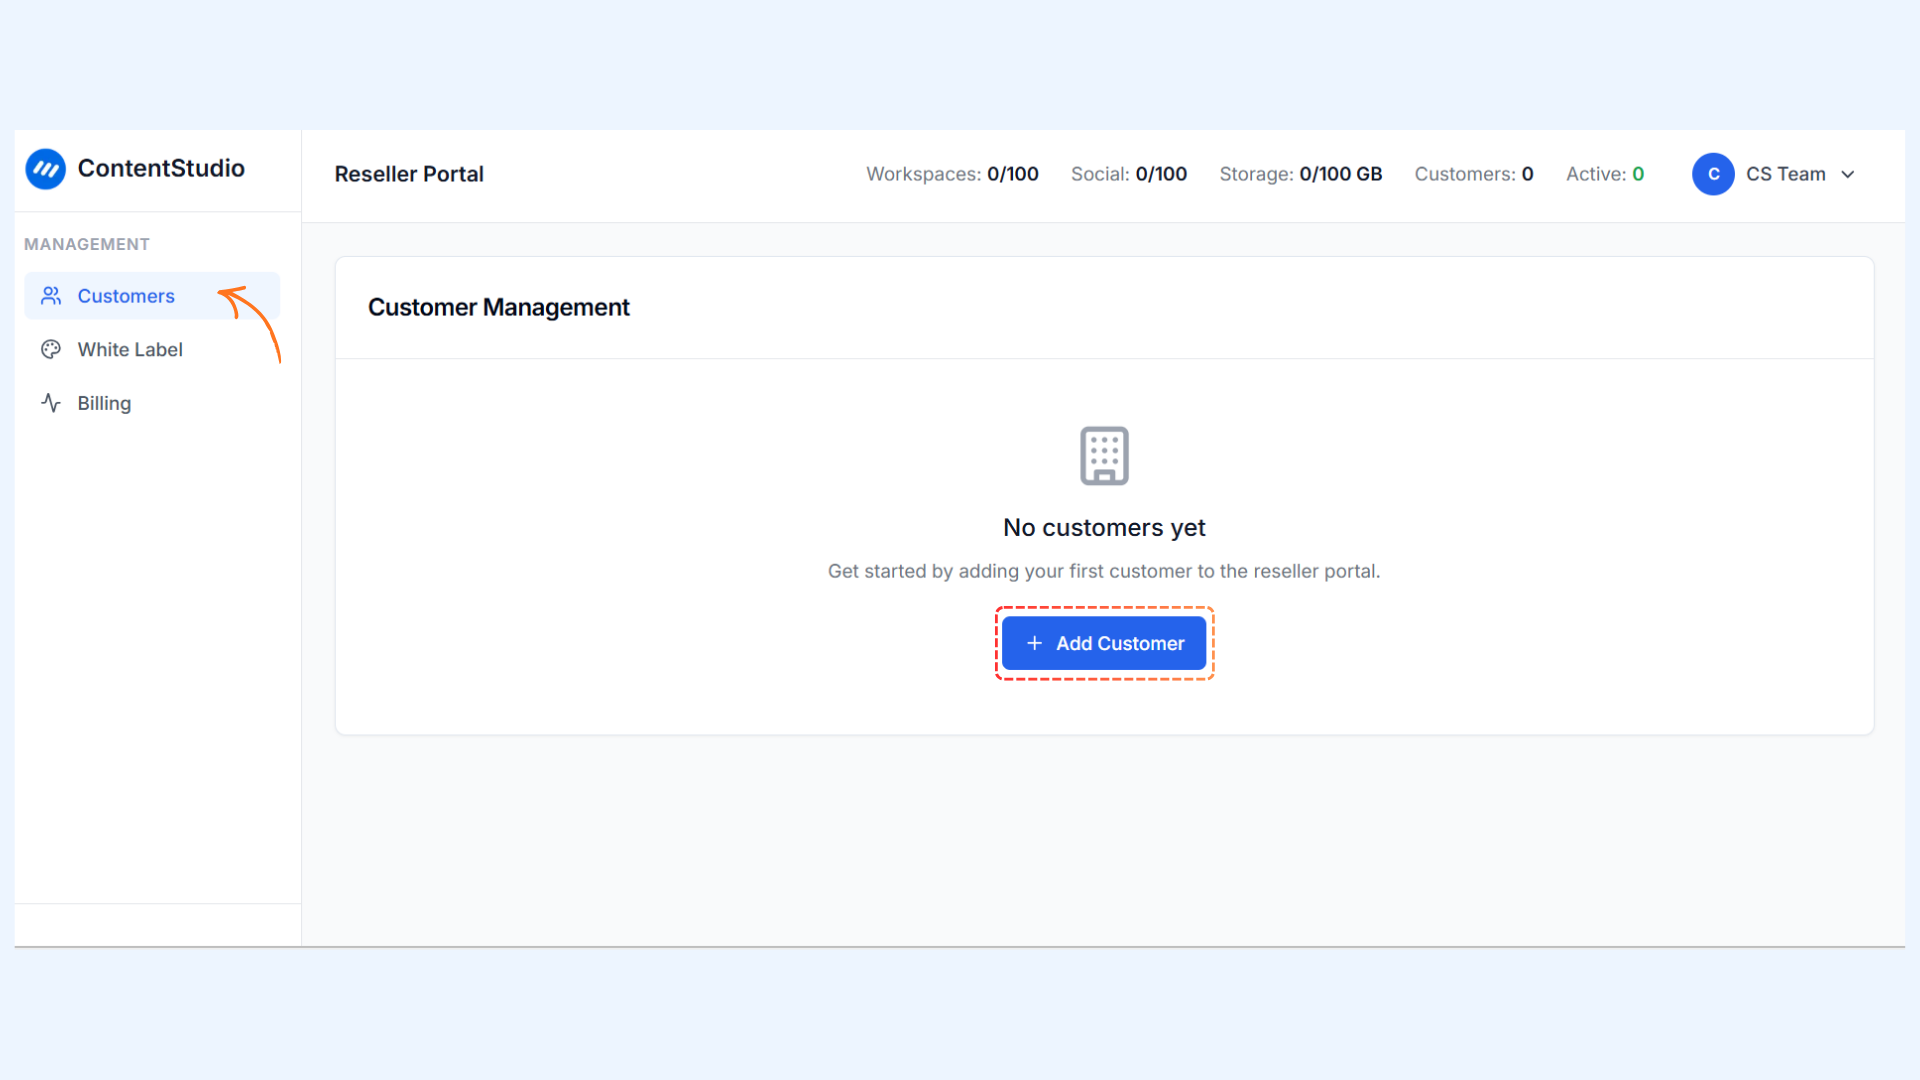
Managing Customers
After completing the White Label Setup, resellers can begin adding customers from the Customers section in the left-hand navigation.
Adding a Customer
Go to Customers → Add Customer.
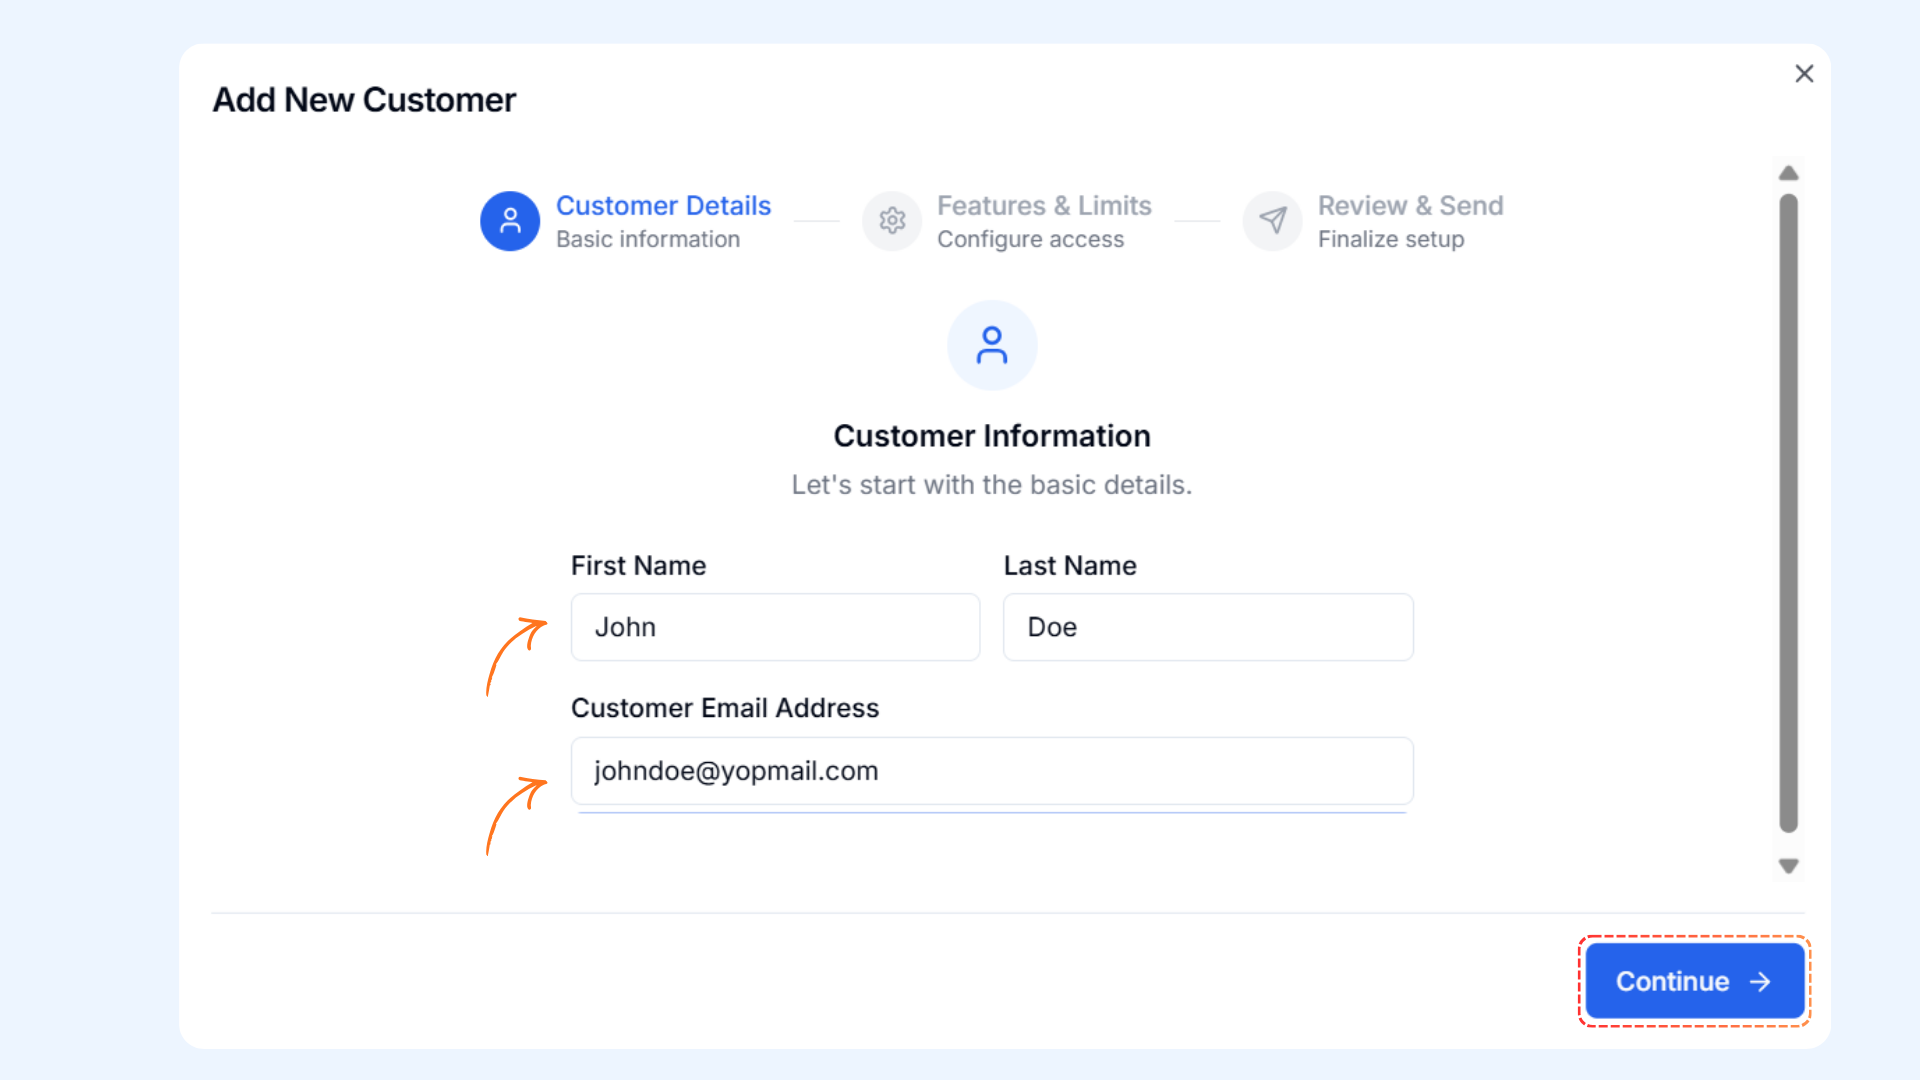
Enter the required customer information:
- Customer name
- Customer email address
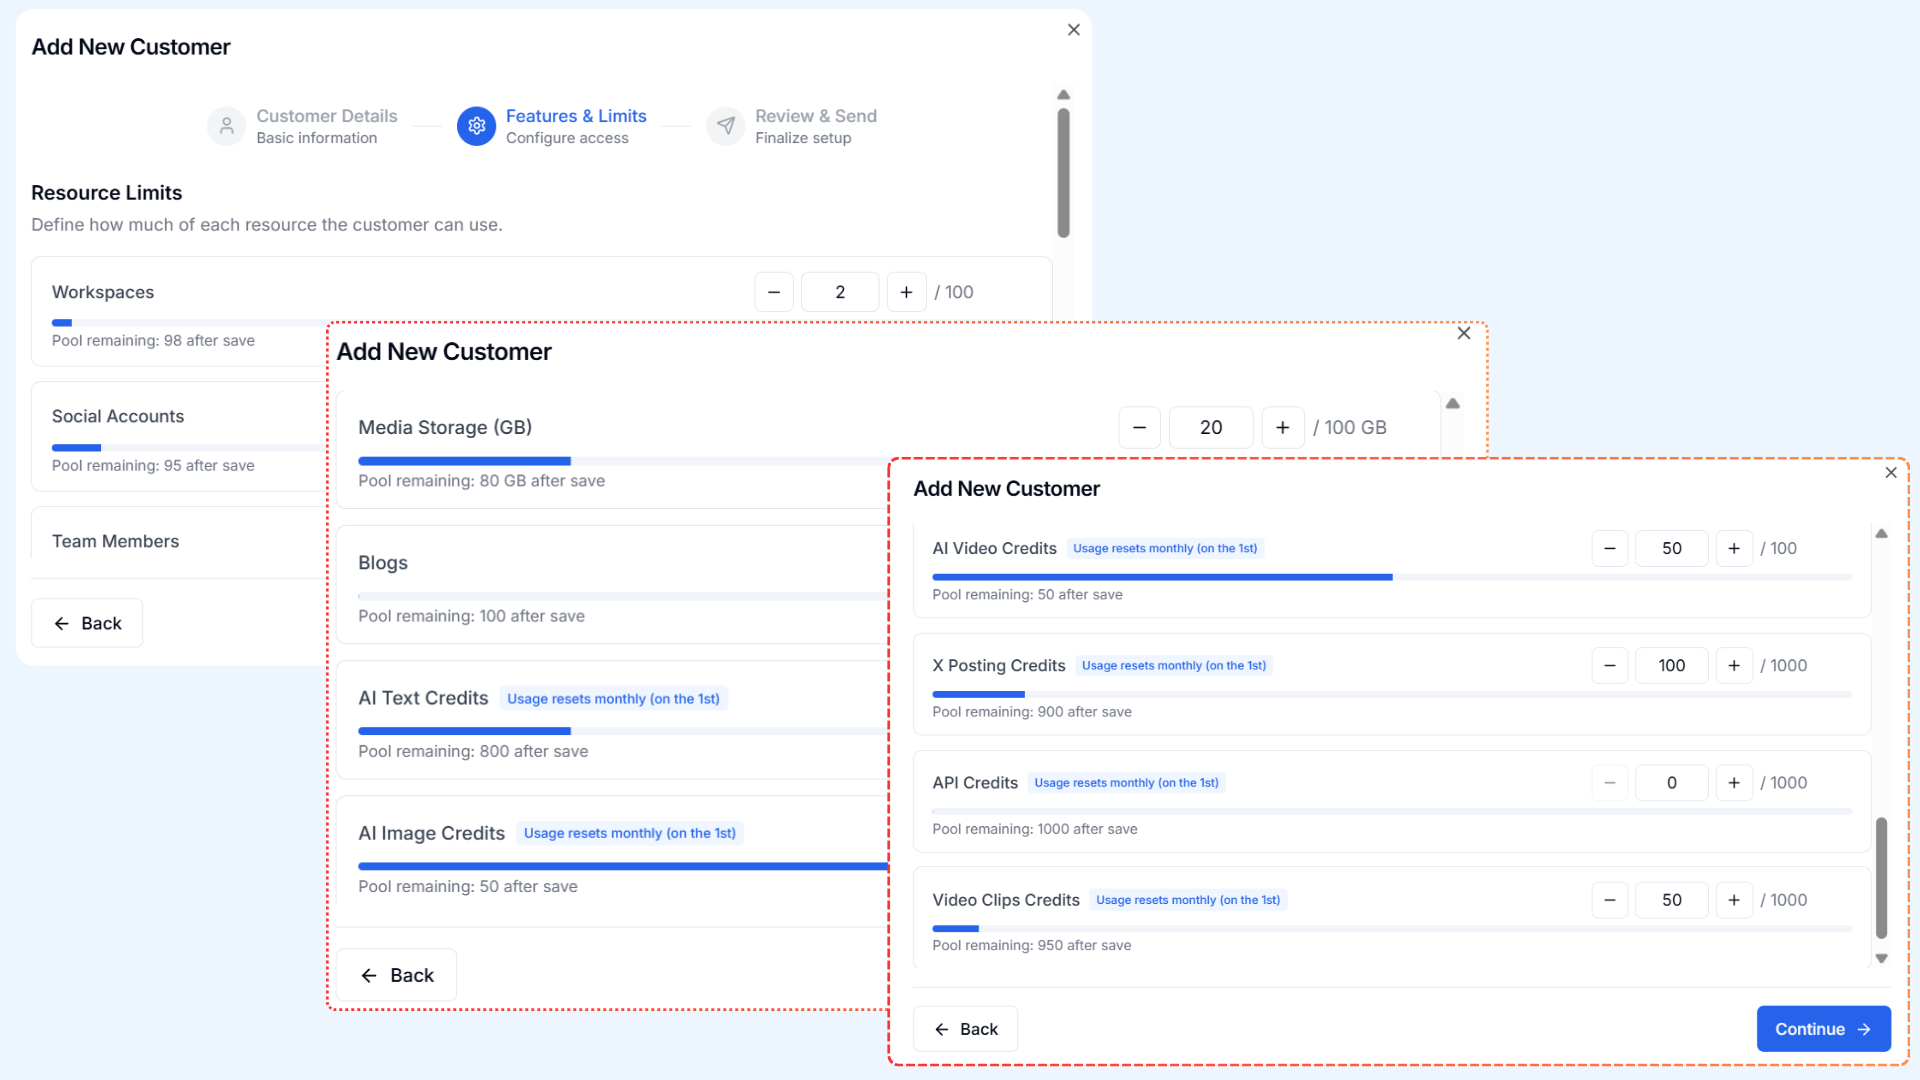
In the Features and Limits section, assign resources to the customer, such as:
- Number of workspaces
- Number of social accounts
- Storage limits, etc.
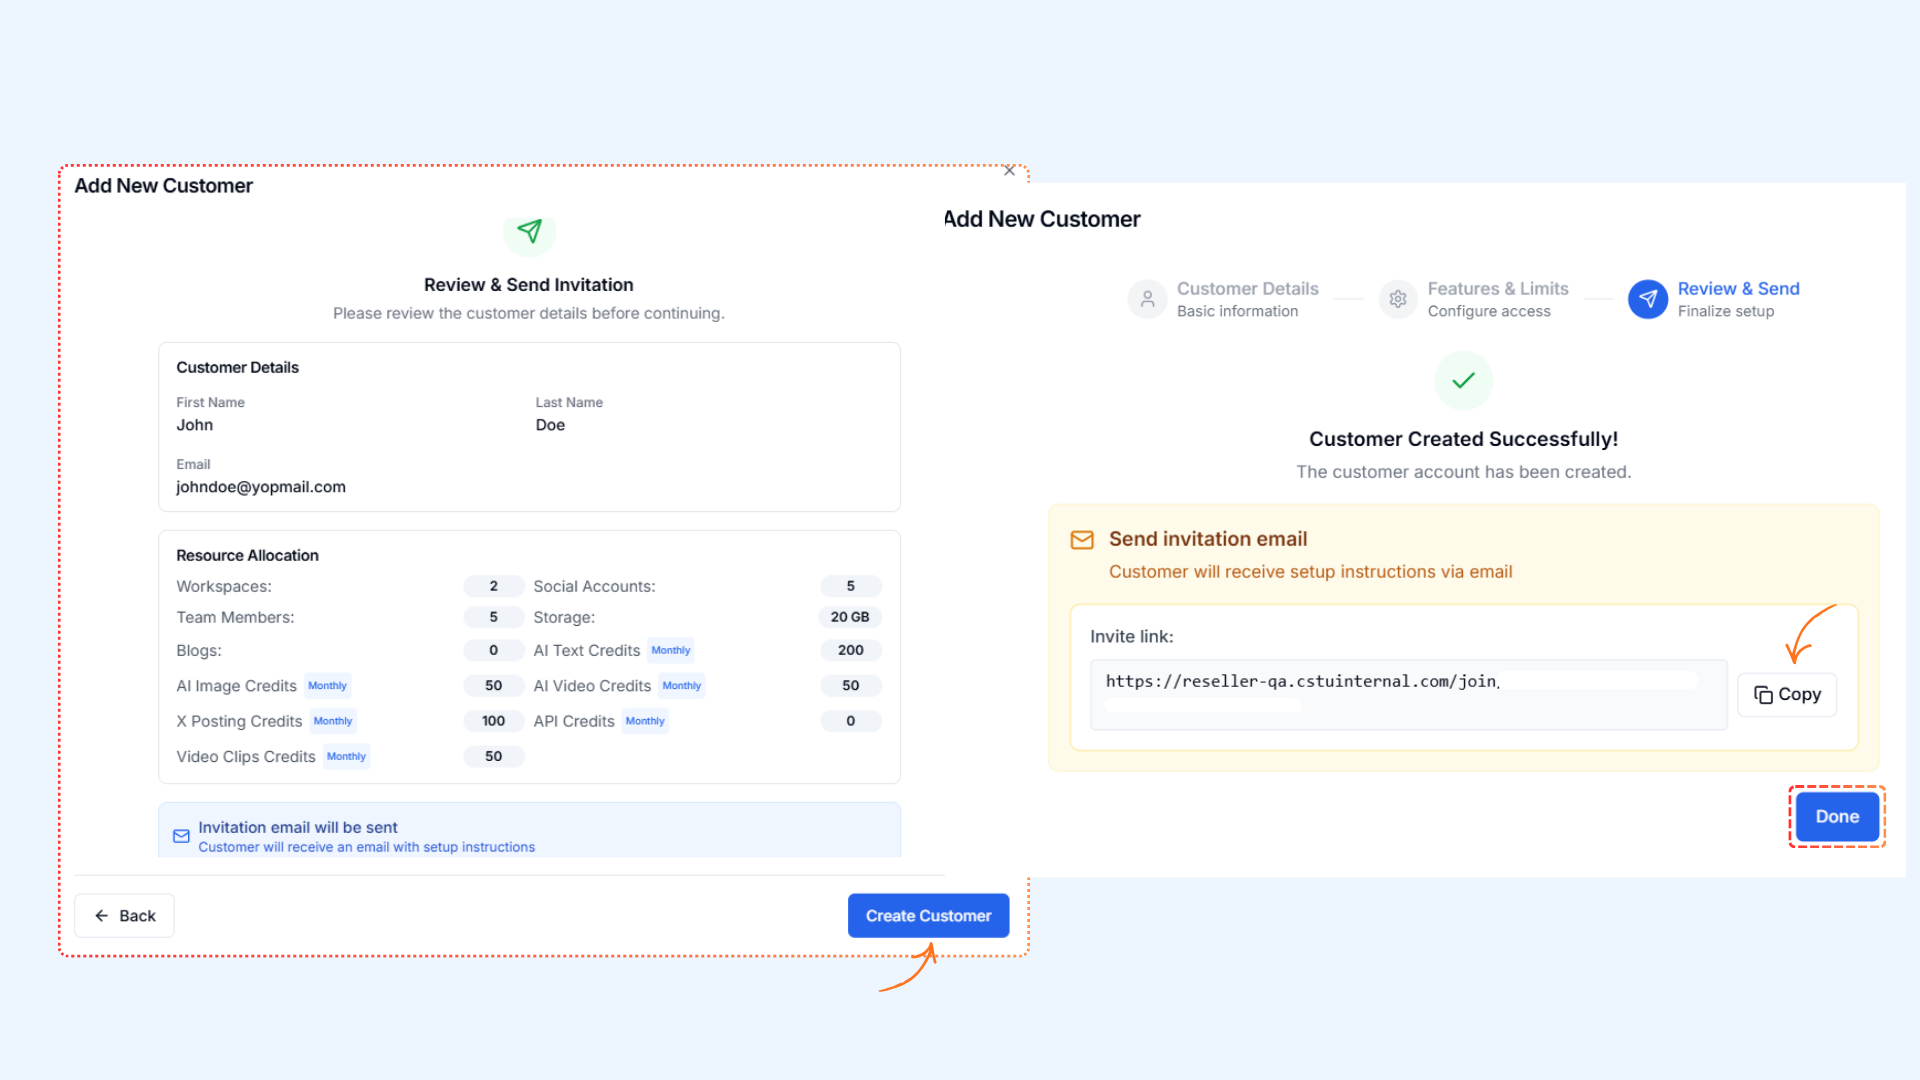
In the Review & Send Invitation section, review all the customer details and click Create Customer.
Send the invitation and complete the process.
- An invitation email is sent to the customer.
- An invite link is also generated and displayed.
- You can copy the invite link if needed.
- Click Done to finish.
Managing Customers after sending the Invitation
Once a customer is created in the Reseller Dashboard, you can perform a variety of actions depending on their status.
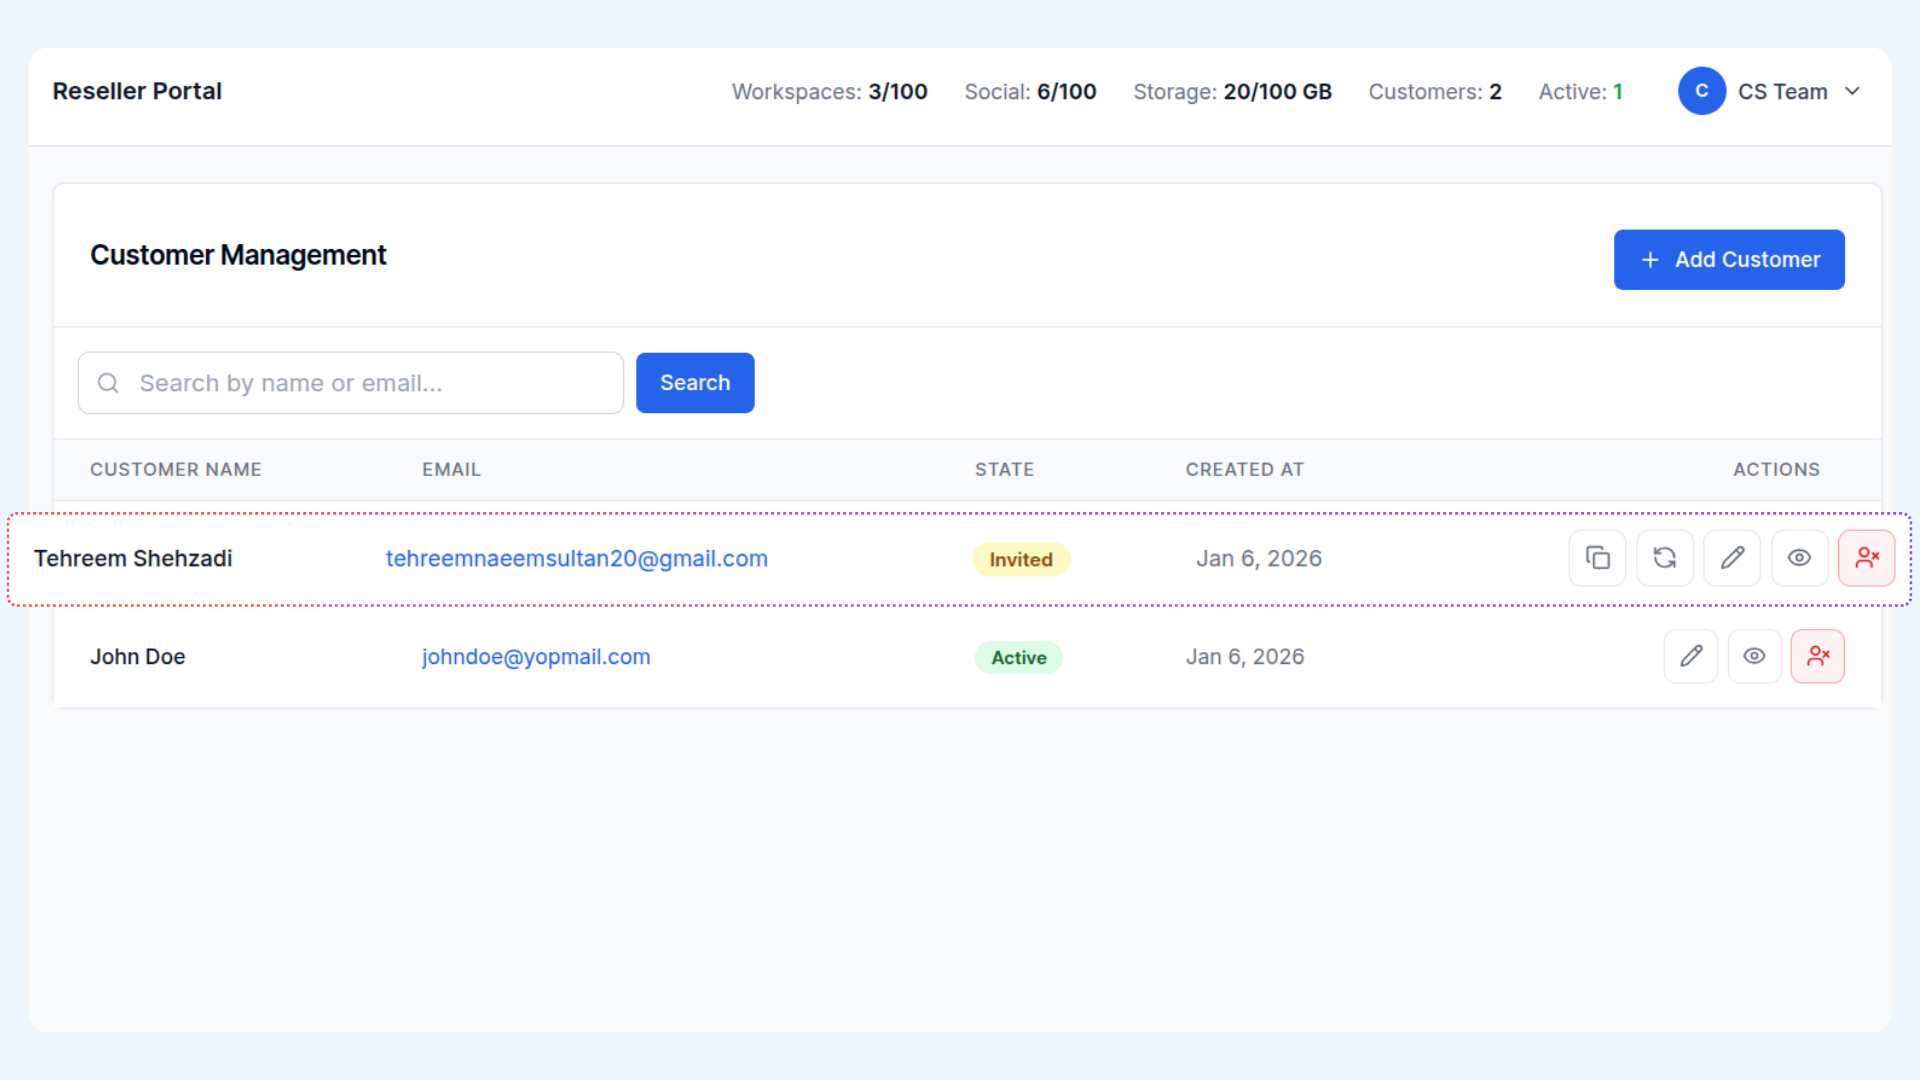
Actions for Invited Customers
Invited customers have not yet accepted their invitation. You can perform the following actions:
- Copy Invitation Link – Quickly copy the unique invitation link to share with the customer.
- Resend Invitation Email – Send the invitation again if the customer did not receive it.
- Edit Customer – Modify the customer’s details.
- View Details – Access more information about the customer.
- Deactivate Customer – Remove the customer from active access if needed.
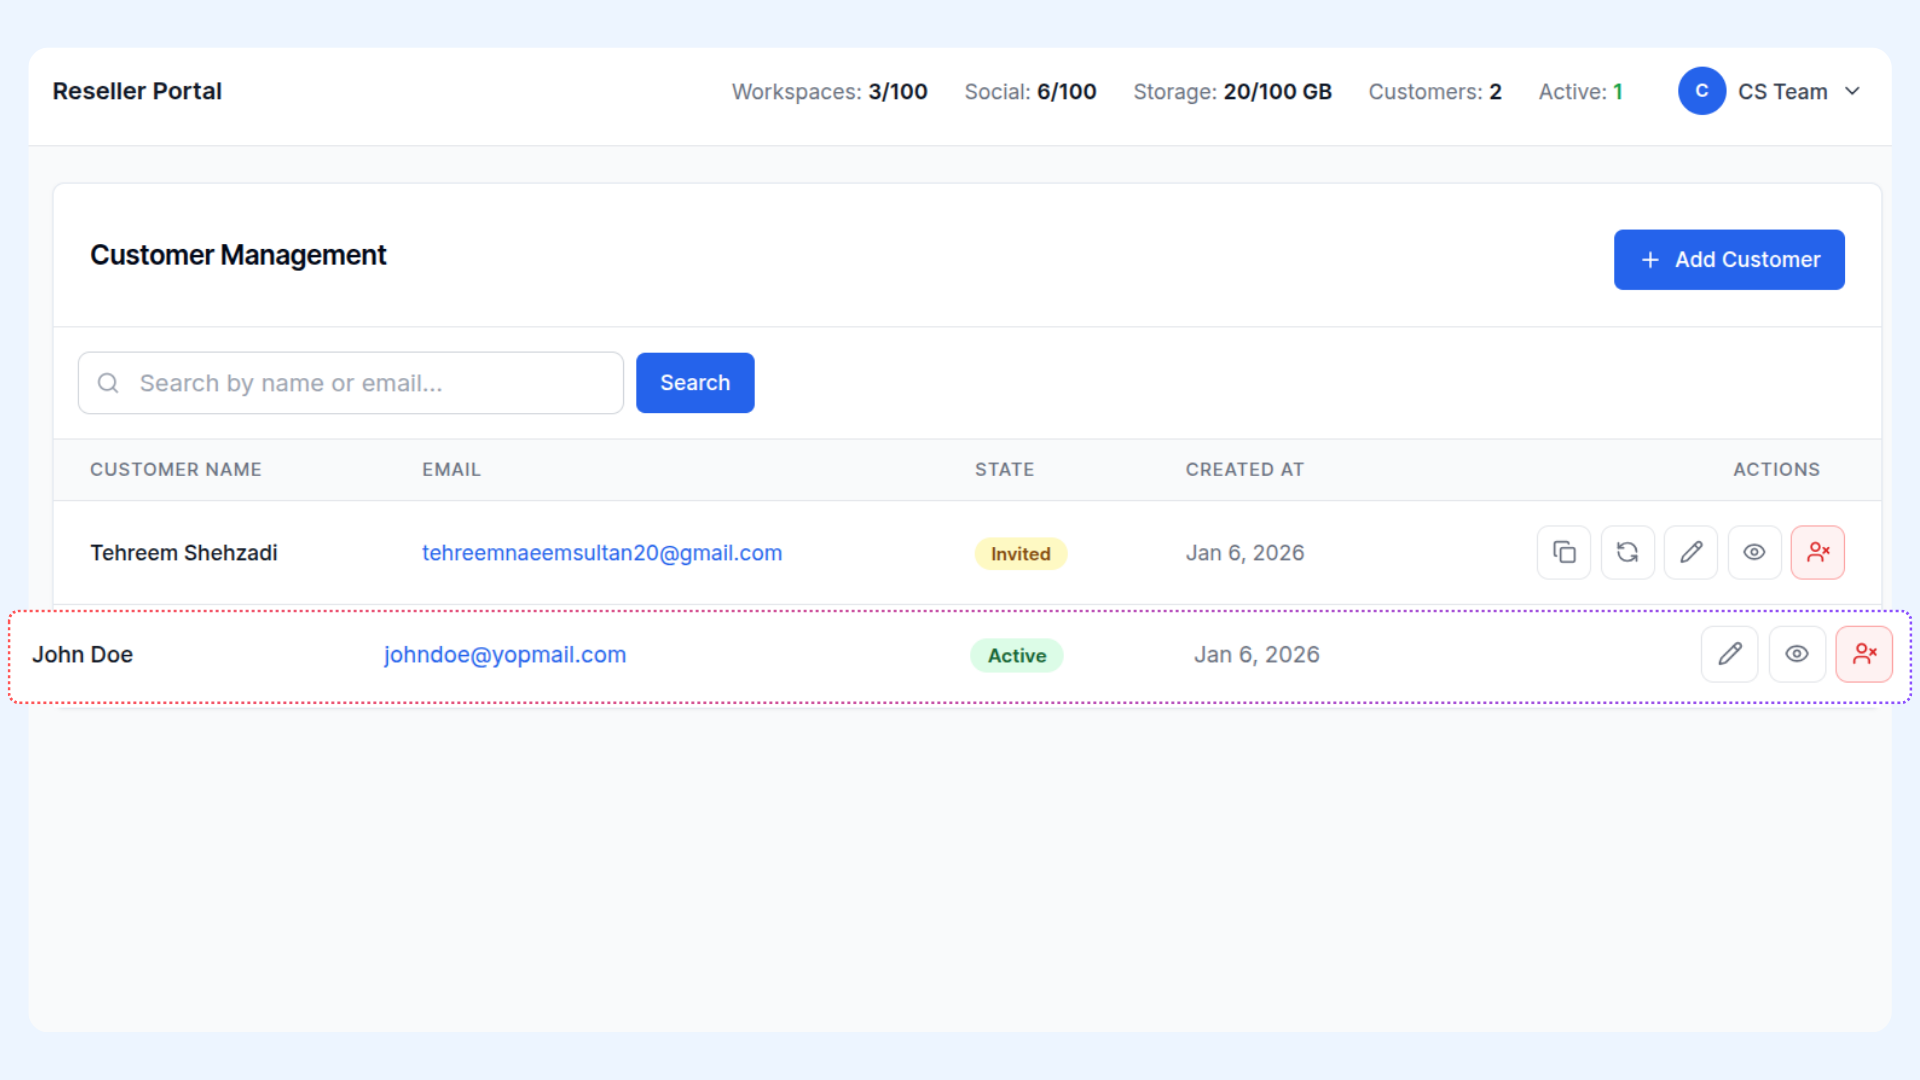
Actions for Active Customers
Active customers have accepted the invitation and can access the platform. You can perform the following actions:
- Edit Customer – Modify the customer’s details.
- View Details – Access detailed customer information.
- Deactivate Customer – Disable the customer’s access to the platform.
Customer Invitation & Sign-Up Flow
Customers can only access the platform through an invitation sent by the reseller. There is no self-sign-up flow available.
Invitation Access
- Each customer receives a unique invite link
- The invite link redirects the customer to the sign-up page
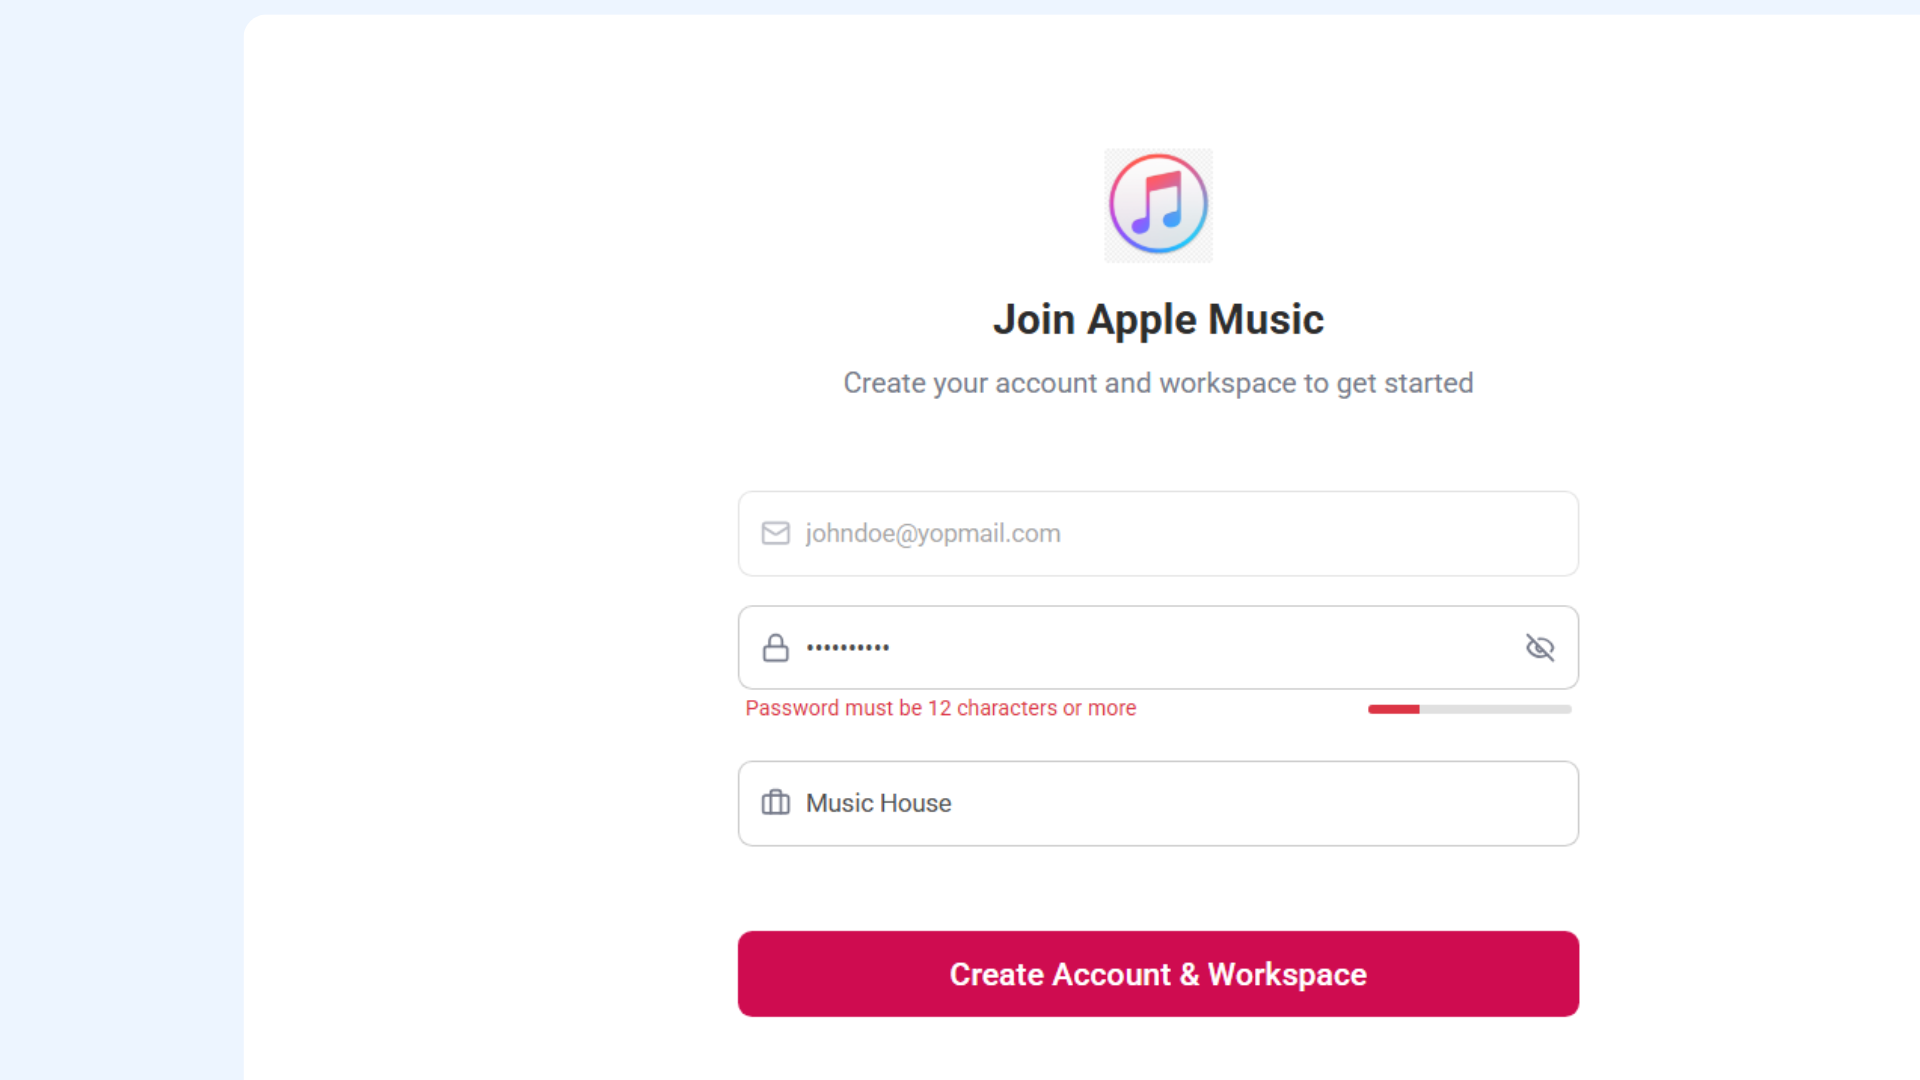
Sign-Up Page Details
- The email address is pre-filled and read-only
- The customer is required to:
- Set a password
- Enter a business name
(This business name is automatically used as the first workspace name)
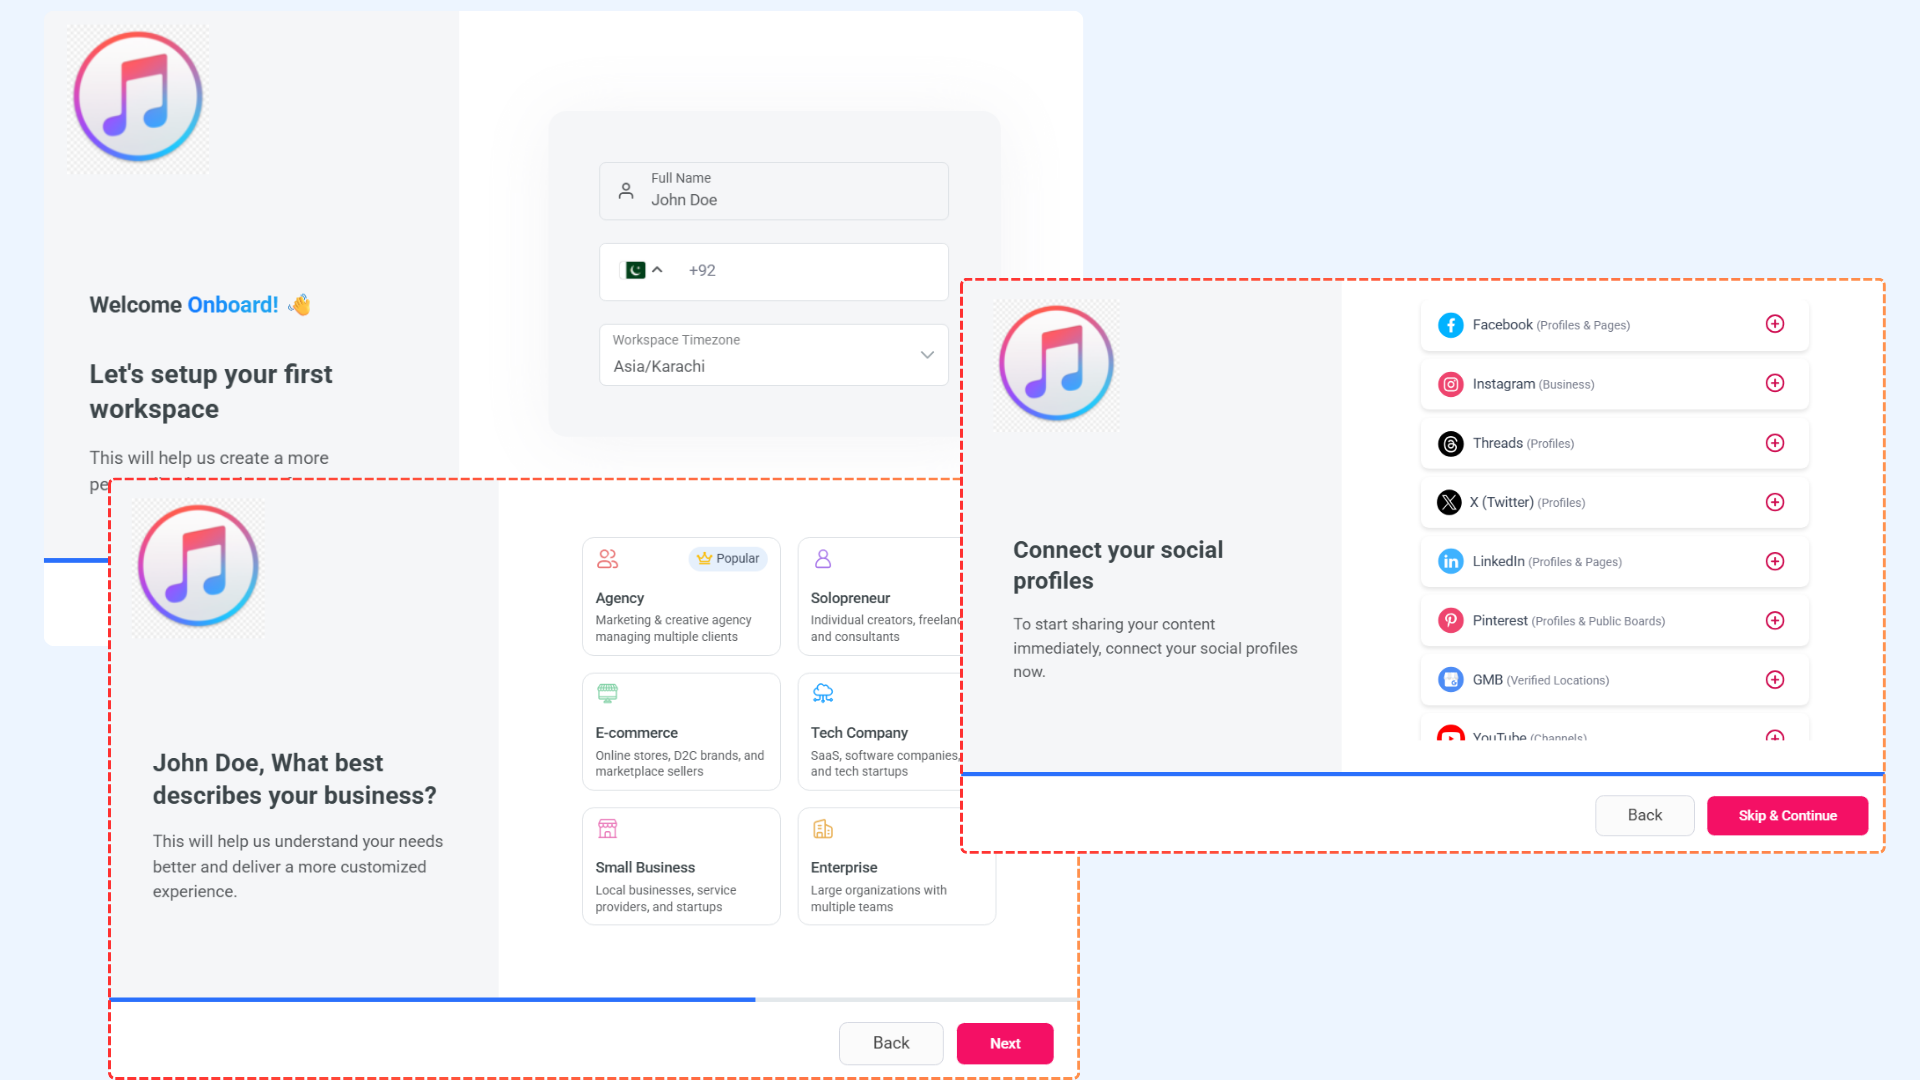
Account Creation
- The customer account is created successfully
- The customer is assigned the role of Super Admin
- The workspace is created inside the reseller’s white-labeled application
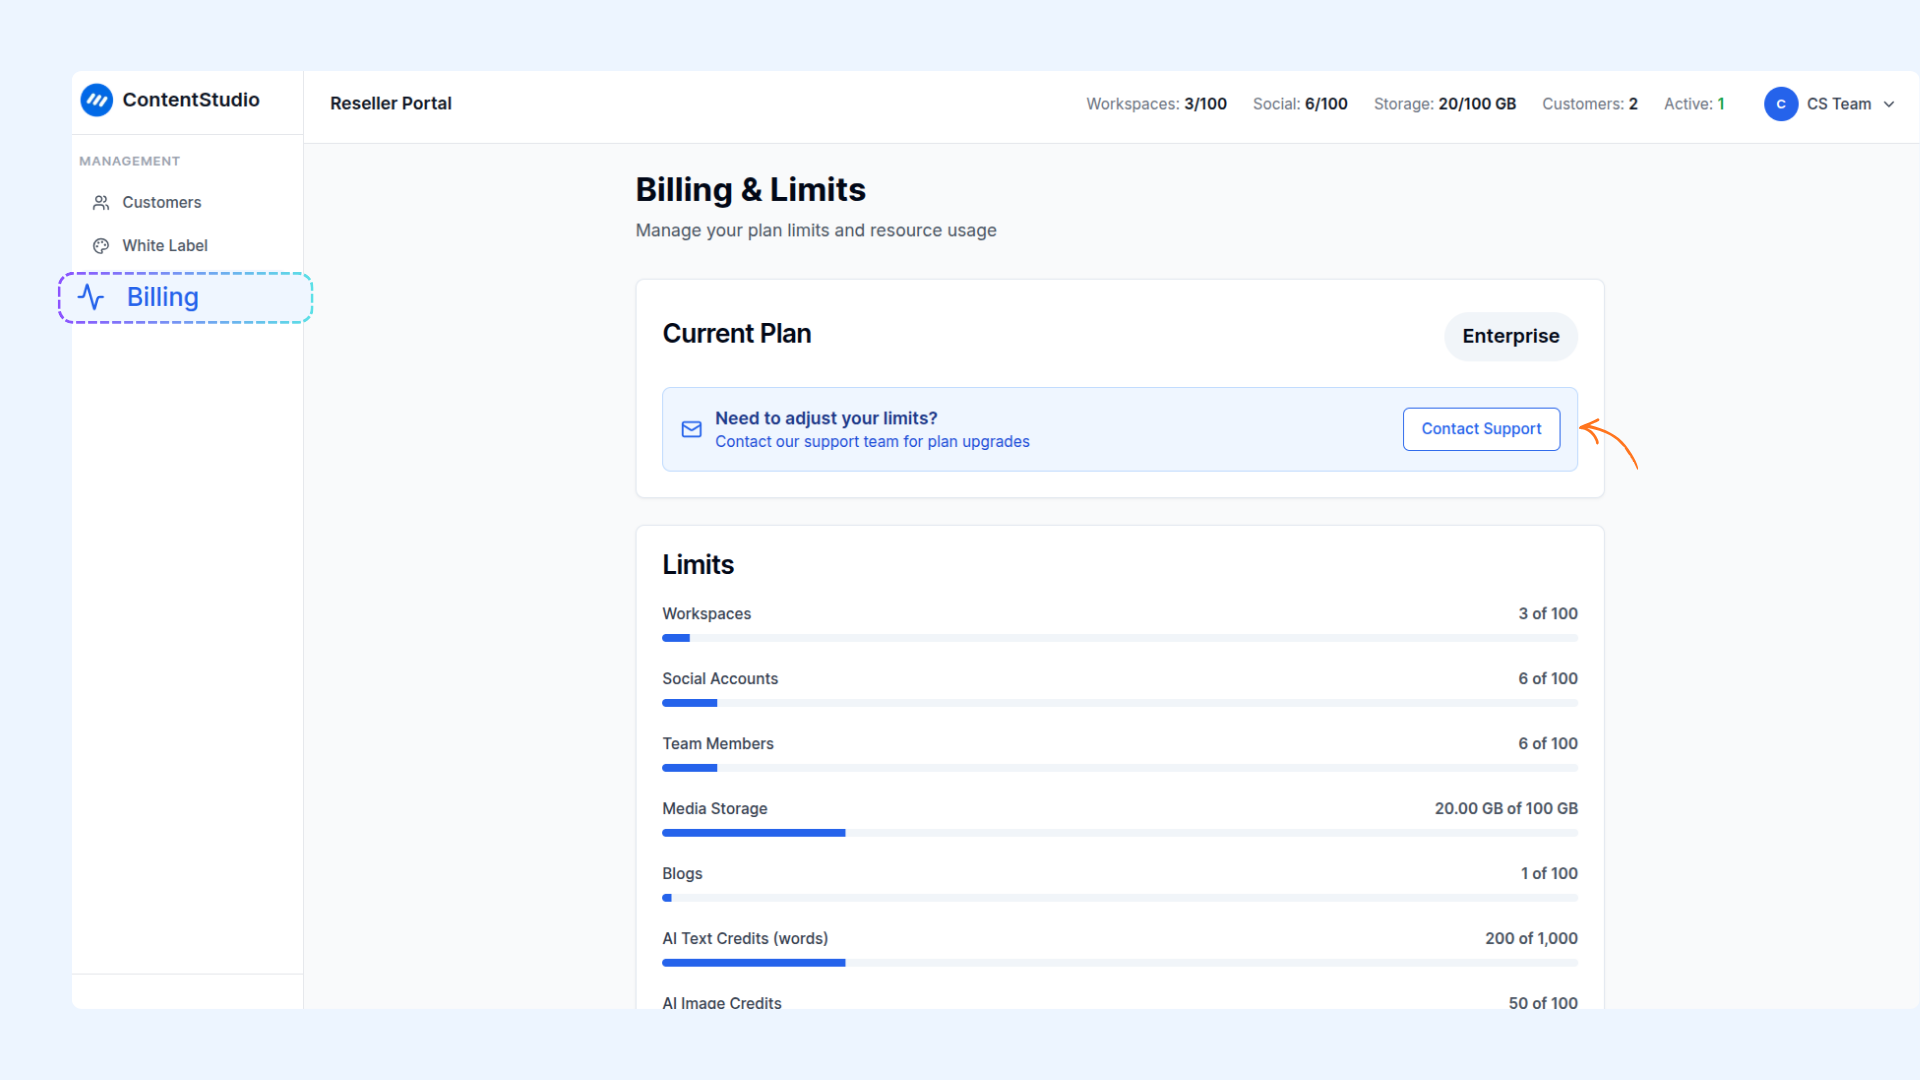
Billing & Payments
Reseller
- ContentStudio continues billing the reseller according to the agreed commercial terms established during onboarding.
- For plan upgrades, billing changes, or payment-related queries, the reseller can contact the ContentStudio support or billing team.
Reseller’s Clients
All billing and payment matters for reseller clients are handled directly by the reseller. ContentStudio does not intervene in, manage, or process payments for reseller clients.
- ContentStudio may suspend or revoke access to the reseller’s white-labeled platform
- This suspension may impact all associated reseller clients until the issue is resolved
FAQs
Can resellers manage billing for their customers inside ContentStudio?
No. ContentStudio does not manage billing between resellers and their customers. All customer billing, invoicing, and payments are handled externally by the reseller.
What happens if a reseller fails to pay ContentStudio?
If a reseller fails to make payments, ContentStudio may suspend or revoke access to the reseller’s white-labeled platform. This suspension can impact all associated reseller customers until the issue is resolved.
Can a reseller deactivate a customer?
Yes. Resellers can deactivate customer accounts at any time from the Reseller Dashboard. Once deactivated, the customer immediately loses access to the platform.
Can resellers edit customer limits after the customer is created?
Yes. Resellers can update customer limits such as workspaces, social accounts, team members, and other allocated resources. Any changes apply immediately.
What happens to a customer’s data if they are deactivated?
When a customer is deactivated, their access to the platform is disabled. The data remains associated with the reseller account unless otherwise removed according to policy.
Can customers contact ContentStudio support directly?
No. Reseller customers should contact their reseller for billing issues, plan upgrades, or account-related questions. ContentStudio support works directly with resellers, not end customers.
Can resellers change branding after onboarding?
Yes. Resellers can update white-label settings such as logo, theme colors, domain, and email configuration. Some changes may require additional validation or propagation time.
Are resellers responsible for customer onboarding and support?
Yes. Resellers are responsible for onboarding their customers, explaining plan limits, and providing first-line support.
What happens if white-label setup is not completed?
If white-label setup is not completed, customer invitations cannot be sent and branding, domain, and email configuration remain inactive. Other dashboard features may also remain inaccessible, depending on configuration.
Can a reseller resend a customer invitation?
Yes. Resellers can resend invitation emails or copy and share the invite link manually if the customer did not receive the original email.