

Cloudflare: Setting up a White label domain
To connect your custom white-label domain with ContentStudio using Cloudflare, you’ll need to configure your DNS settings by adding a CNAME record. This setup ensures your branded domain correctly points to ContentStudio’s white-label URL, providing a seamless and professional experience for your users. Follow the steps below to complete the configuration in your Cloudflare account.
In this Article:
Setting up a white-label domain
Navigate to cloudflare.com and sign in to your account.
Select your domain and click on the DNS tab from the top menu.
In the DNS Records section, click Add Record and select CNAME from the Type dropdown menu.
Enter your desired Host/Name and set the Target value to:
whitelabel.contentstudio.io
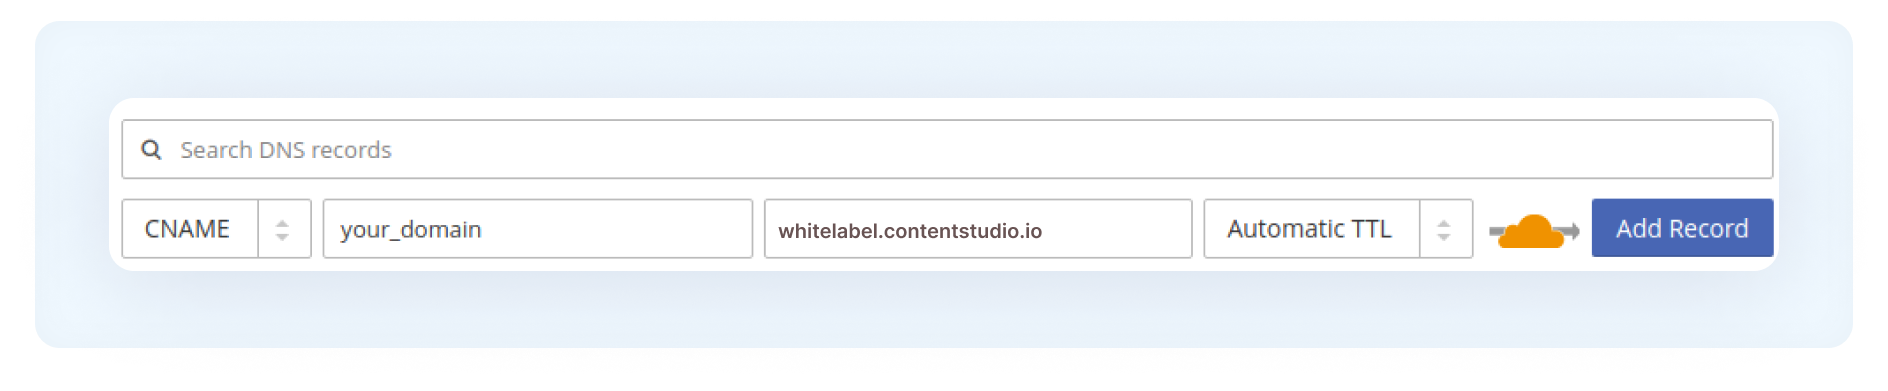
Click Add Record to save your changes.
FAQs
Q1: Do I need a Cloudflare account to use a white-label domain?
Yes. You must have a Cloudflare account and manage your domain’s DNS through Cloudflare to set up the CNAME record.
Q2: What CNAME value should I enter?
Enter: whitelabel.contentstudio.io in the Target/Value field. Make sure there are no extra spaces or typos.
Q3: How long does it take for changes to take effect?
DNS propagation may take a few minutes to 24–48 hours depending on your settings and Cloudflare’s DNS refresh cycle.
Q4: What if my white-label domain isn’t working after setup?
Check that the CNAME is correctly entered and that no conflicting records exist (like an A record for the same host). If issues persist, contact ContentStudio support for help.
Was this article helpful?