Set Up Single Sign-On (SSO)
Single Sign-On (SSO) lets your team log into ContentStudio using your company's existing identity provider — like Okta, Azure AD, Google Workspace, or OneLogin — so there are no separate passwords to manage. Once enabled, anyone with a verified email domain on your workspace will be able to sign in through your company's login portal automatically.
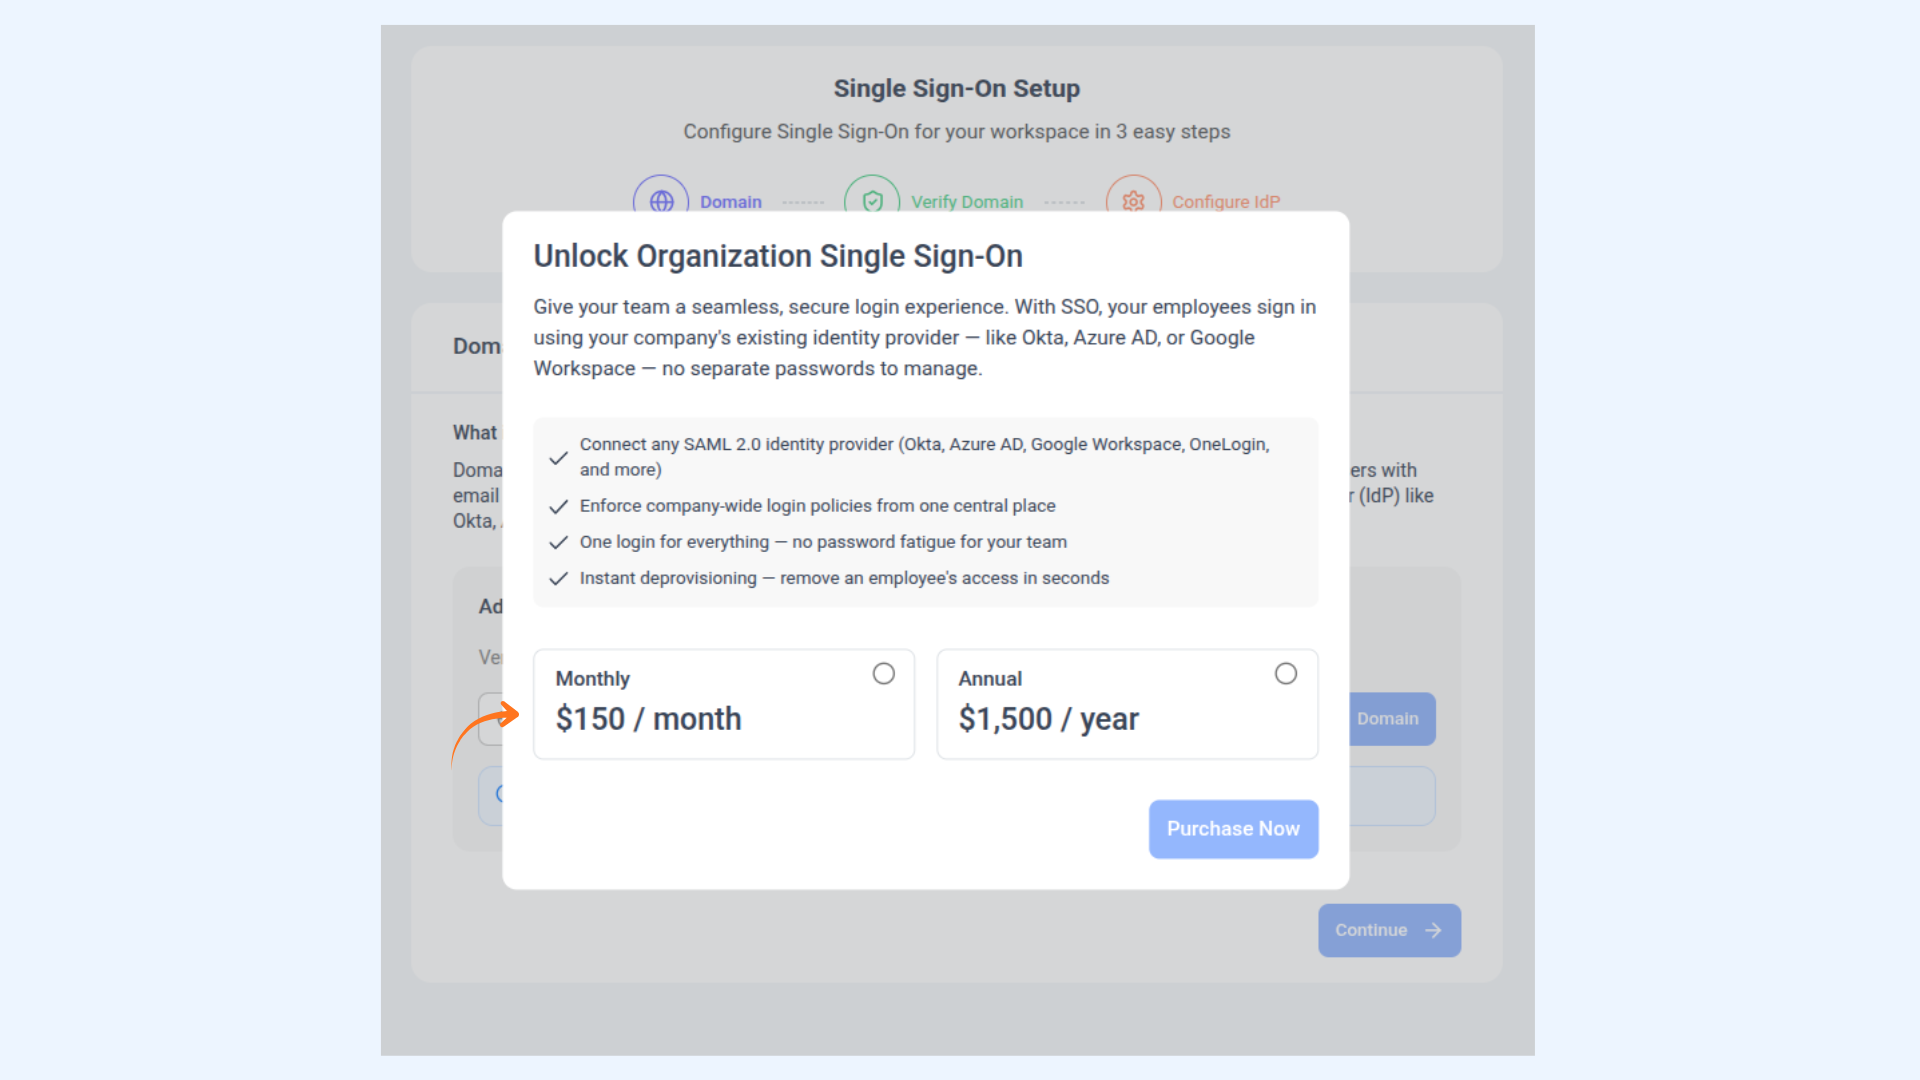
SSO is available as a standalone add-on plan. You can purchase it directly from the SSO settings page inside ContentStudio.
In this Article:
How to Set Up Single Sign-On (SSO)
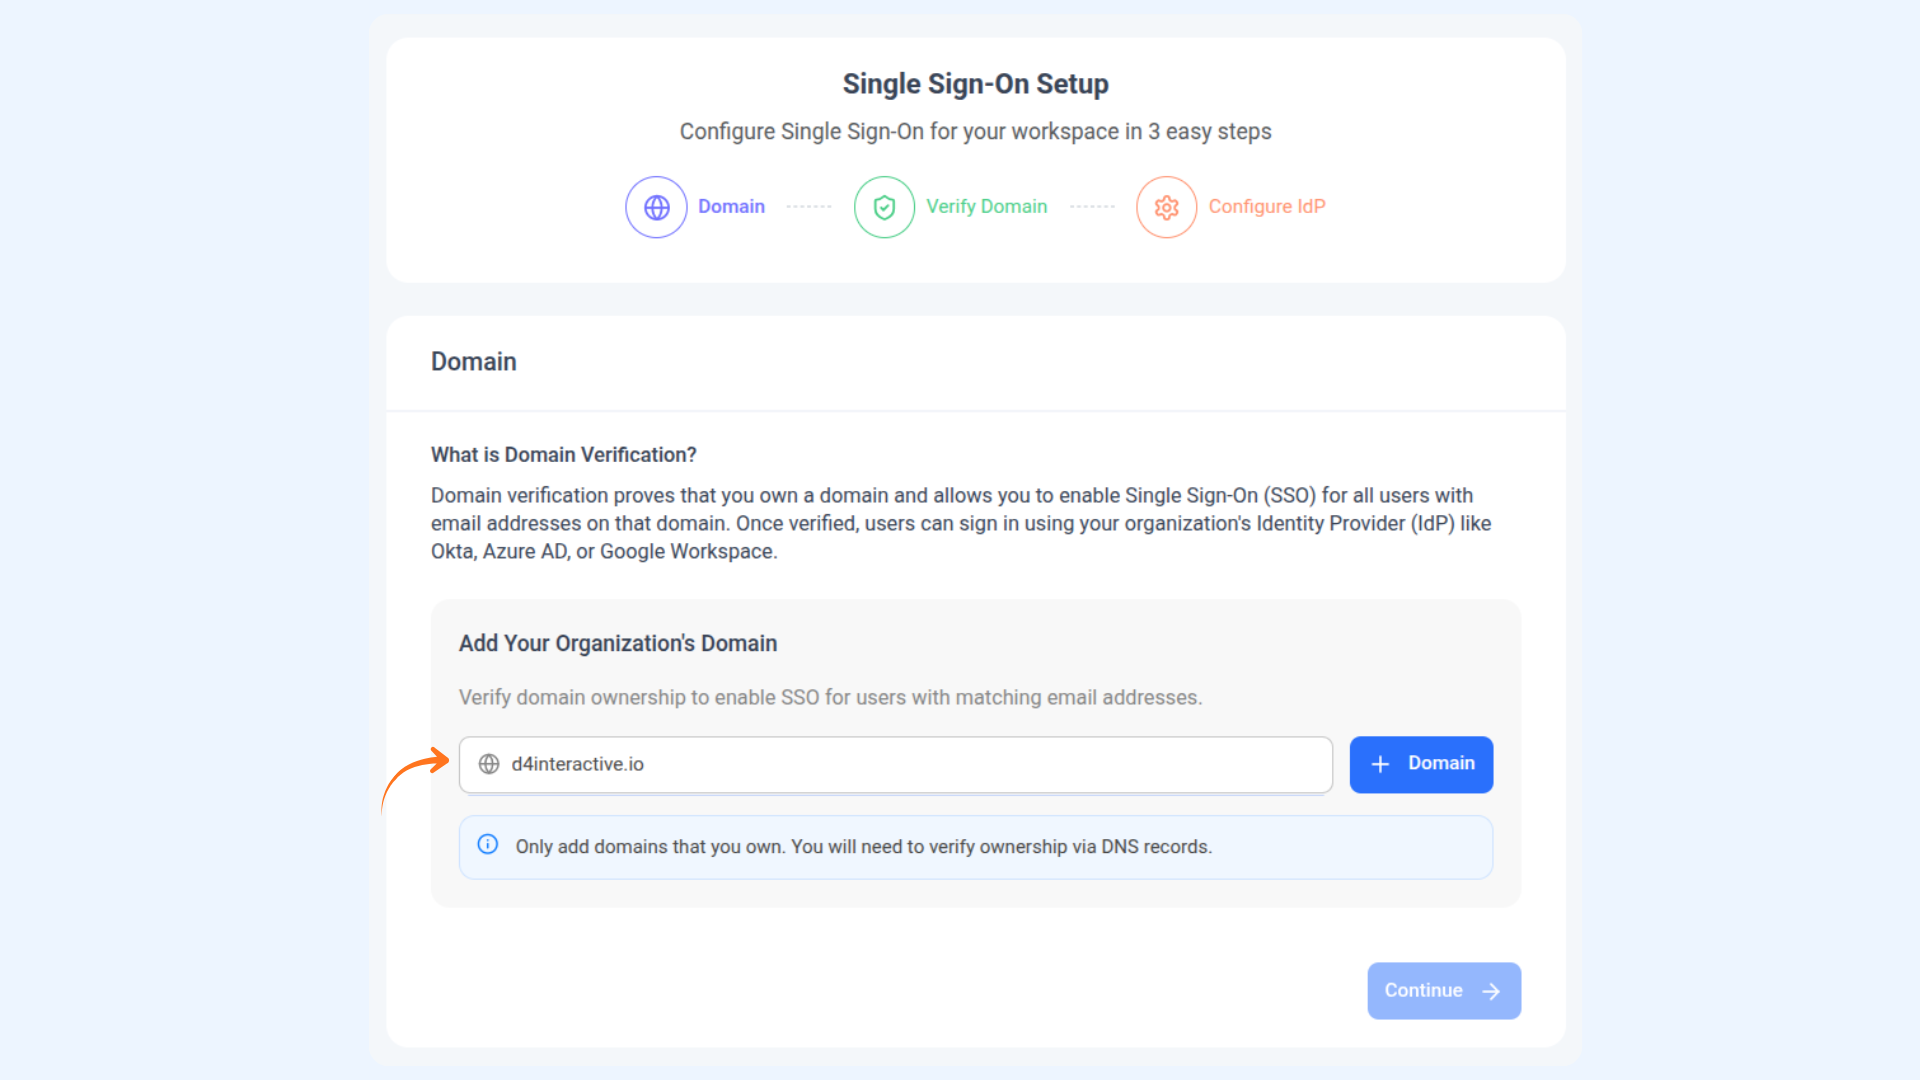
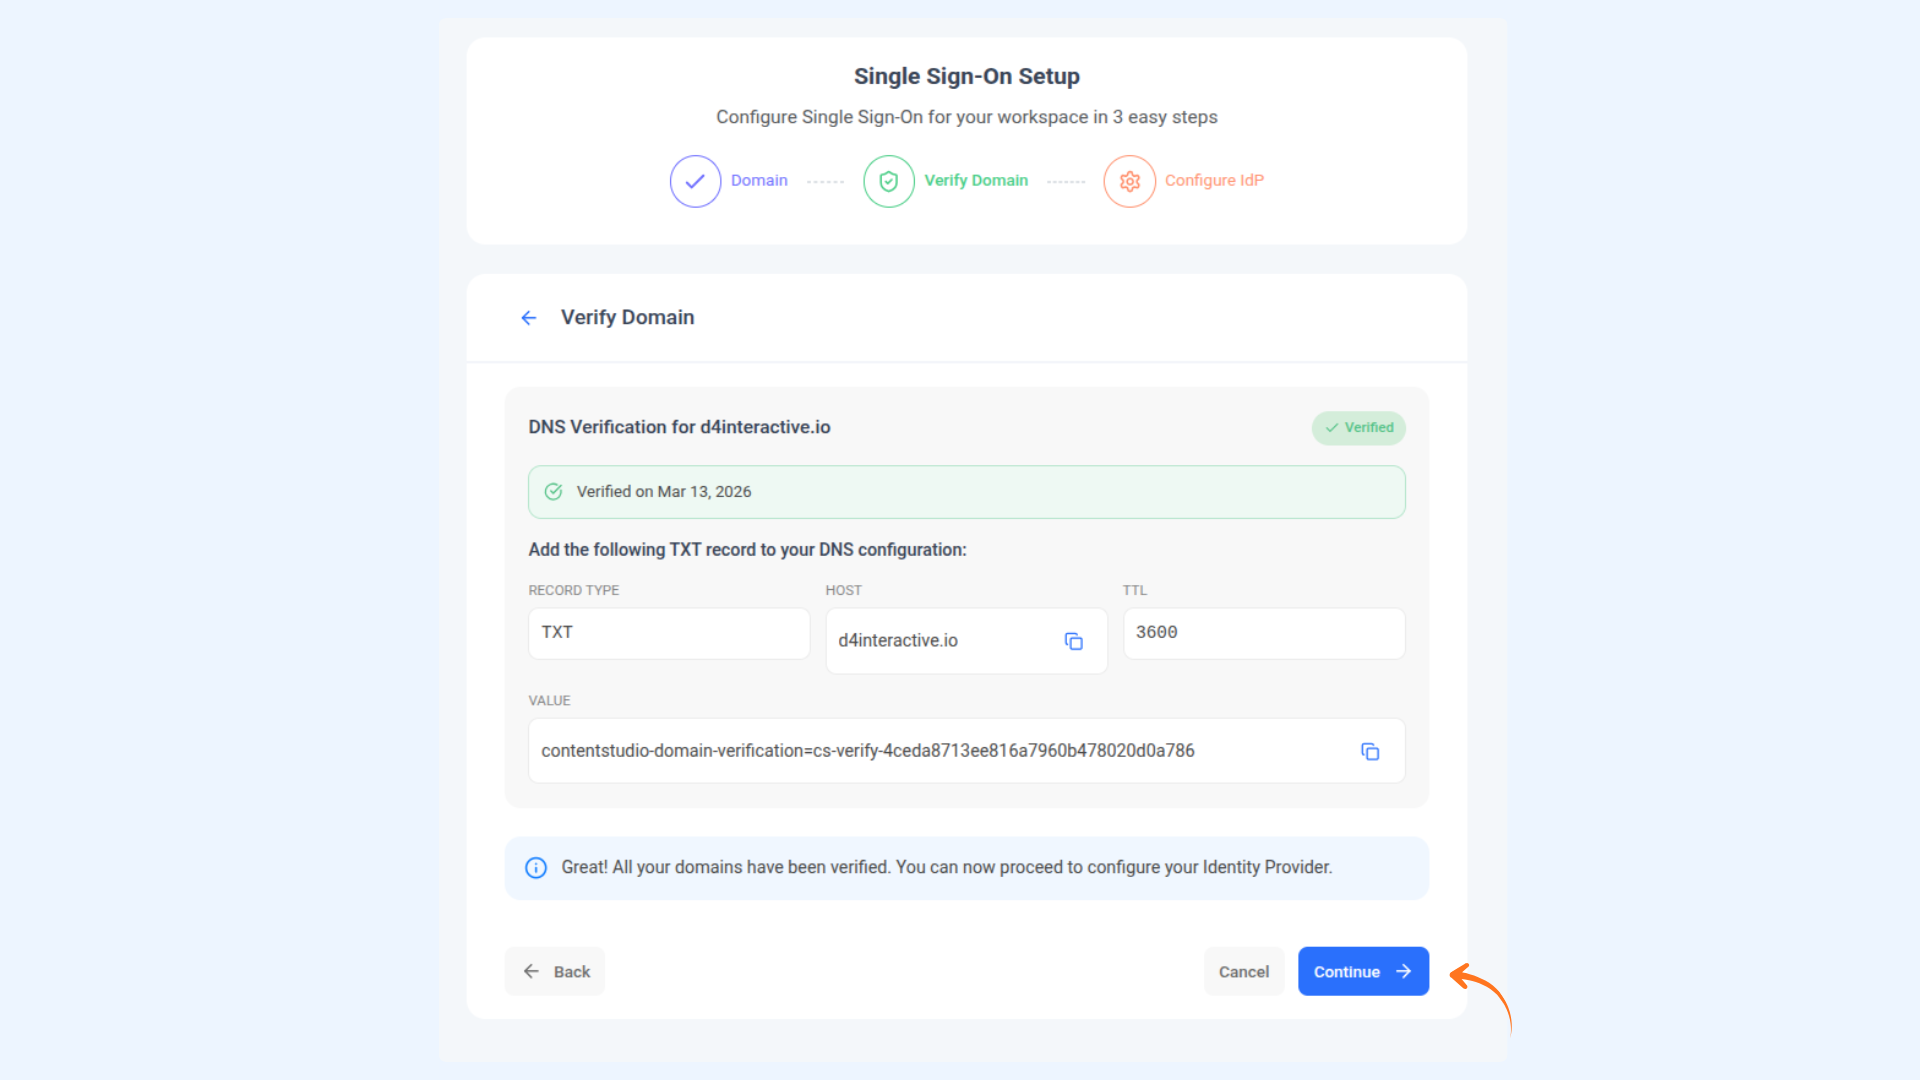
Setting up SSO takes 3 steps: adding your domain, verifying it via DNS, and connecting your Identity Provider (IdP).
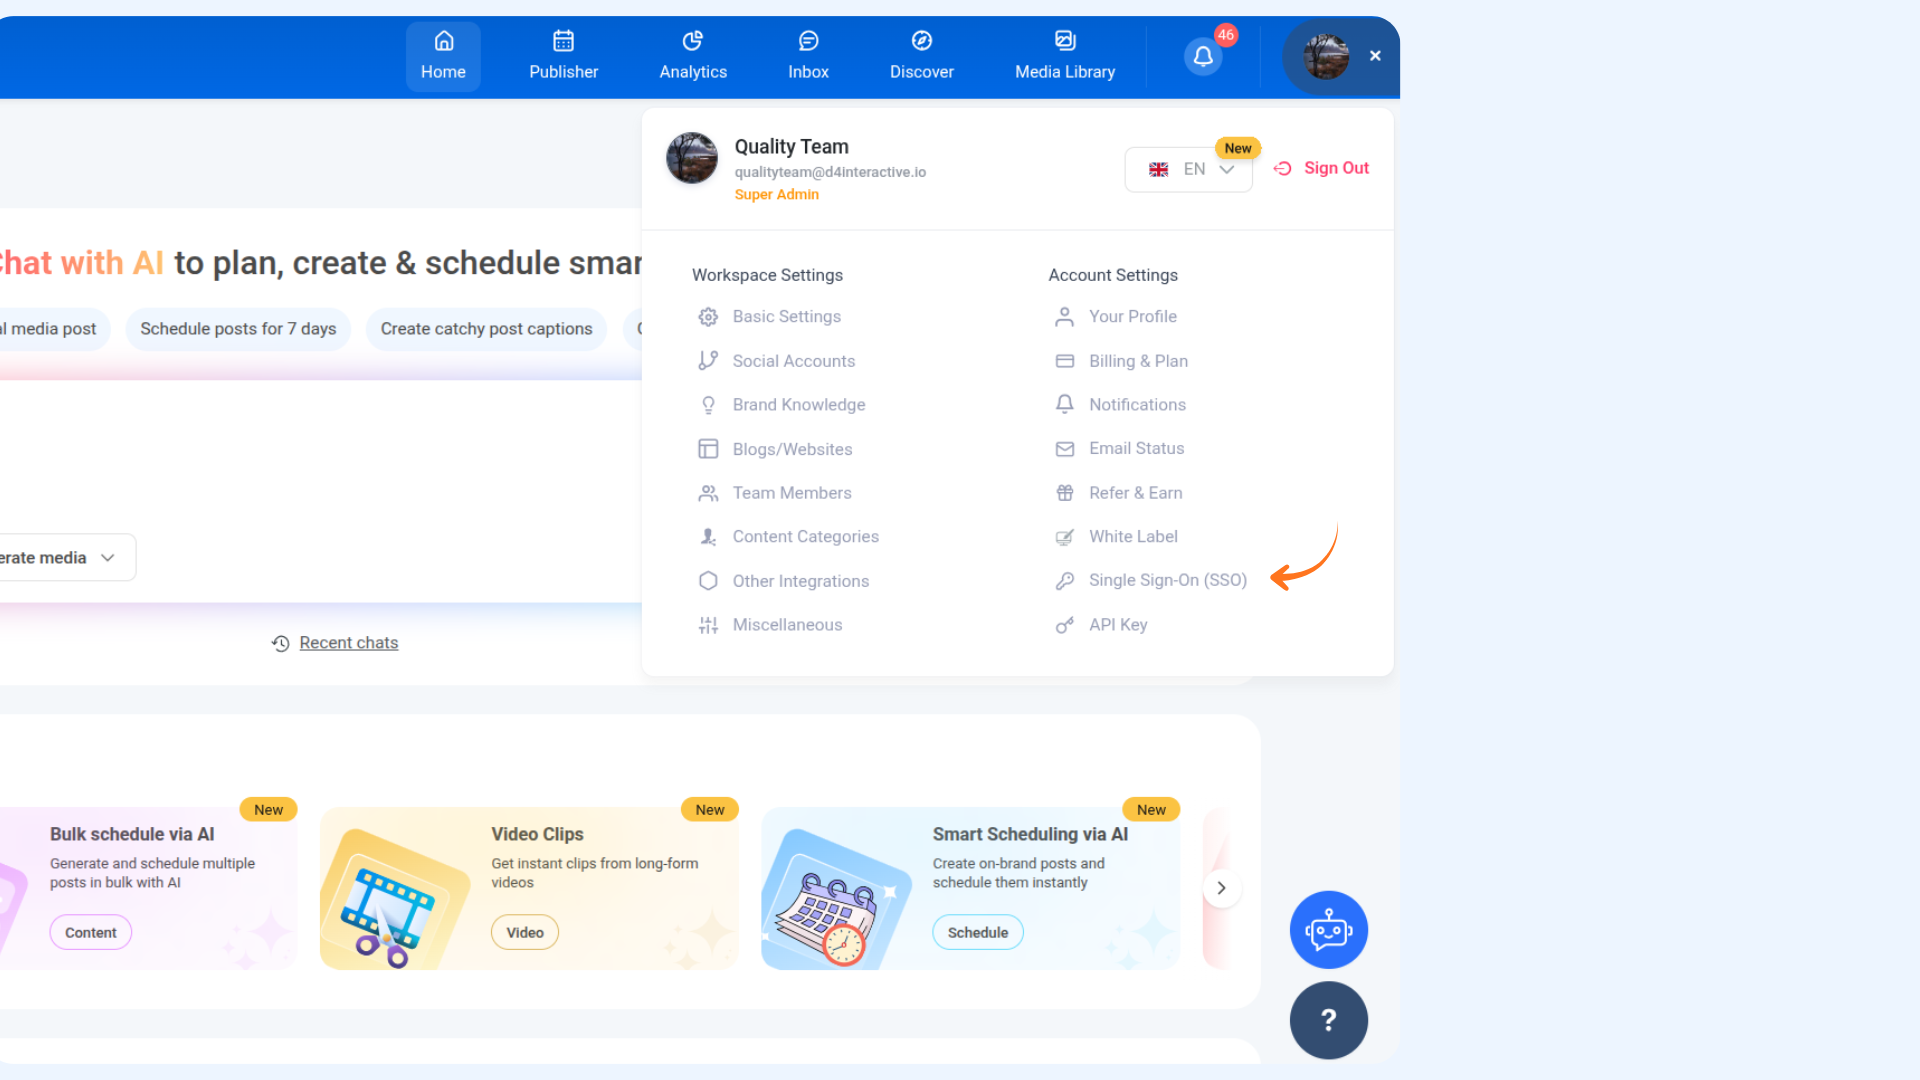
Step 1 — Go to SSO Settings
Step 2 — Add Your Domain
yourcompany.com) and click + Domain.
Step 3 — Verify Your Domain via DNS
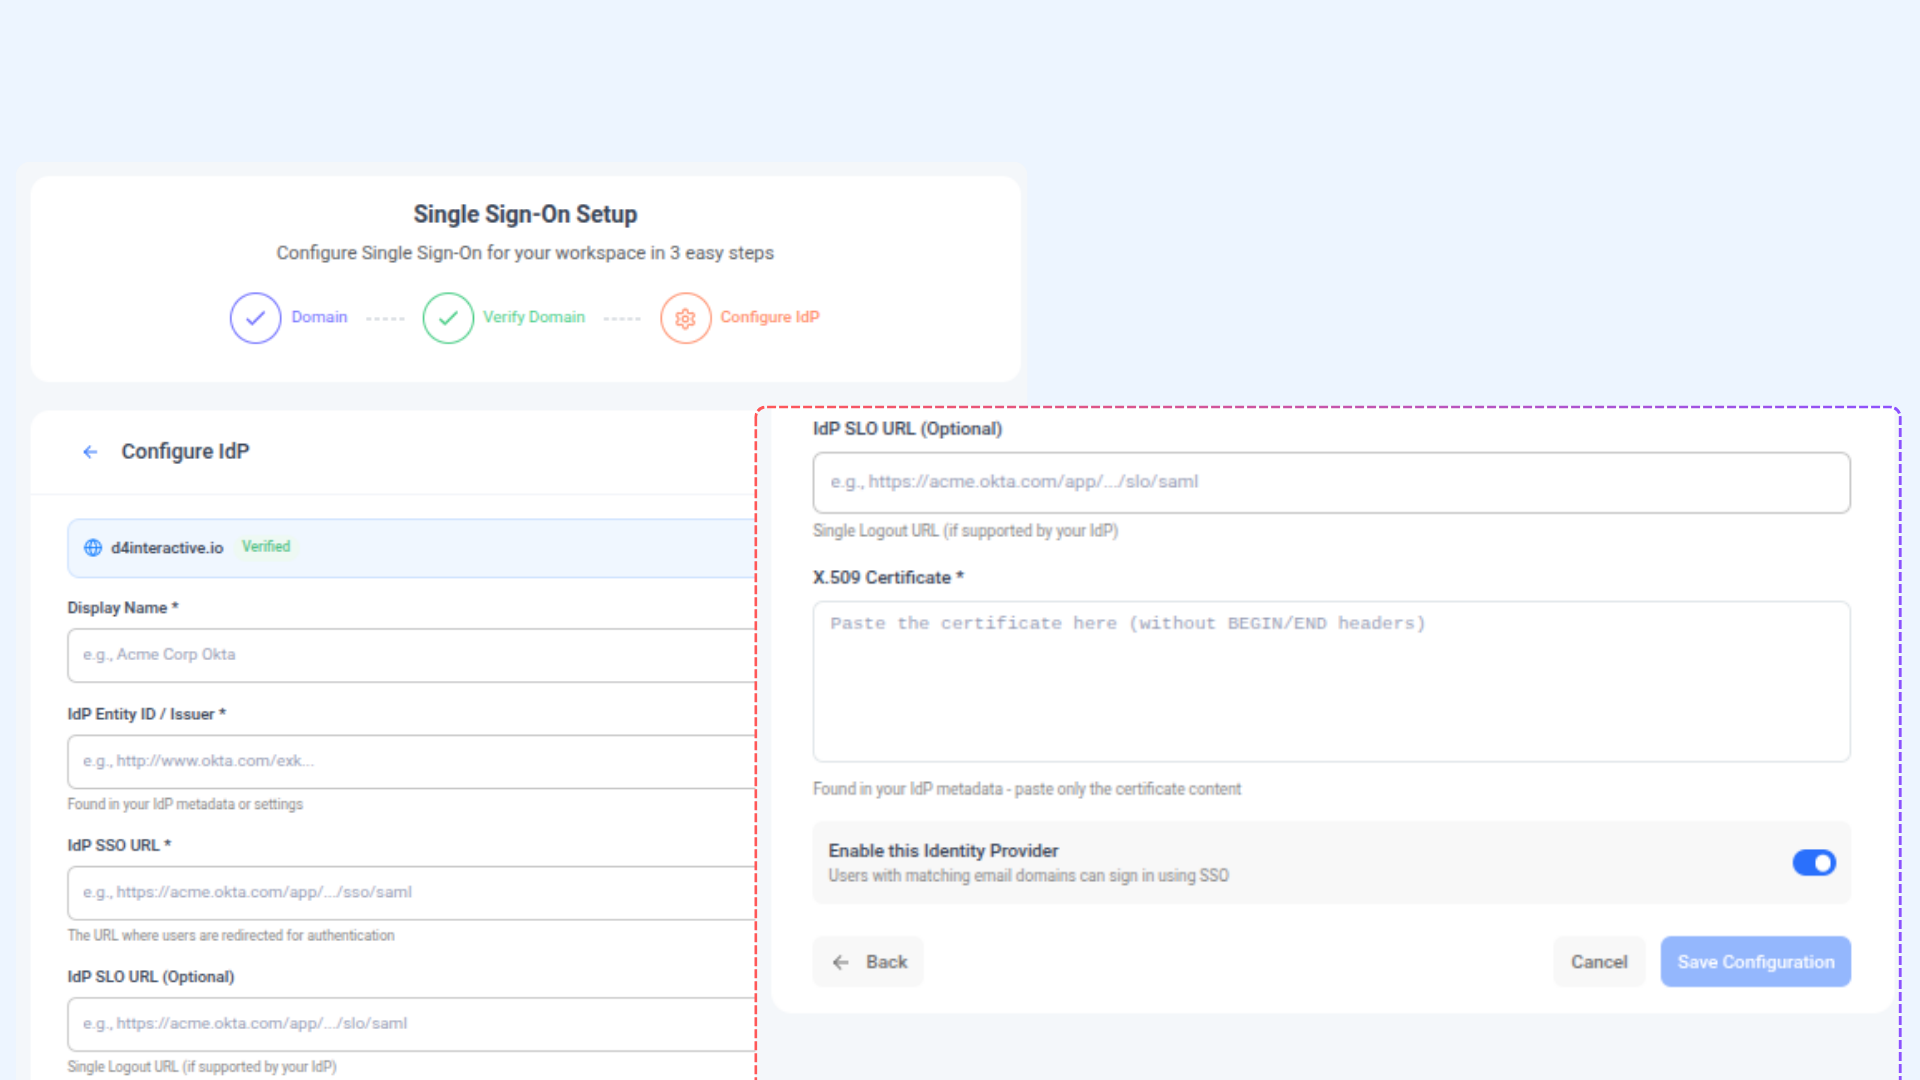
Step 4 — Configure Your Identity Provider (IdP)
- Okta — Go to your app's Sign On tab → View SAML setup instructions
- Azure AD — Go to Enterprise Applications → Single sign-on → SAML Signing Certificate
- Google Workspace — Go to Apps → Web and mobile apps → your app → SSO details
- Display Name — A label for this IdP, e.g. "Acme Corp Okta"
- IdP Entity ID / Issuer — Found in your IdP's metadata or settings
- IdP SSO URL — The URL where users are redirected to authenticate
- IdP SLO URL (Optional) — For Single Logout, if your IdP supports it
- X.509 Certificate — Paste the certificate content from your IdP (without the BEGIN/END headers)
FAQs
What is Single Sign-On (SSO)? SSO lets your team sign into ContentStudio using your company's existing login system — like Okta, Azure AD, or Google Workspace — without needing a separate password for ContentStudio.
Which Identity Providers does ContentStudio support? ContentStudio supports any SAML 2.0-compliant Identity Provider, including Okta, Azure AD, Google Workspace, OneLogin, PingIdentity, and more.
Is SSO available on all plans? SSO is available as a separate add-on plan. You can purchase it from Profile Settings → Single Sign-On (SSO) at $150/month or $1,500/year.
What is domain verification and why is it required? Domain verification confirms that you own the email domain you want to enable SSO for. It prevents anyone from claiming your domain and enforcing SSO on your users without your permission.
What is an X.509 Certificate and where do I find it? It's a security certificate issued by your Identity Provider that ContentStudio uses to validate that login responses are genuinely coming from your IdP. You can download it from your IdP's SAML configuration settings.
What happens if a user's email domain is not verified? They won't be able to log in via SSO. Only users whose email domain matches a verified and active domain on your SSO configuration will be redirected to your IdP for authentication.
Can I connect multiple Identity Providers? You can configure one IdP per verified domain. If your organization uses multiple domains, you can verify each domain and link them accordingly.
What is the SLO URL and do I need it? SLO stands for Single Logout. It allows ContentStudio to notify your IdP when a user logs out, signing them out of all connected apps at once. It's optional — only fill this in if your IdP supports Single Logout.