WordPress Plugin
Before proceeding ahead, have a look at the following points to avoid any issues.
- Your WordPress version should be 4.4 or above
- Set "WP-content" folder permissions to 755 and create empty folders named as 01, 02, 03, 04, 05, 06 07, 08, 09, 10, 11, 12 inside the /wp-content/uploads/2018 folder. (This helps upload featured images without any problems)
ContentStudio WordPress Plugin (Preferred)
This is the preferred method.
- 1
- Before integrating your website in ContentStudio with this method, you have to install ContentStudio official plugin on your Wordpress website.
-
ContentStudio Plugin (Direct Download Link: https://s3.amazonaws.com/contentstudioio/plugin/contentstudio-plugin-master.zip)
- 2
- Login in your Wordpress and hover over Plugins located in the left-hand toolbar of your WordPress Plugins on the left menu. And then click on Add New in the sub-menu.
-

When the next page opens, click on Upload Plugin button.

On the next page, you will be able to upload the ContentStudio plugin in the zip format which you downloaded from the above URL. Click on Choose File to select the plugin file you downloaded earlier.

Once you have the plugin file selected, Click on the Install Now button to start the installation process.
After it is all done on the WordPress dashboard, it's time to move onto ContentStudio platform.
- 3
- Go to Settings > Blogs & Websites from the menu on the top right corner.
-

- 4
- On the next screen, click on the Connect a new WordPress blog/website. This will make a pop-up appear on your screen.
-

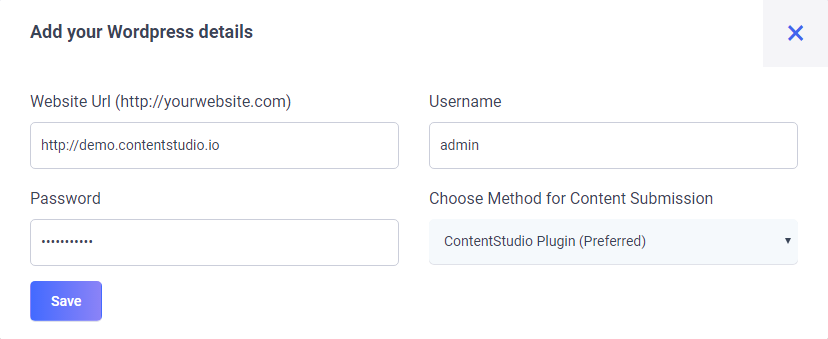
Once the pop-up appears on your screen. Fill in the required details
- Enter the URL of your Wordpress website in the first input box. Please follow the required pattern given and make sure to start it with http://or https://. If your Wordpress is installed in an inner directory, you will need to specify the exact homepage URL of your website.
- In the second field, give your Wordpress Username.
- Provide Password in the third input field.
- In the Choose Method for Content Submission, you have to select ContentStudio Plugin
- Next, click on the 'Save'
If you have entered everything correctly, your WordPress site will be successfully connected and showing up in the list underneath, as pictured in the image below.
