Approval Workflows in ContentStudio
Never let an unapproved post go live again. ContentStudio's Multi-Level Approval Workflows give your team a structured, accountable way to review content before it's published. Whether you're a agency managing multiple clients or a brand with a layered internal review process, you can now set up custom approval chains — each with its own reviewers and rules. Create as many levels as you need, assign the right people to each one, and decide whether a single approver is enough or if the whole team needs to sign off.
In this Article:
How to Create an Approval Workflow
This section walks you through setting up a new approval workflow from scratch inside ContentStudio's settings.
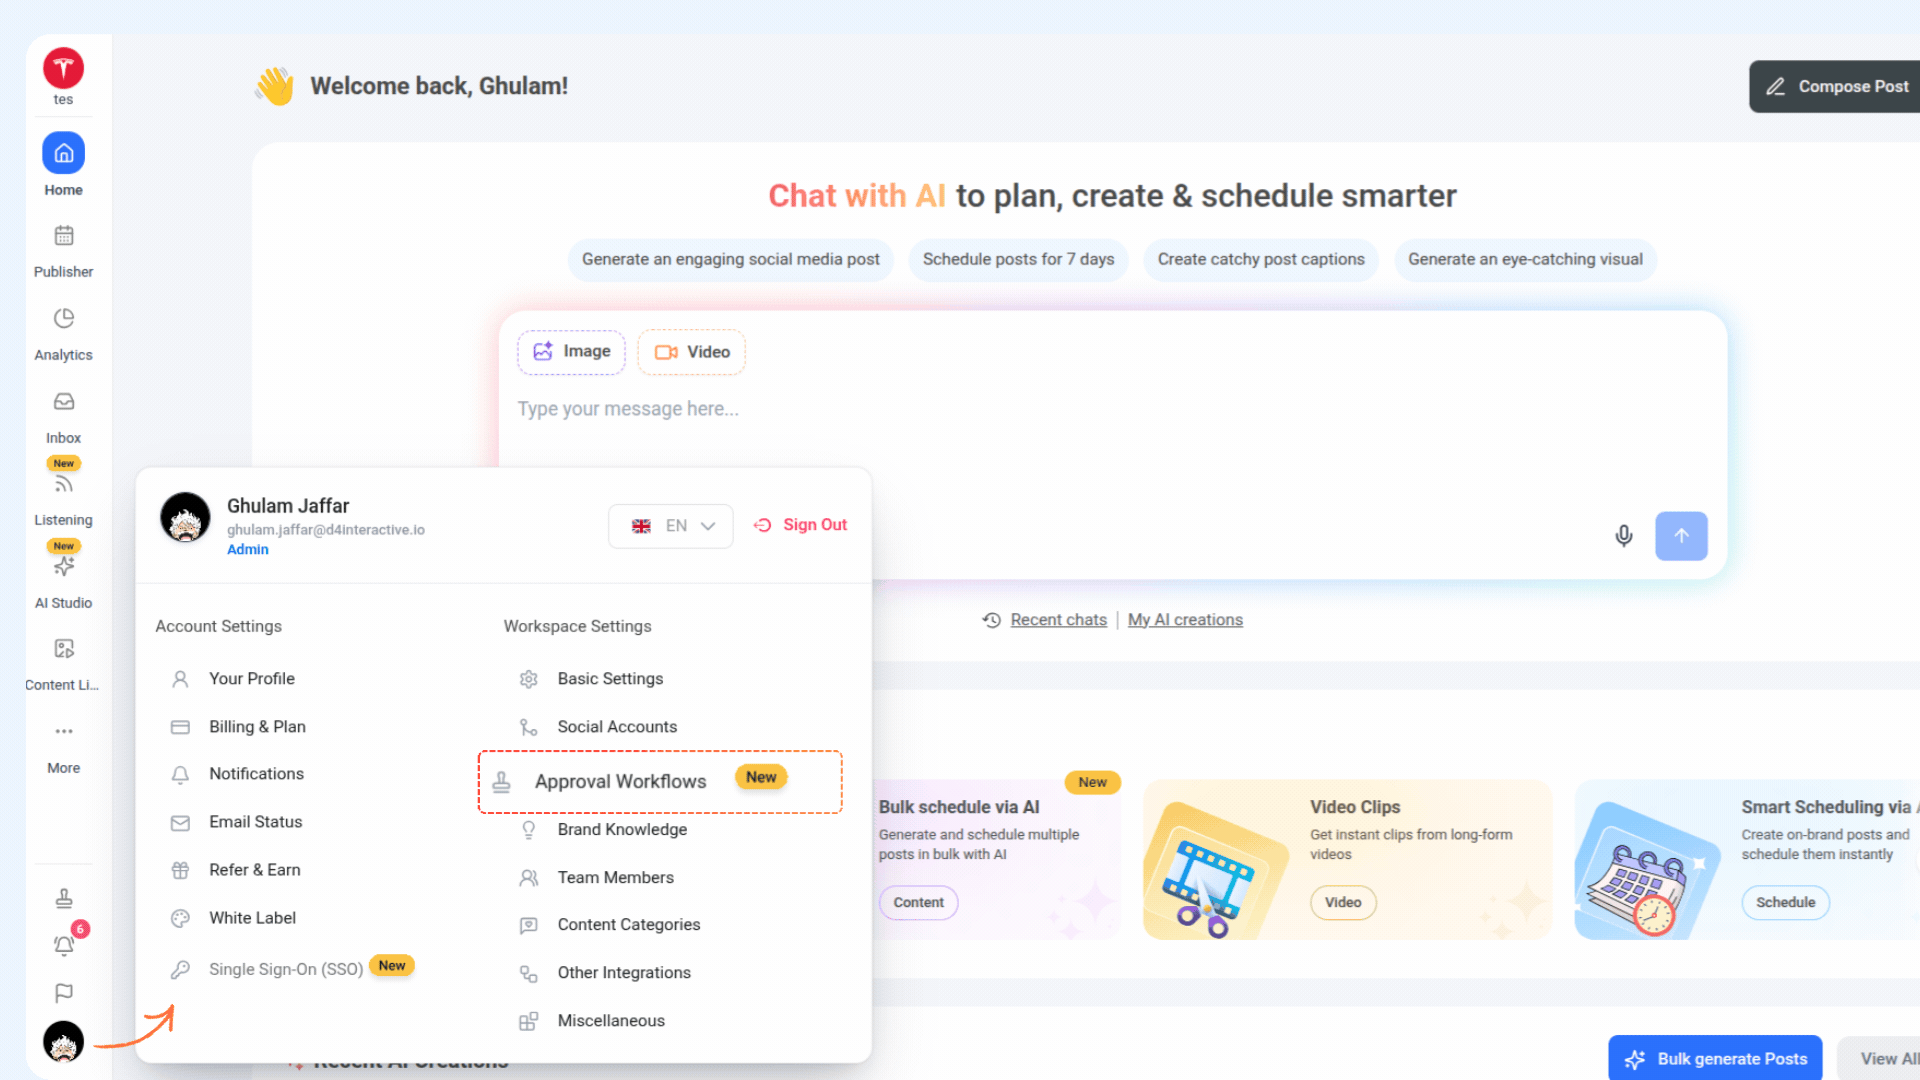
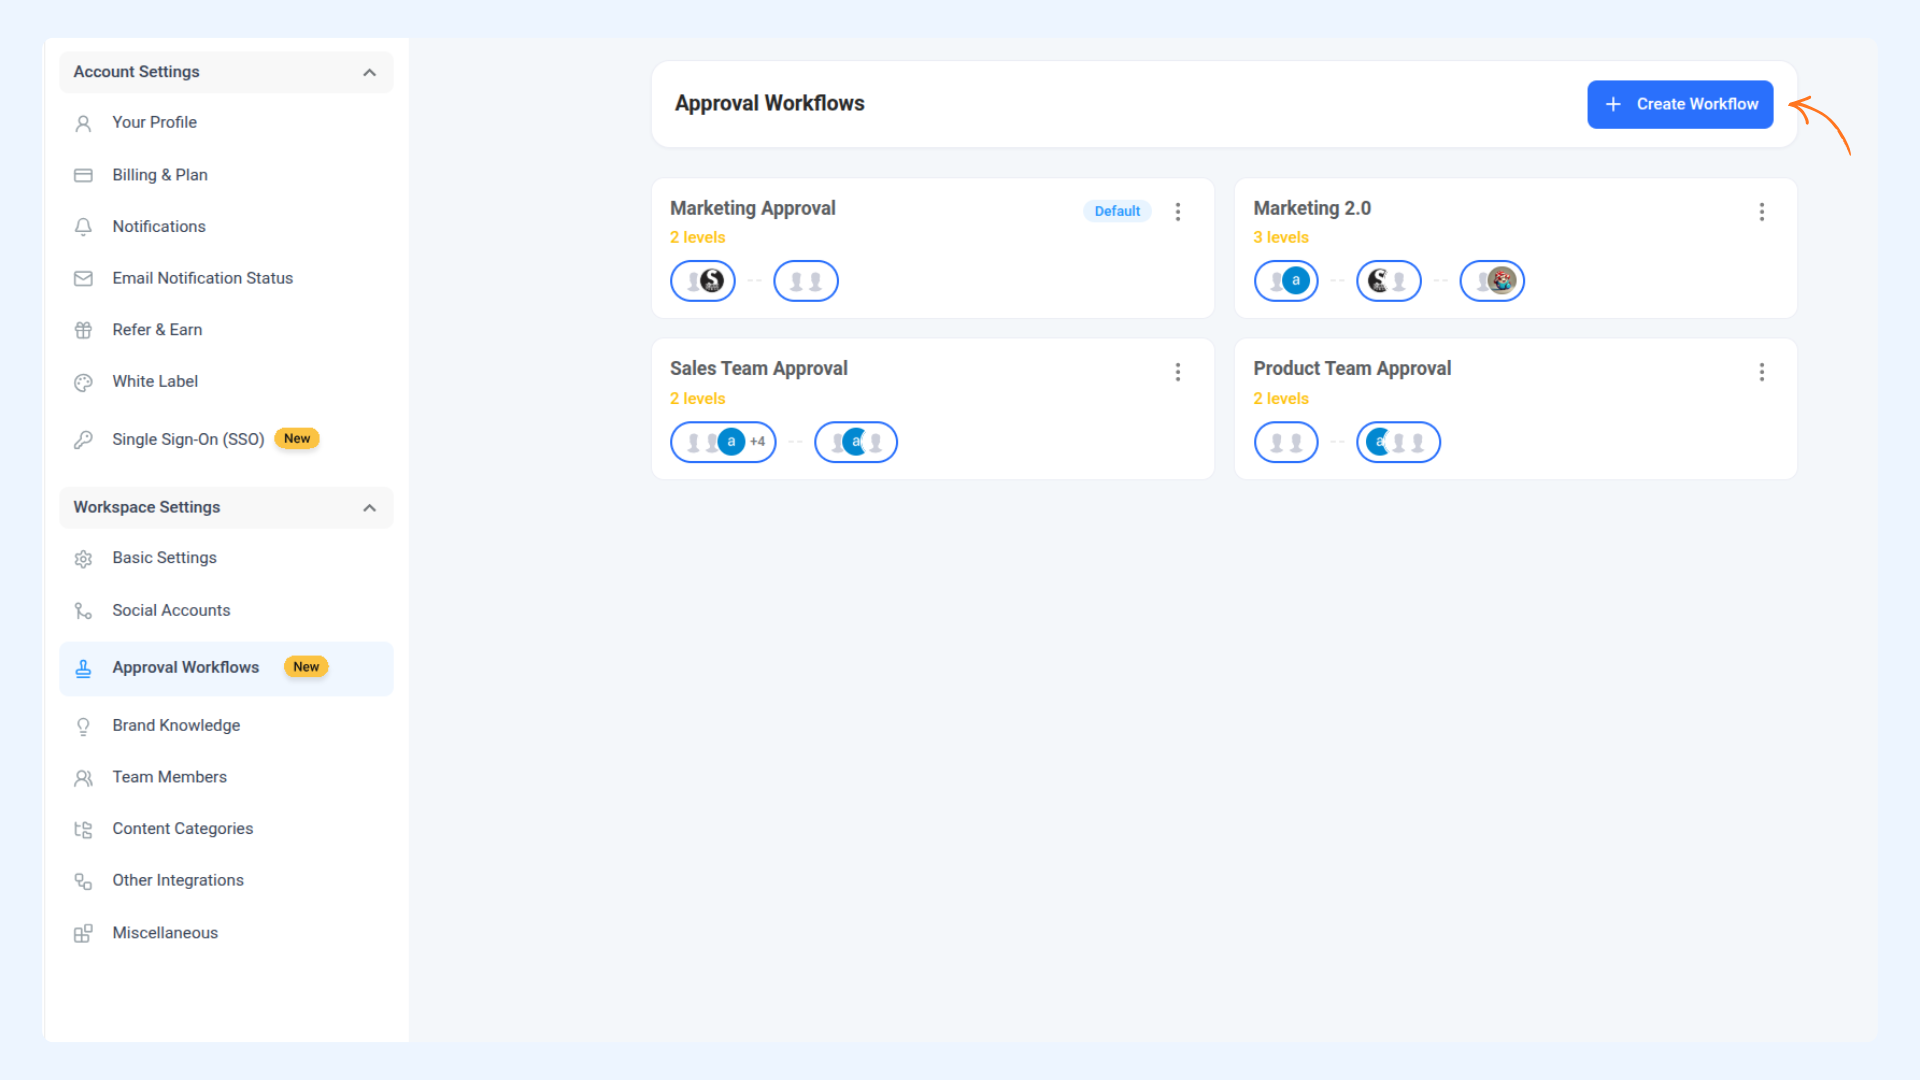
1 Go to Settings from the bottom-left corner of ContentStudio, then click on Approval Workflows under Workspace Settings. Any existing workflows will be listed here.
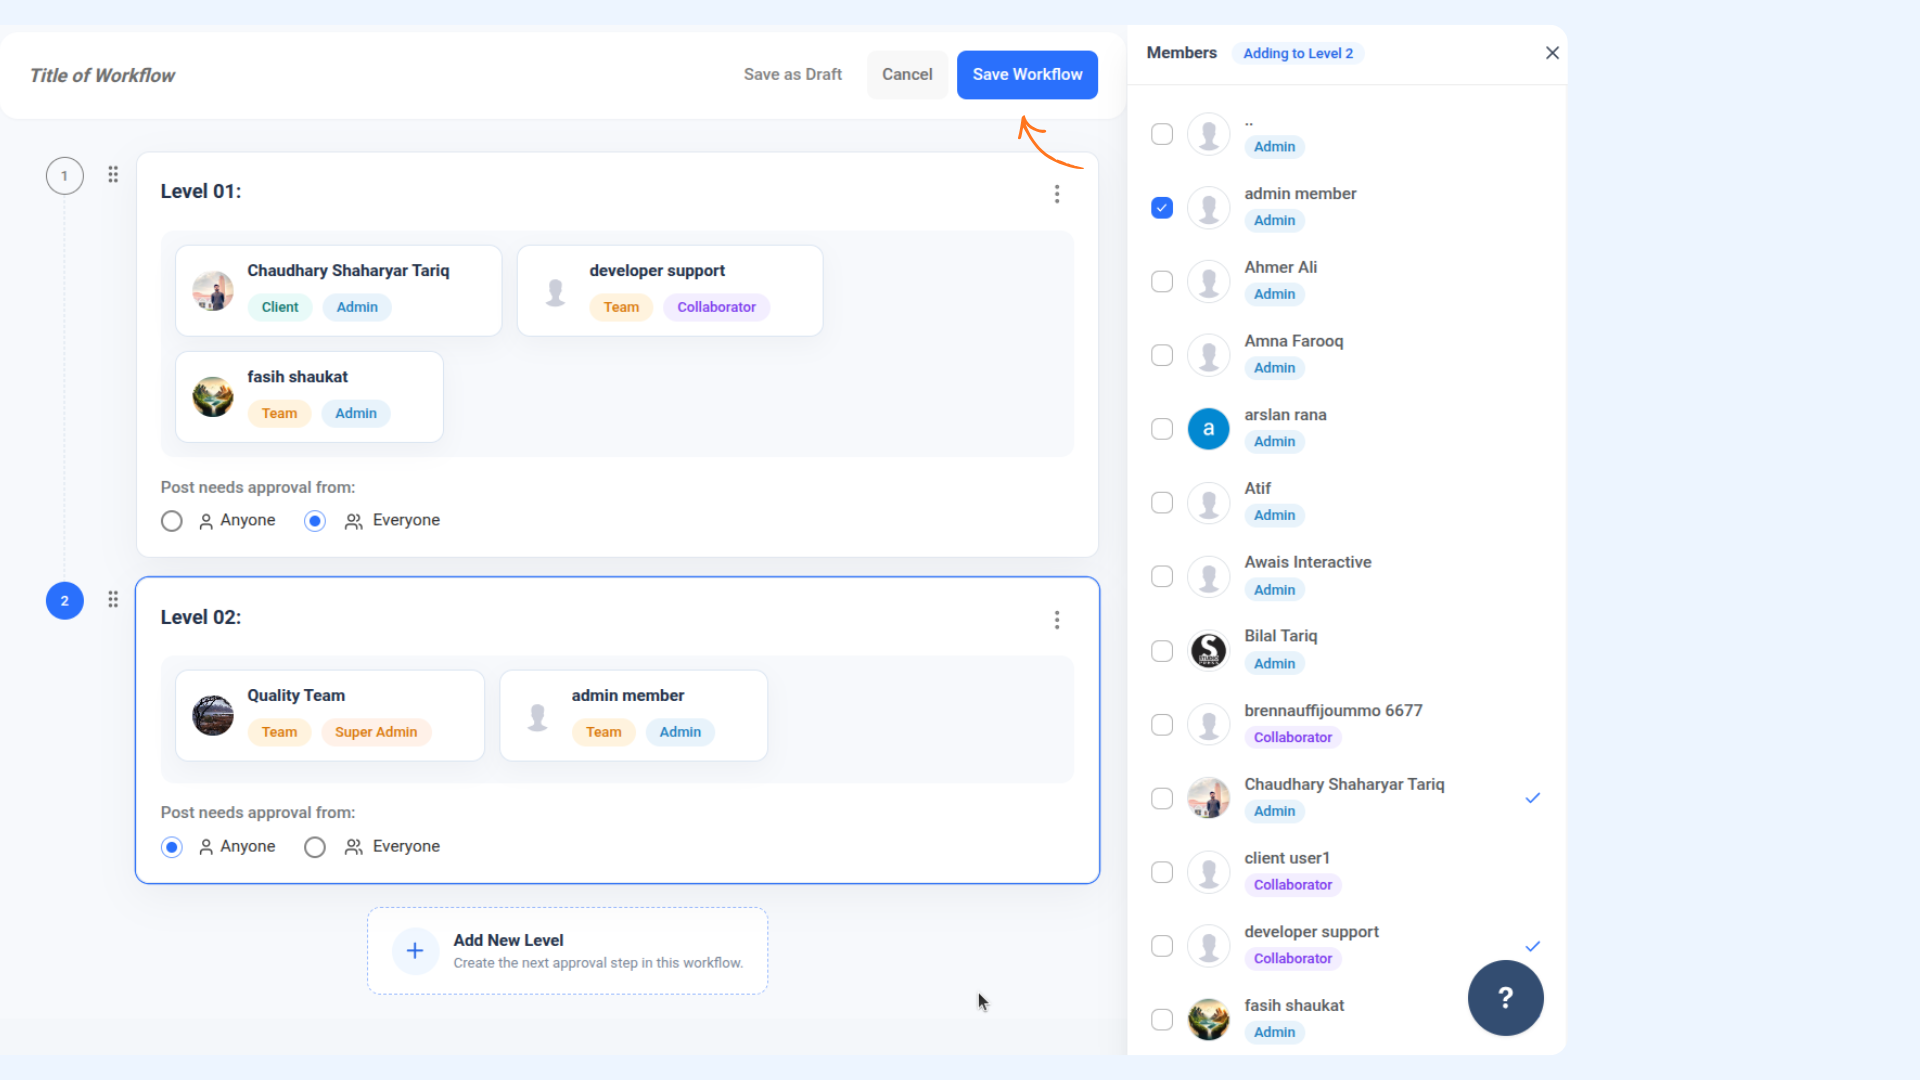
2 Click the + Create Workflow button in the top-right corner. A new workflow screen will open with a members panel on the right side.
3 Enter a title for your workflow at the top of the screen. This is mandatory — the workflow cannot be saved without a name.
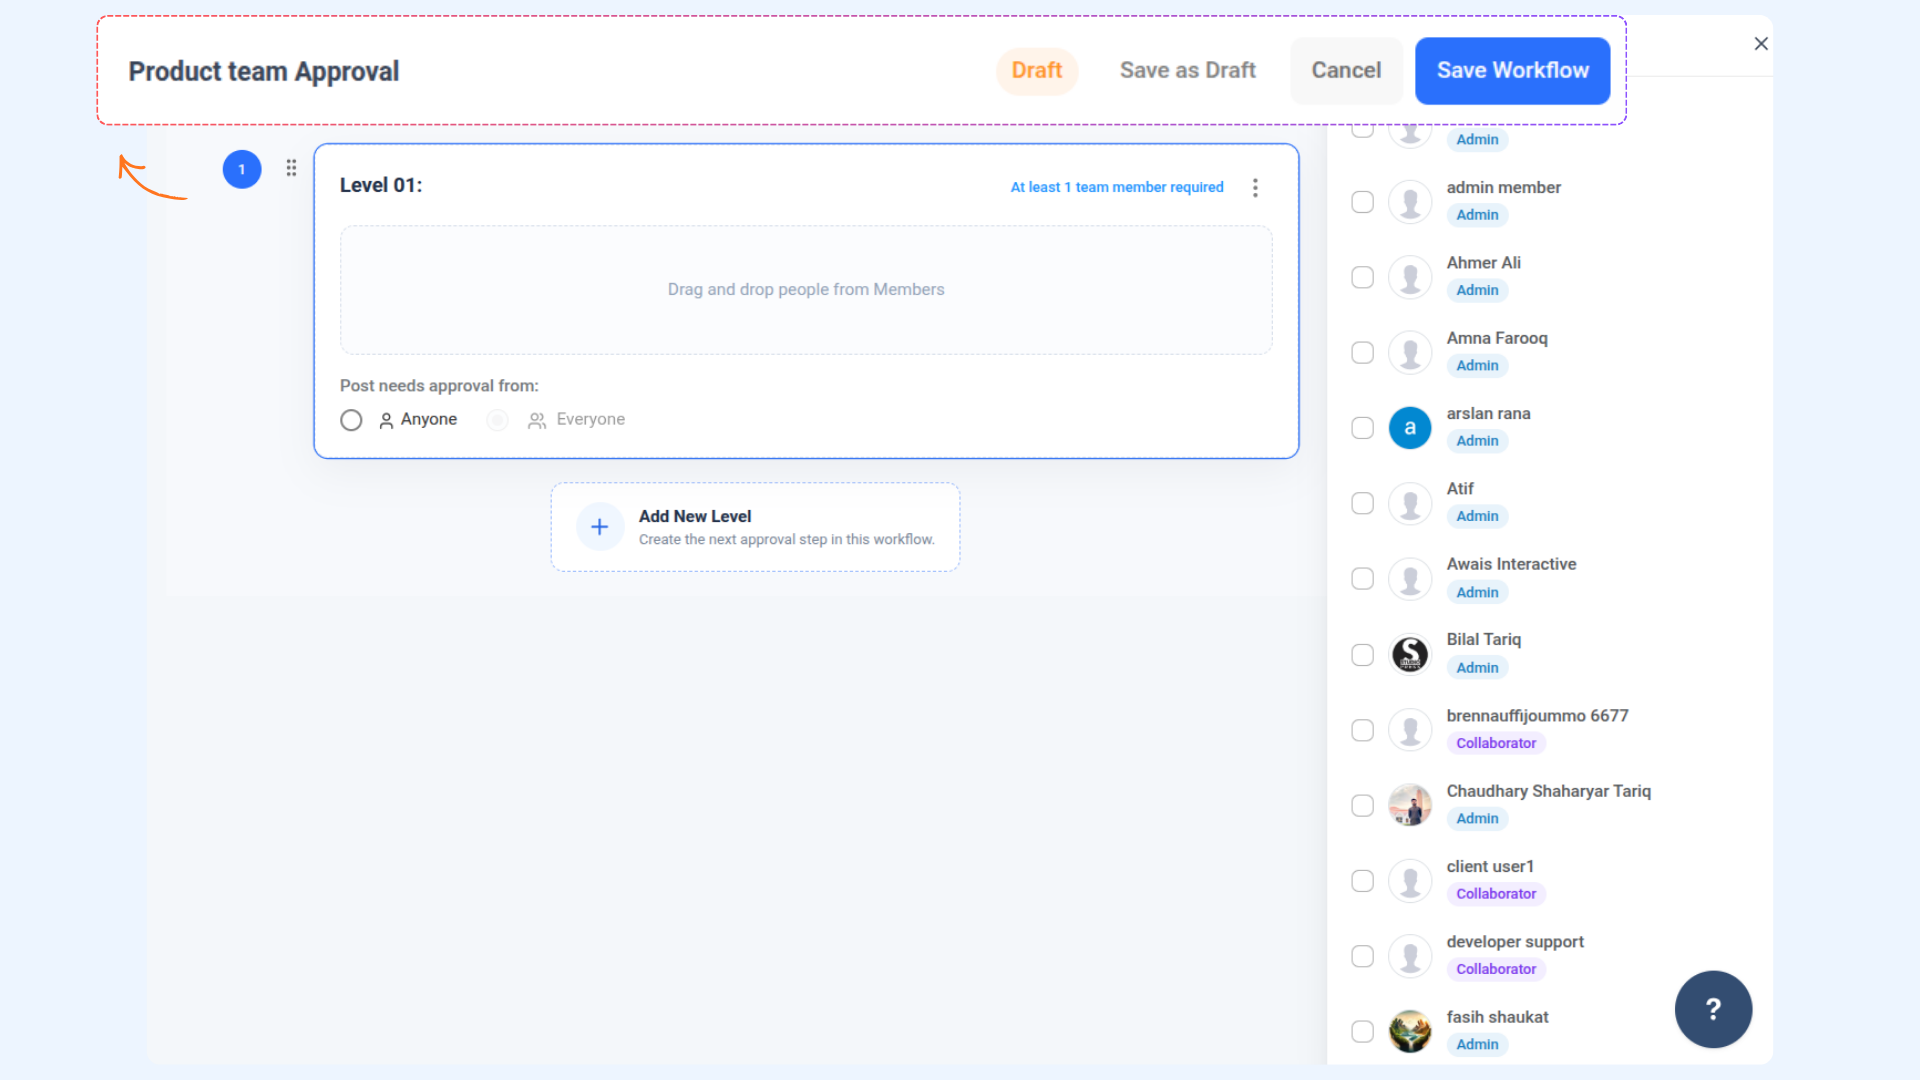
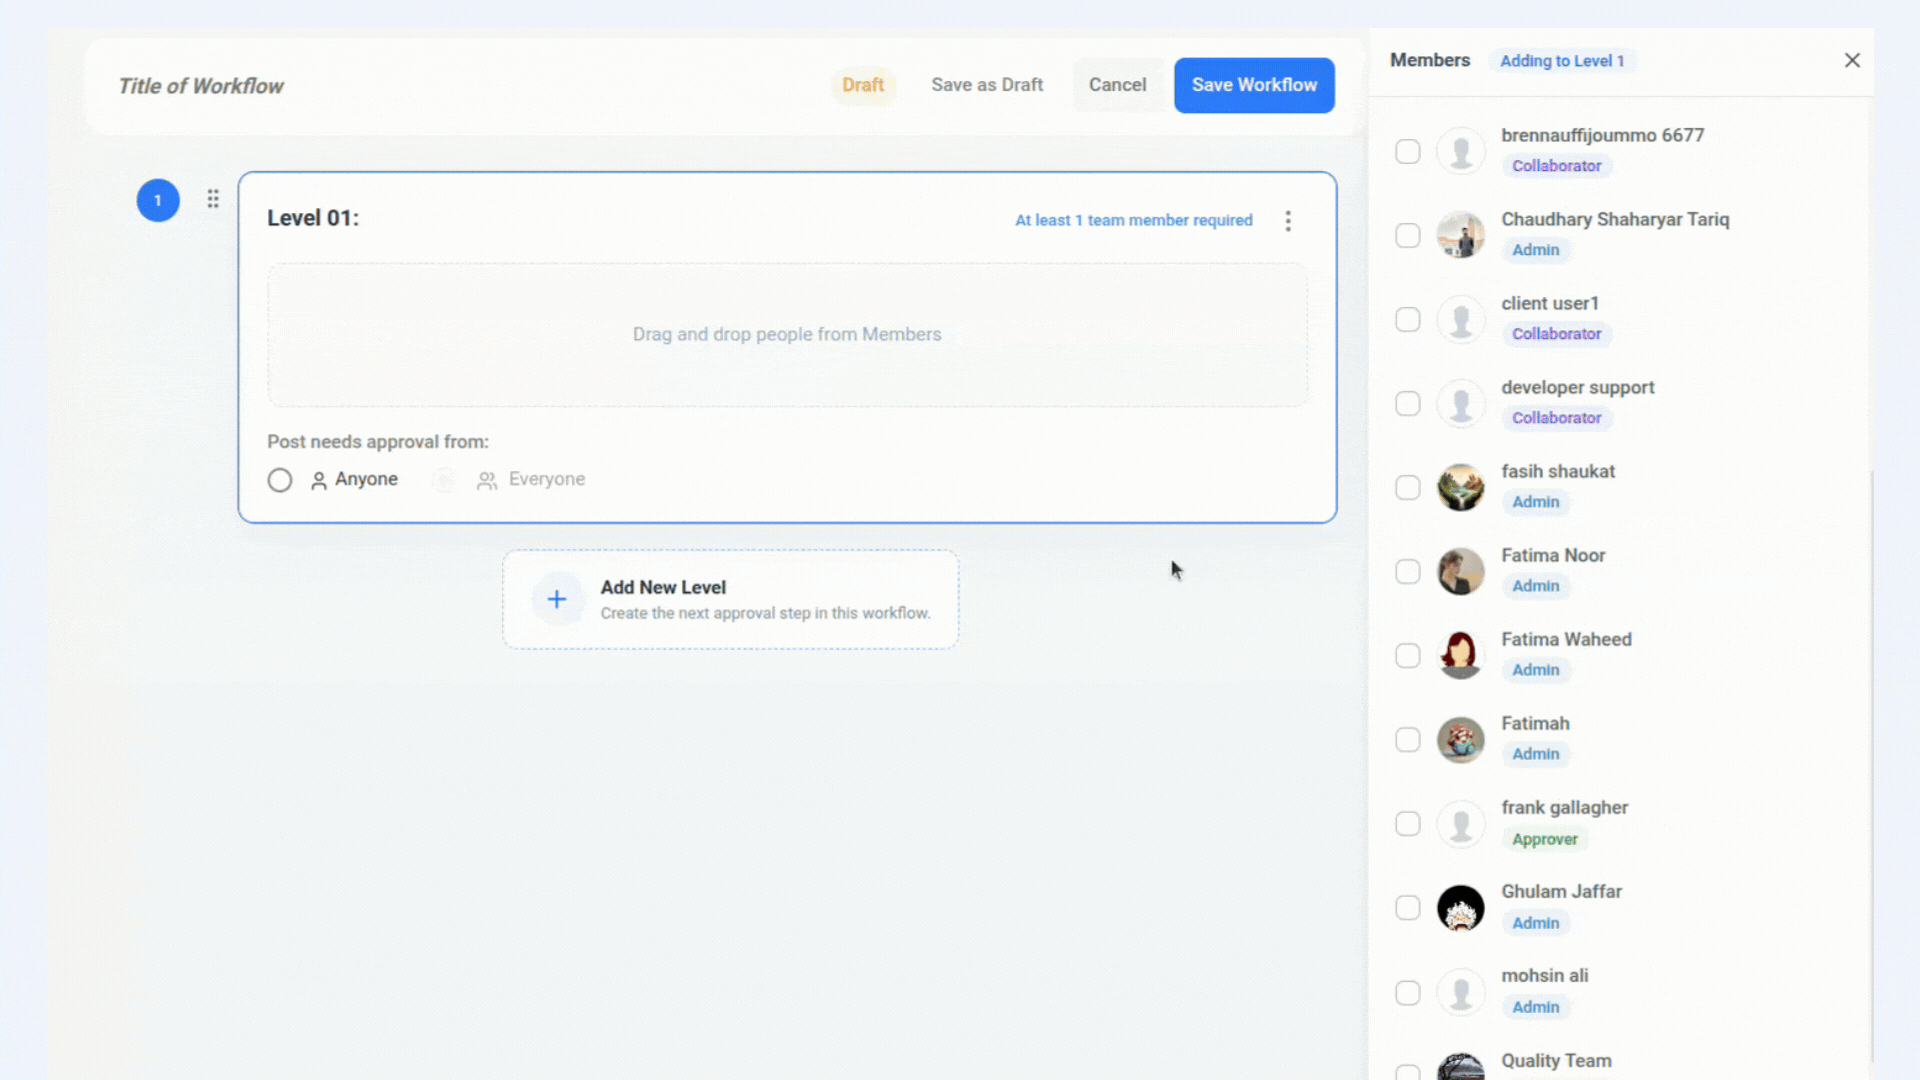
4 From the Members panel on the right, drag and drop the team members you want to assign to Level 01.
💡
Anyone vs Everyone Under Post needs approval from, select either Anyone (approval is granted when any one of the assigned members approves) or Everyone (all assigned members must approve before the post moves forward).
5 To add more levels, click Add New Level and repeat the process — drag in members and set the approval rule for each level. You can create as many levels as your review process requires.
6 Once all levels are configured, click Save Workflow. Your workflow will now appear on the Approval Workflows page and be available to use in the Post Composer.
💡
Save as Draft Not ready to finalize your workflow yet? Click Save as Draft to preserve your progress and come back to it later before making it live.
How to Use an Approval Workflow in the Post Composer
Once your workflow is set up, here's how to send a post through it directly from the composer.
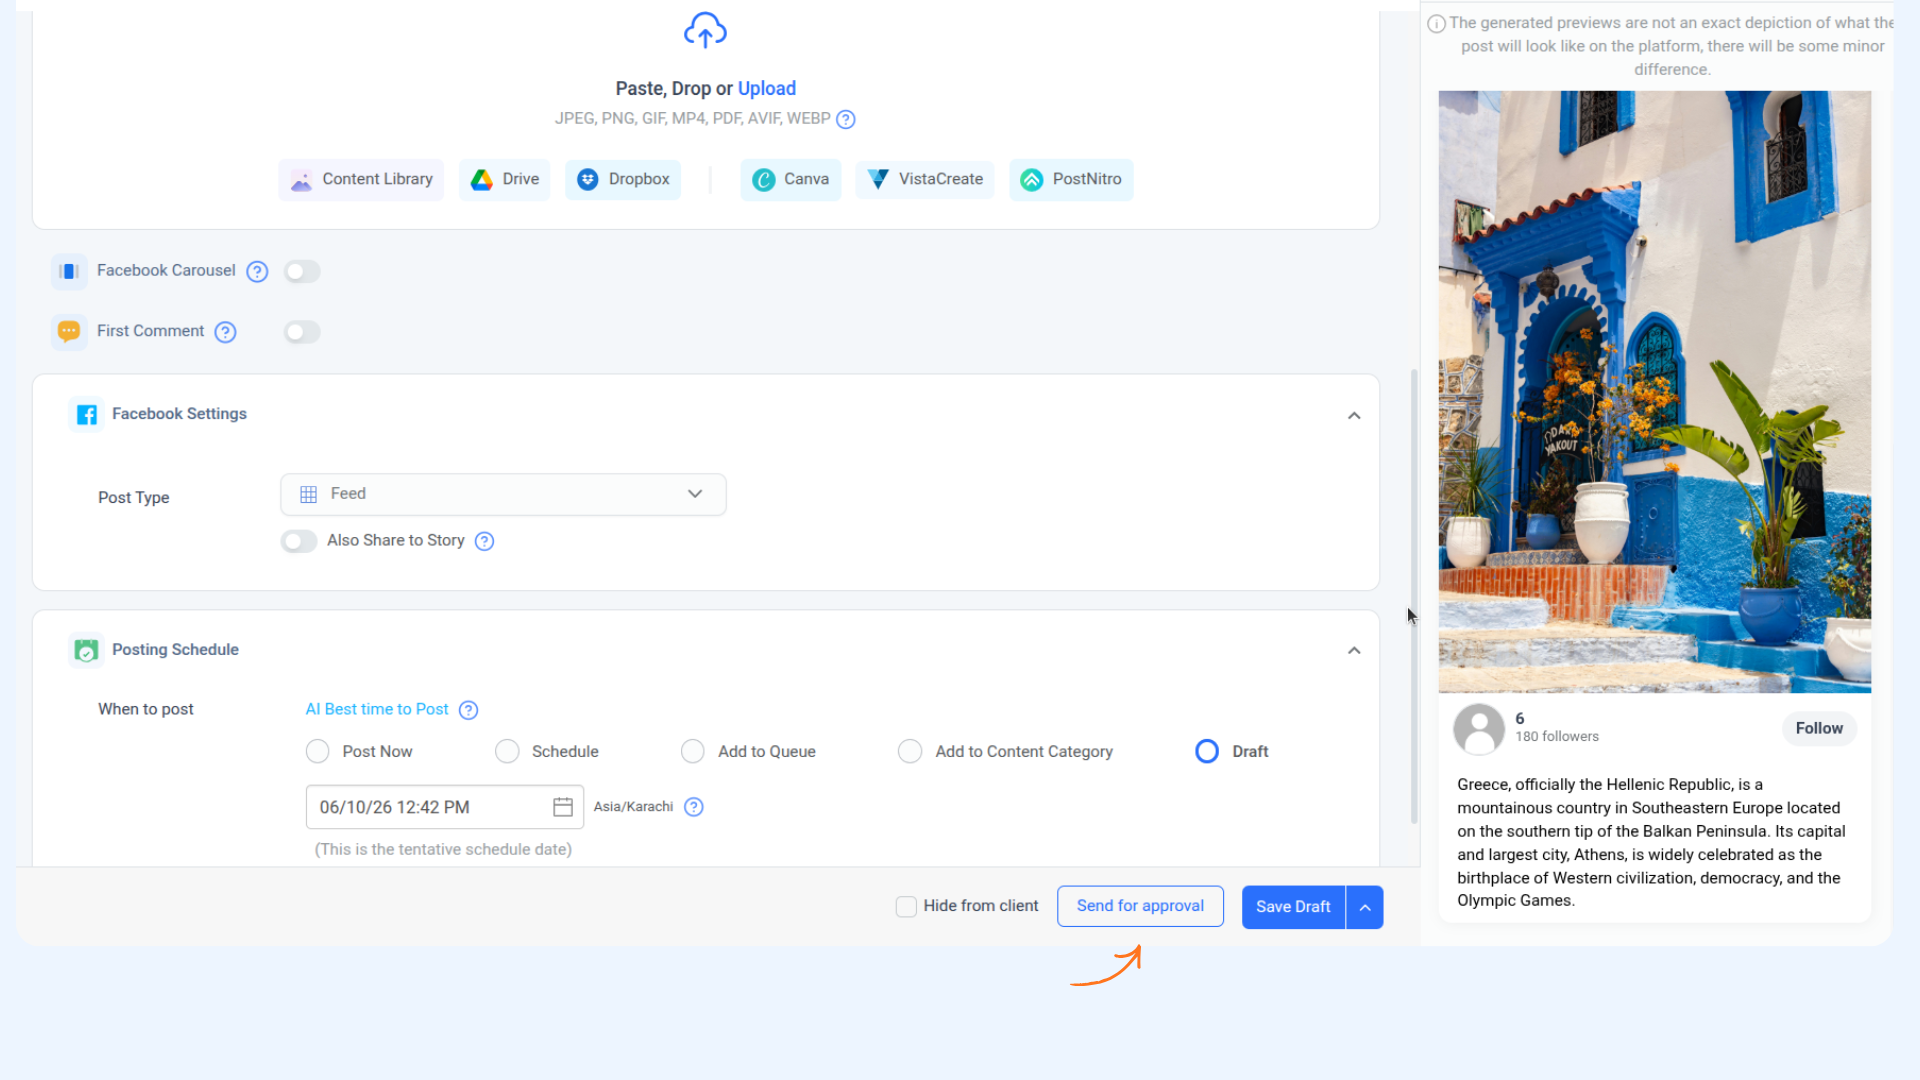
1 Open the Post Composer and create your post. Write your content, upload media, and set your posting schedule (Schedule, Add to Queue, Add to Content Category, or Draft).
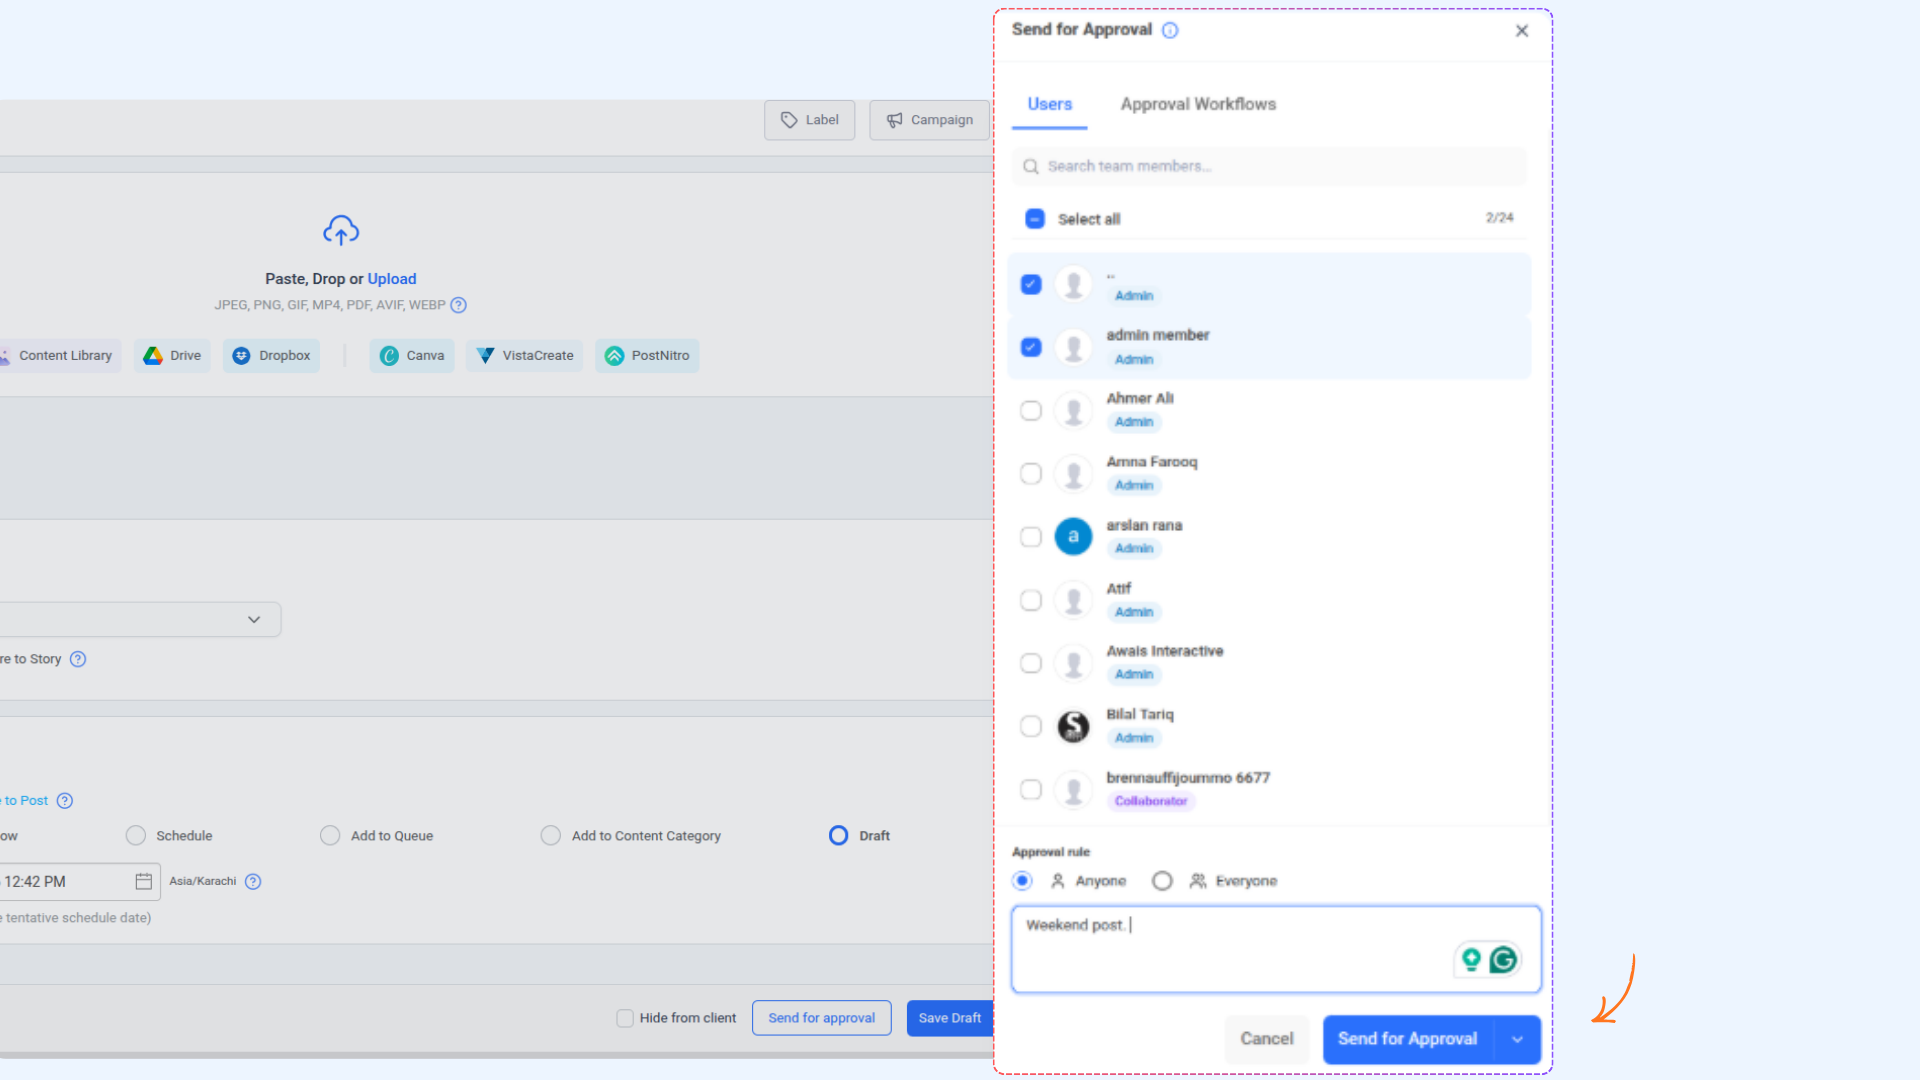
2 Click the Send for Approval button at the bottom of the composer. A panel will slide open from the right side.
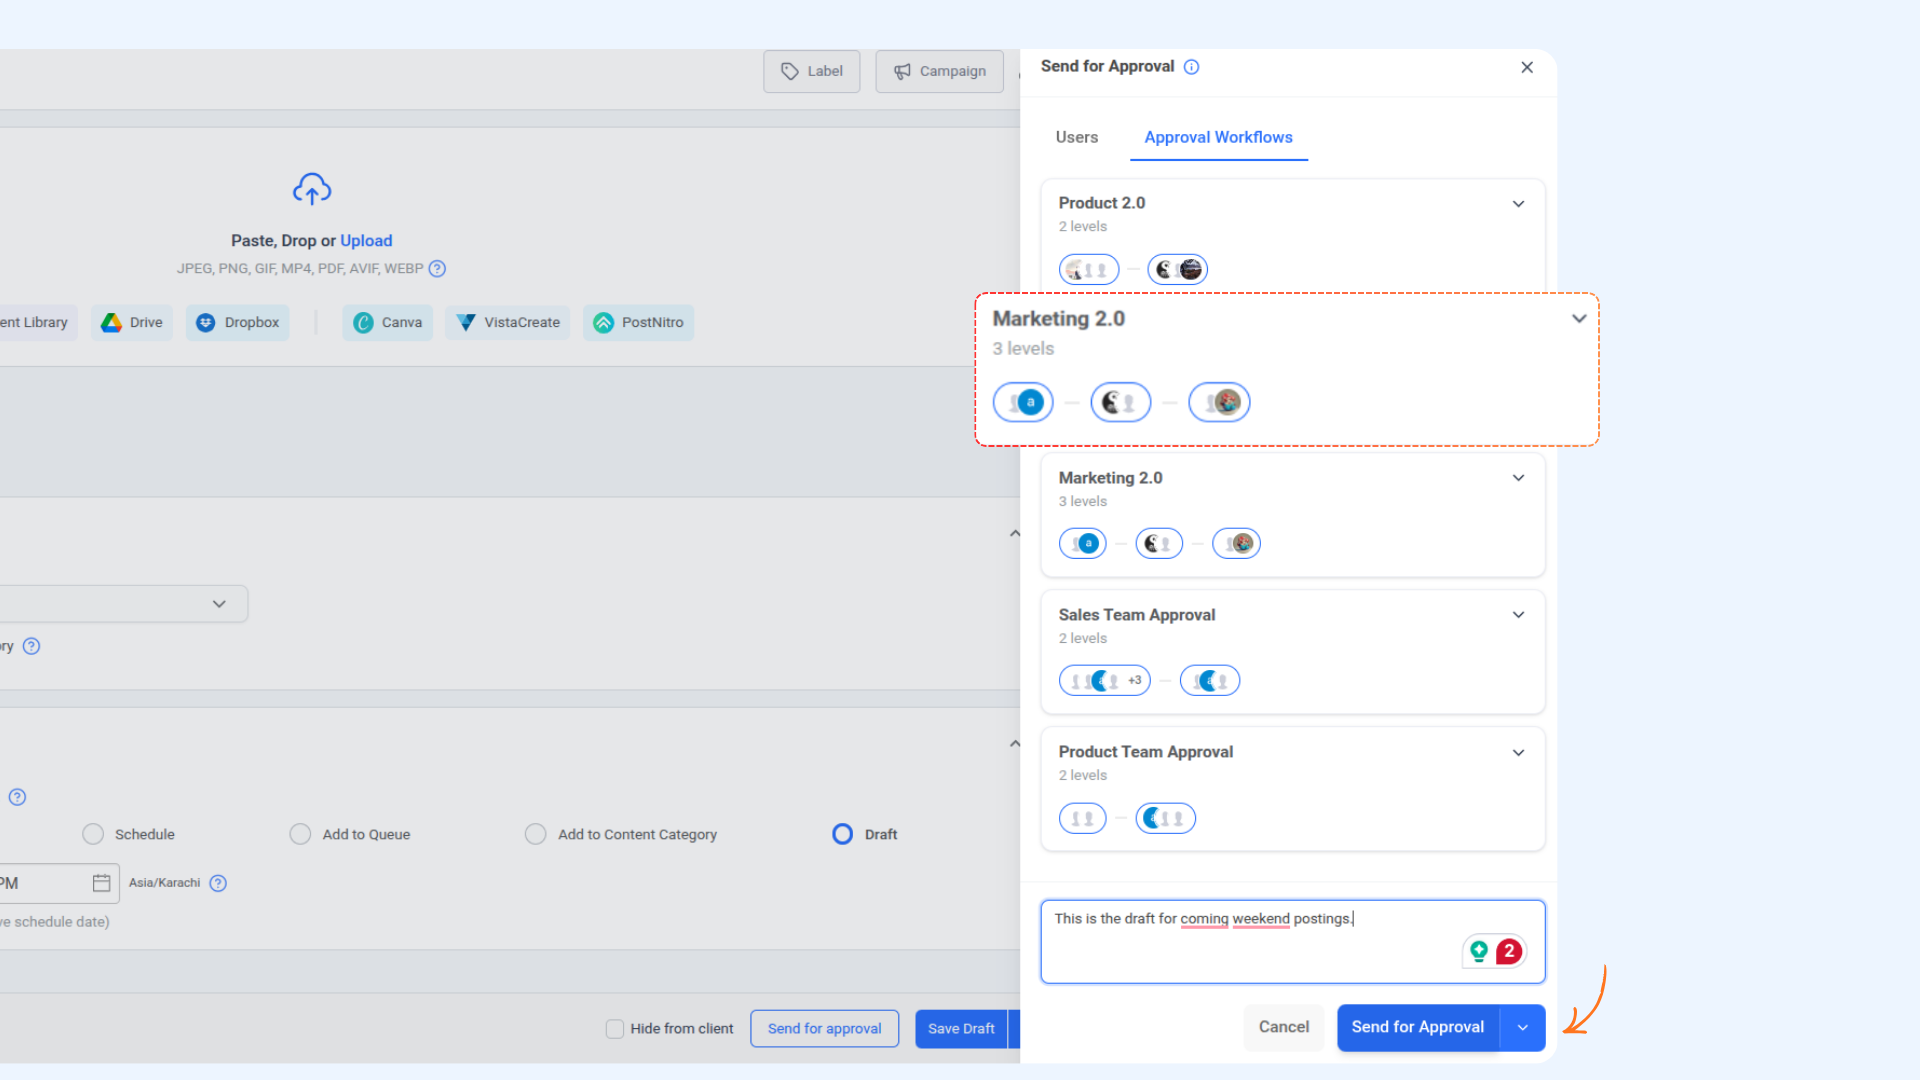
3 In the Send for Approval panel, you'll see two tabs — Users and Approval Workflows. Choose the method that fits your needs.
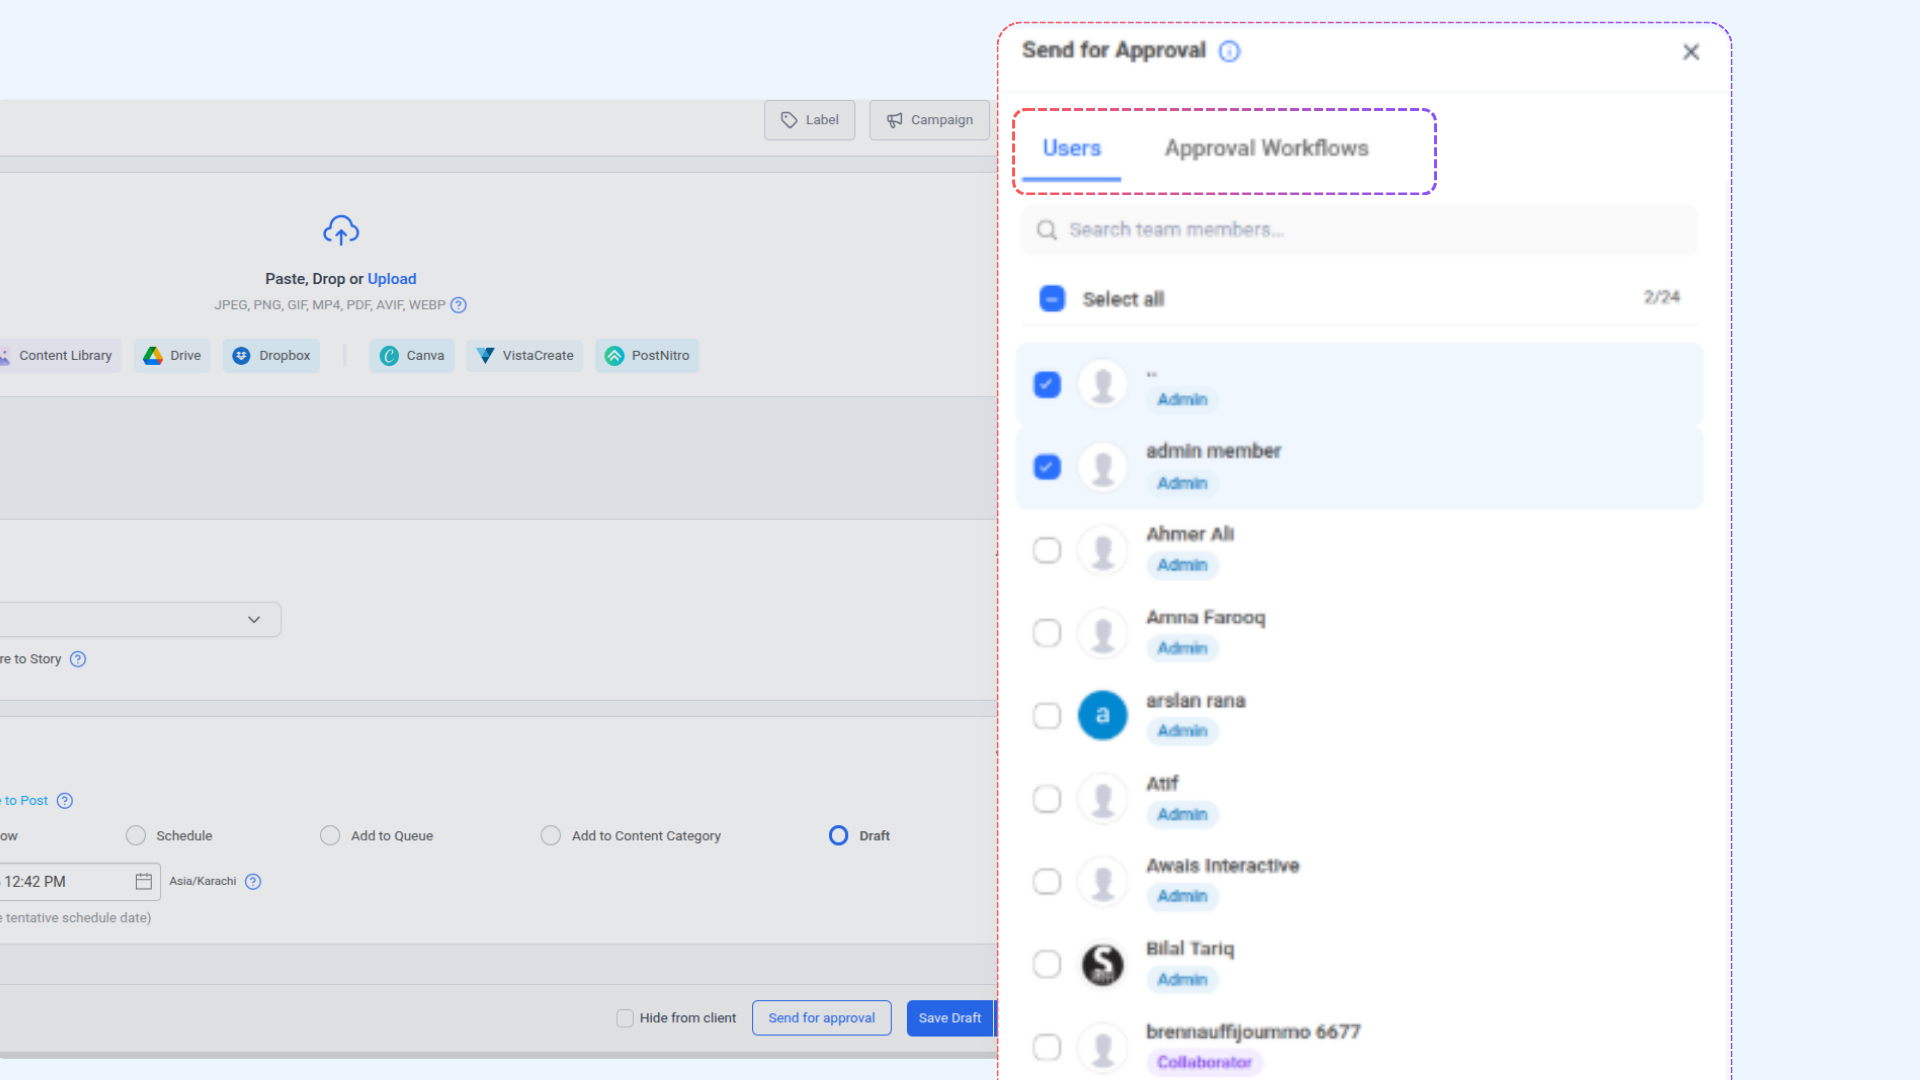
Option A: Send to Individual Users
4 Under the Users tab, select the team members you want to review this post. Set the approval rule to Anyone or Everyone, optionally add a note for your approvers, then click Send for Approval.
Option B: Use an Approval Workflow
4 Switch to the Approval Workflows tab. All your saved workflows will appear here. Select the workflow you want to use, optionally add a note, and click Send for Approval. The post will automatically move through each level of the workflow in order.
💡
Default Workflow If you've marked a workflow as Default, it will be pre-selected automatically when you open the Approval Workflows tab in the composer, saving you time on every post.
FAQs
Can I have more than two levels in a workflow?
Yes, there's no fixed limit on the number of levels. You can keep clicking "Add New Level" and assign as many review stages as your process requires.
What's the difference between "Anyone" and "Everyone" approval?
"Anyone" means the post moves forward as soon as any one of the assigned members approves it. "Everyone" means every single assigned member must approve before the post proceeds to the next level.
Can I edit a workflow after saving it?
Yes, you can go back to Approval Workflows in Settings, open any existing workflow, make your changes, and save it again.
What happens if I save a workflow as a Draft?
It won't be available to use in the Post Composer until it's fully saved. Drafts are just a way to save your progress mid-setup.
Can I set a default workflow?
Yes. On the Approval Workflows page, you can mark any workflow as Default. This workflow will then be pre-selected automatically whenever you use the Approval Workflows tab in the composer.
What's the difference between sending to Users vs. using an Approval Workflow?
Sending to Users is a one-time, ad hoc approval — you pick people manually each time. Using an Approval Workflow applies your pre-configured multi-level chain, so the right reviewers are notified at each stage automatically without any manual selection.


