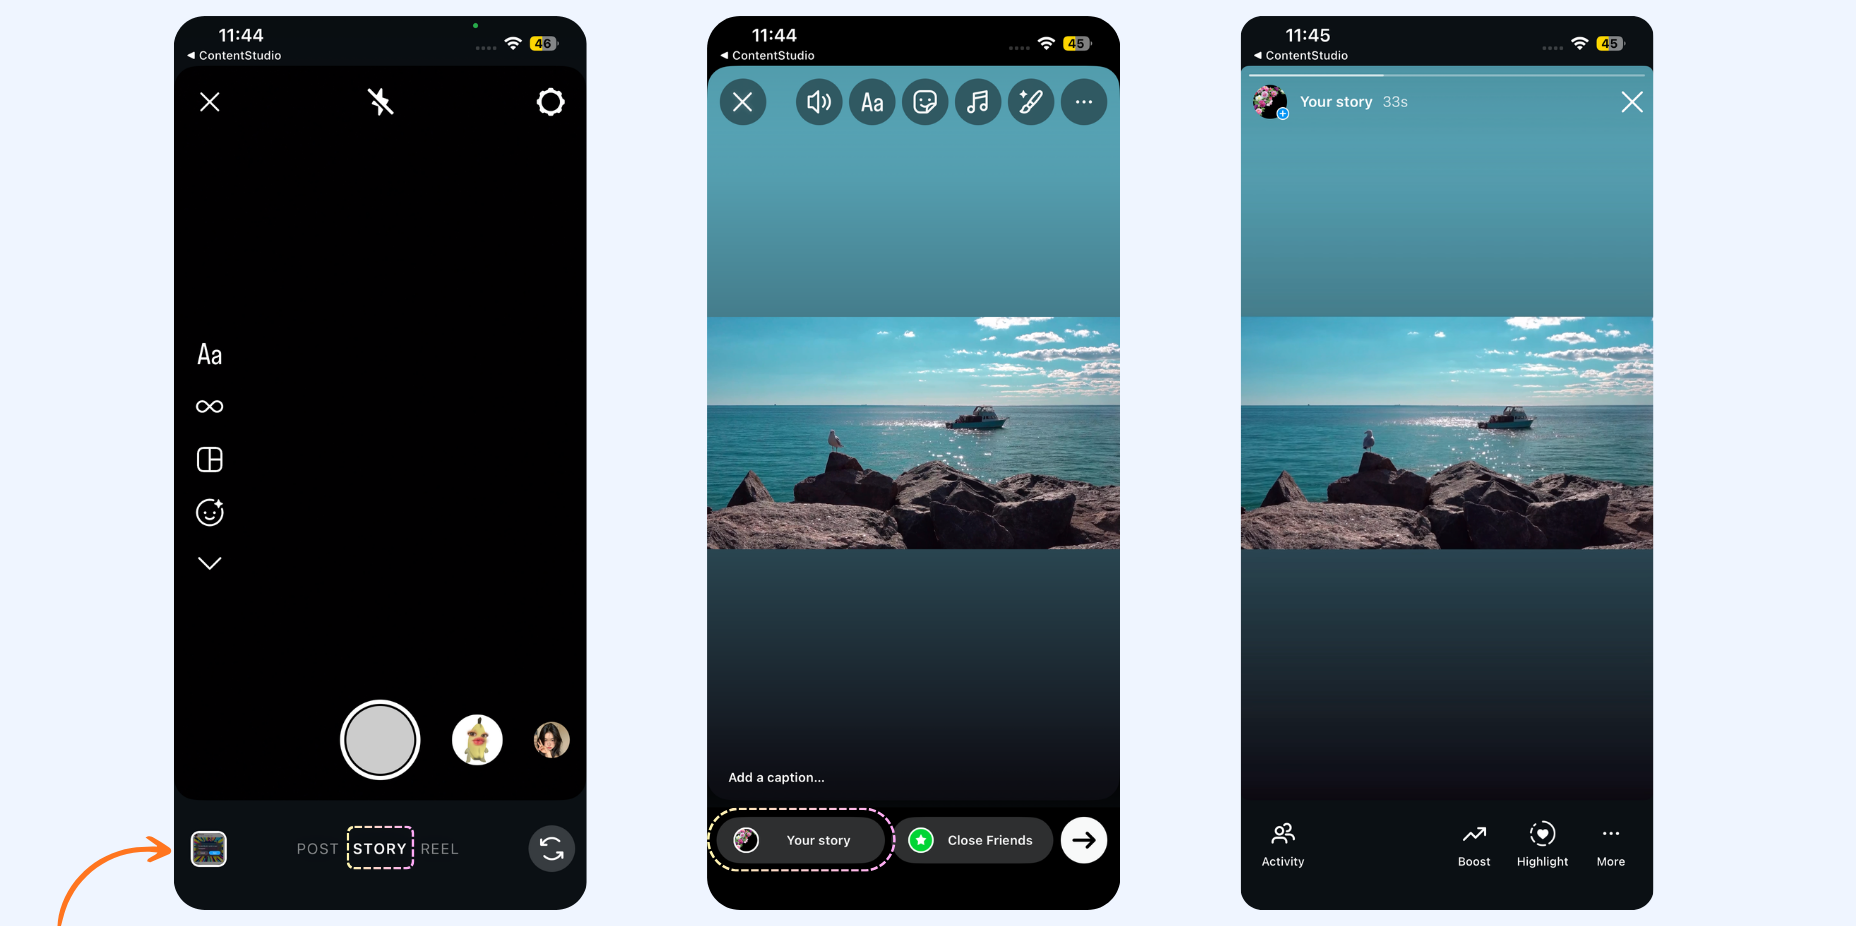
How to post on Instagram via push notifications (iOS app)
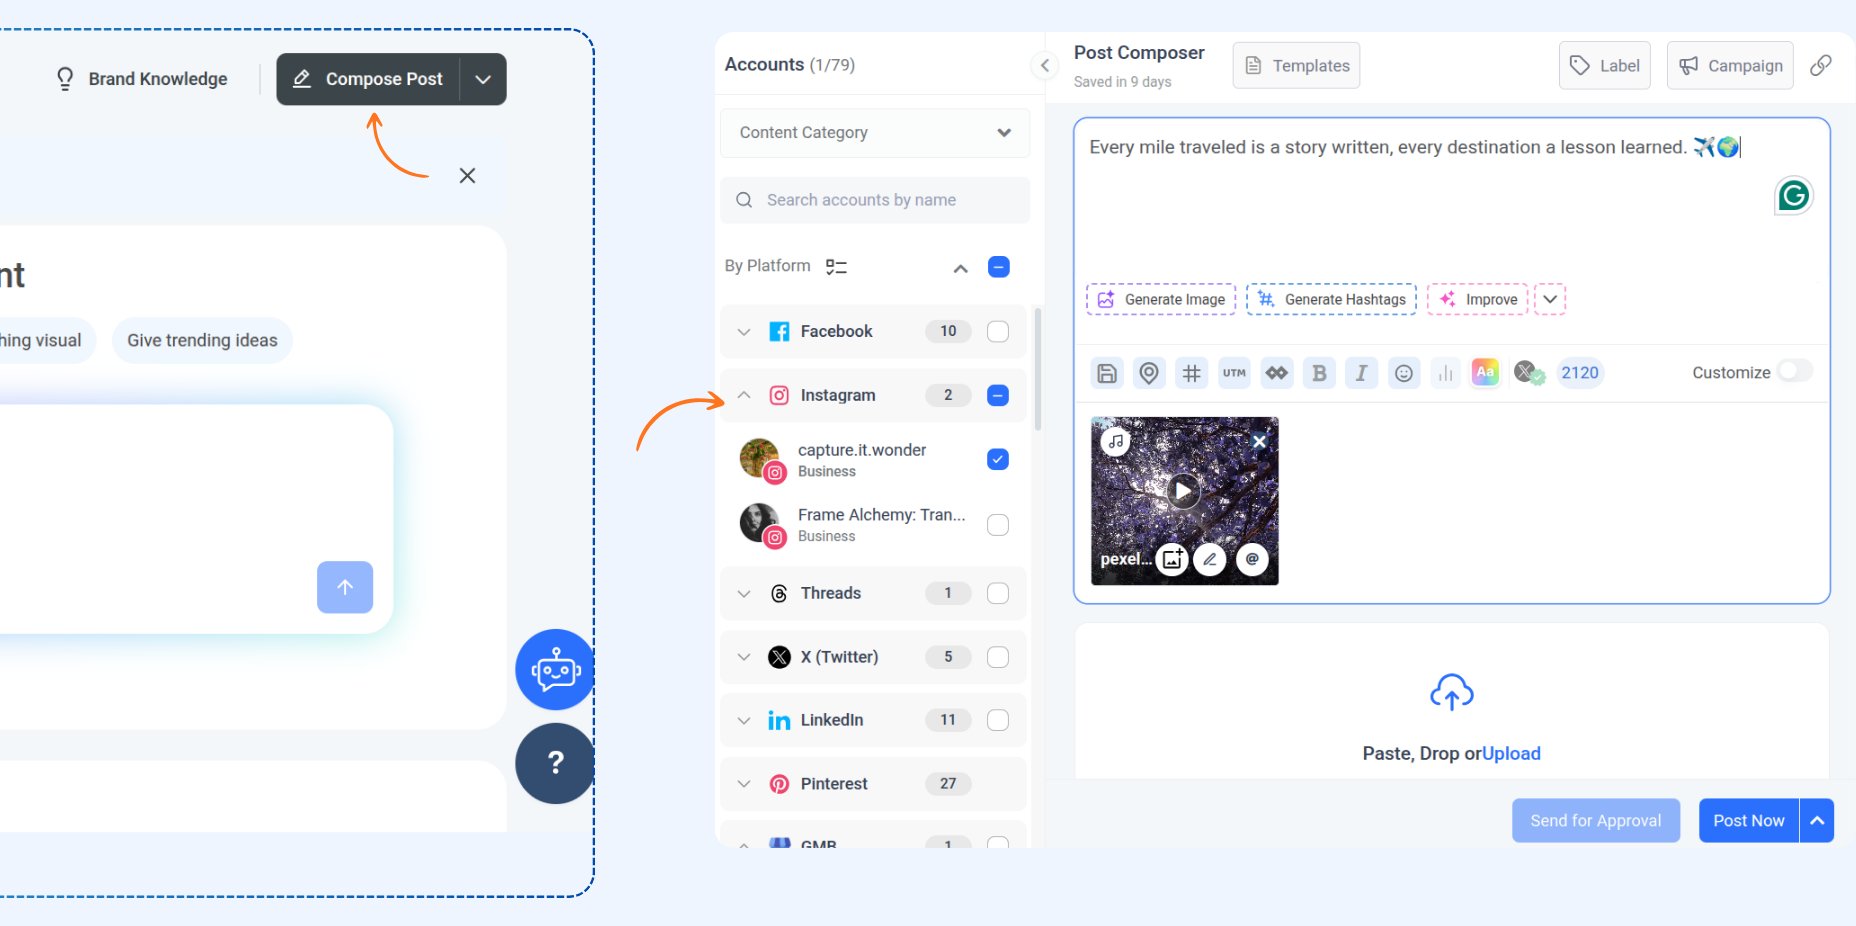
Now, scheduling Instagram posts is easier than ever with ContentStudio’s API-powered publishing. Effortlessly plan, schedule, and publish your content at the perfect time, all while staying in sync with your audience. This guide takes you step-by-step through the process, from creating your post to publishing via push notifications.
In this article:
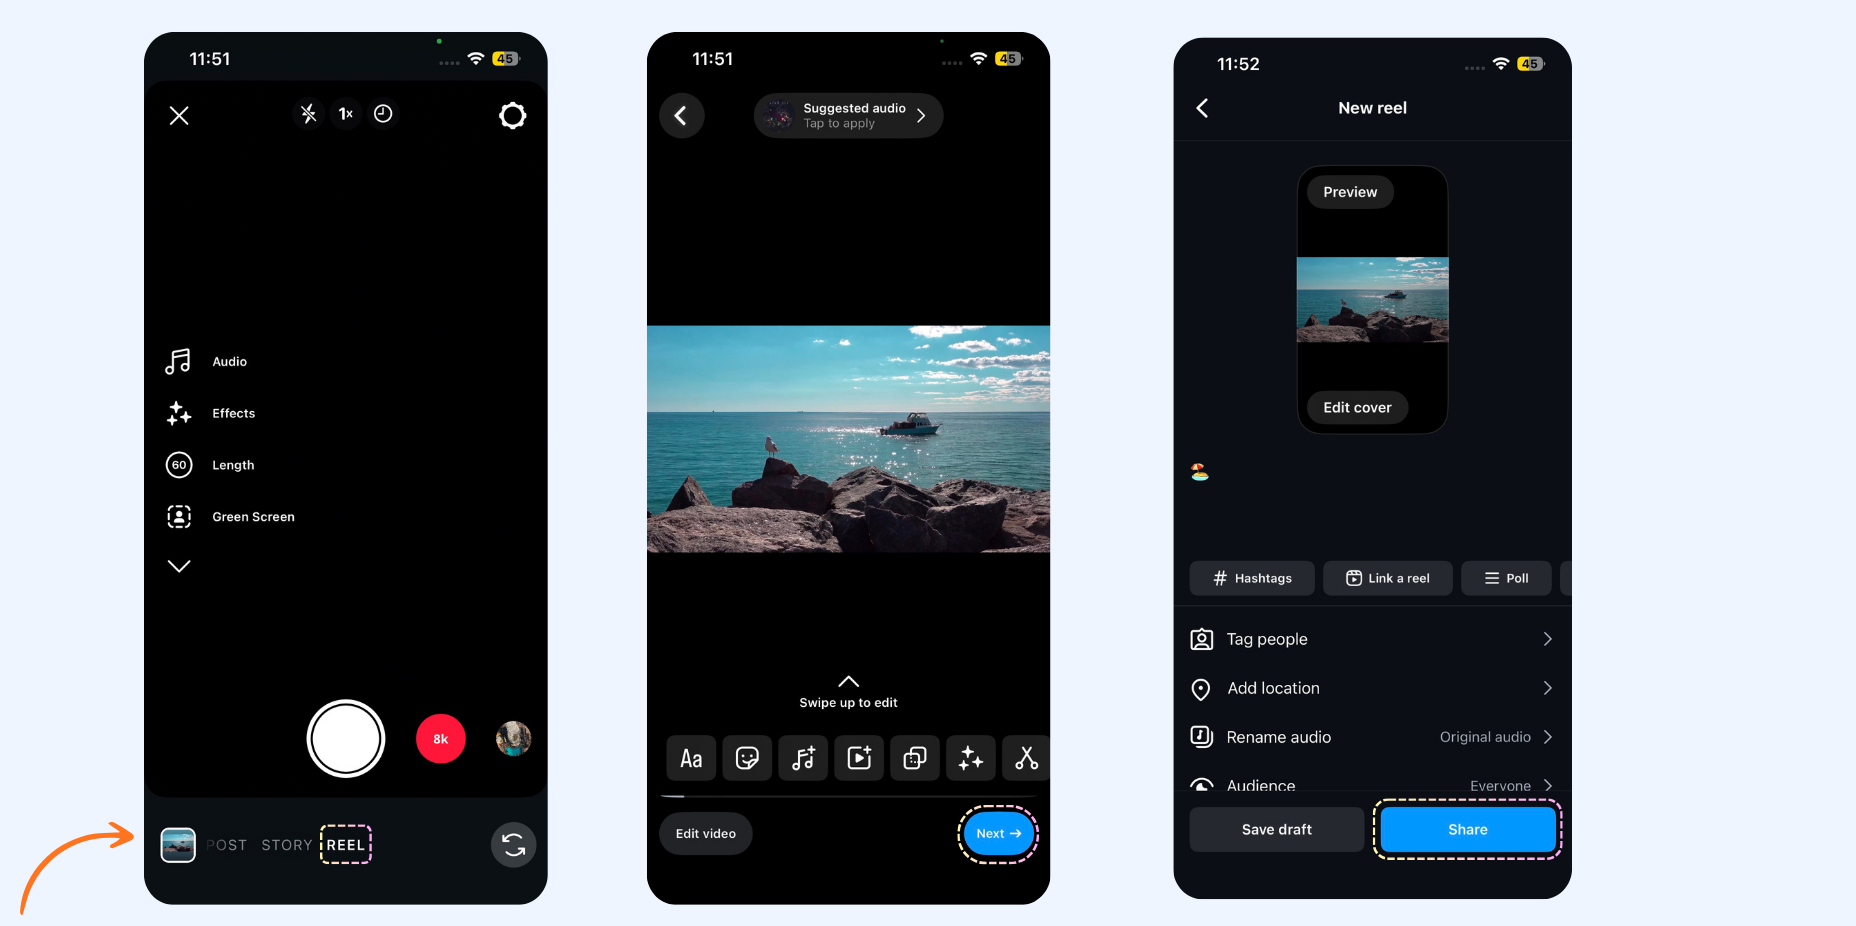
How to post a video


Tip:
You can also go to Push Notification in the app to view the missed notifications.
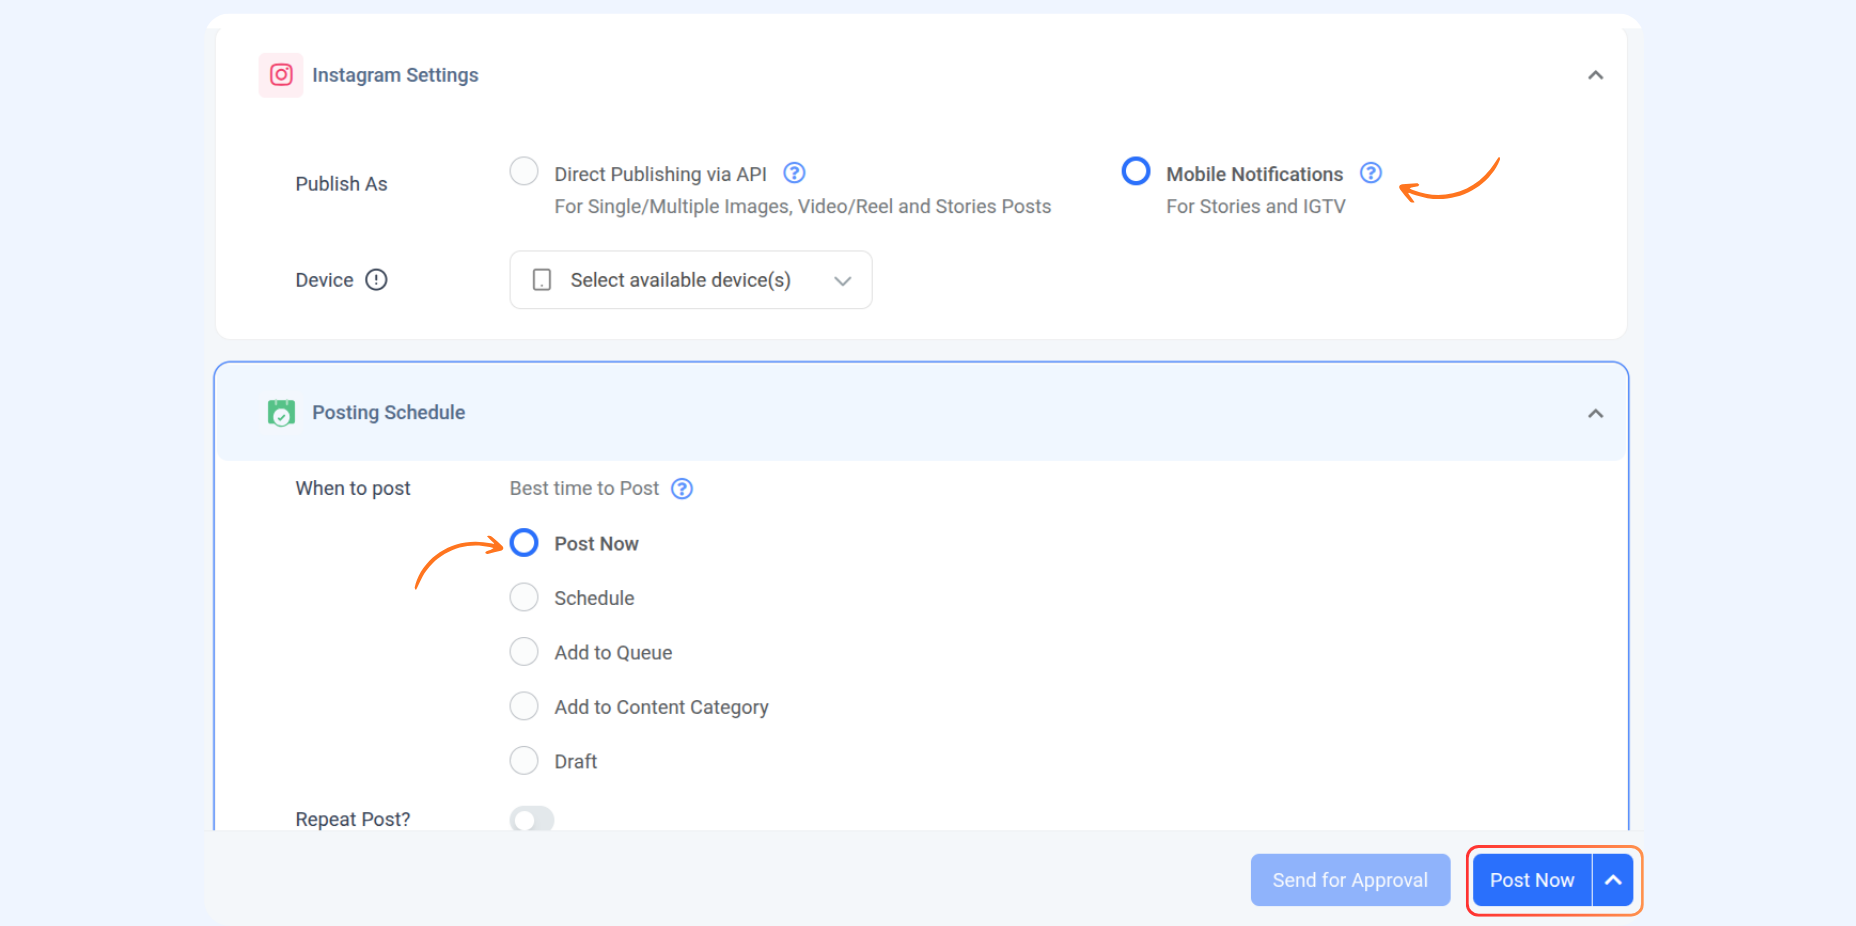
Post Confirmation
After tapping Post Now and completing (or skipping) the steps inside the native app, the next time you open the ContentStudio iOS app, a confirmation pop-up will appear asking whether you actually published the post.
You will be presented with two options:

New Post Status Filters
Two new filters have been added to the Planner to help you track and manage posts that were sent via push notification:

If you missed the confirmation pop-up on the iOS app, you can still update a post's status directly from the Planner on the web app. Here's how:

- I published this — Marks the post as published. It will move to the Published filter.
- I didn't post this — Marks the post as not published. It will move to the appropriate fallback status (e.g., Rejected).

Related Articles:
- Simultaneously posting content on Instagram: story, reel, and feed
- How to post stories using Instagram push notifications (Android app)
- What are the requirements to directly publish images and videos to Instagram?
FAQs
Q1: What if I accidentally miss the Instagram push notification?
A: No worries! You can always find missed alerts in the Push Notifications section of the ContentStudio mobile app and post from there.
Q2: How do I publish my Instagram Story after getting the notification?
A: Simply tap the push notification, hit Post Now, and follow the on-screen steps. The post will automatically open in Instagram, ready to share as your Story.
Q3: Can I choose between posting as a Story or a Reel?
A: Yes! Once your media opens in Instagram, you can decide whether to post it as a Story or a Reel, depending on your content type.
Q4: How can I tell if my Story or Reel was successfully published?
A: You can check your post status directly in the Planner section — it’ll show as “Published” once it’s live.
Q5: Do I need to keep the ContentStudio app open to receive notifications?
A: It’s best to keep the app running in the background with notifications enabled so you don’t miss any post reminders.