How to integrate Shopify
This guide will help you seamlessly connect your Shopify store with ContentStudio. Once integrated, you’ll be able to publish blogs directly from ContentStudio to your Shopify store without any extra steps. Let’s dive in and get you connected! 🚀
In this article:
Note!
Shopify requires a paid membership for its services. To learn more about their prices, click here.
Create a new Shopify Partners account
1
Open the
Shopify Partners link. Fill in the necessary details in the boxes, then click
'Create Account' to proceed.

Or open
Shopify and
log in to your account.

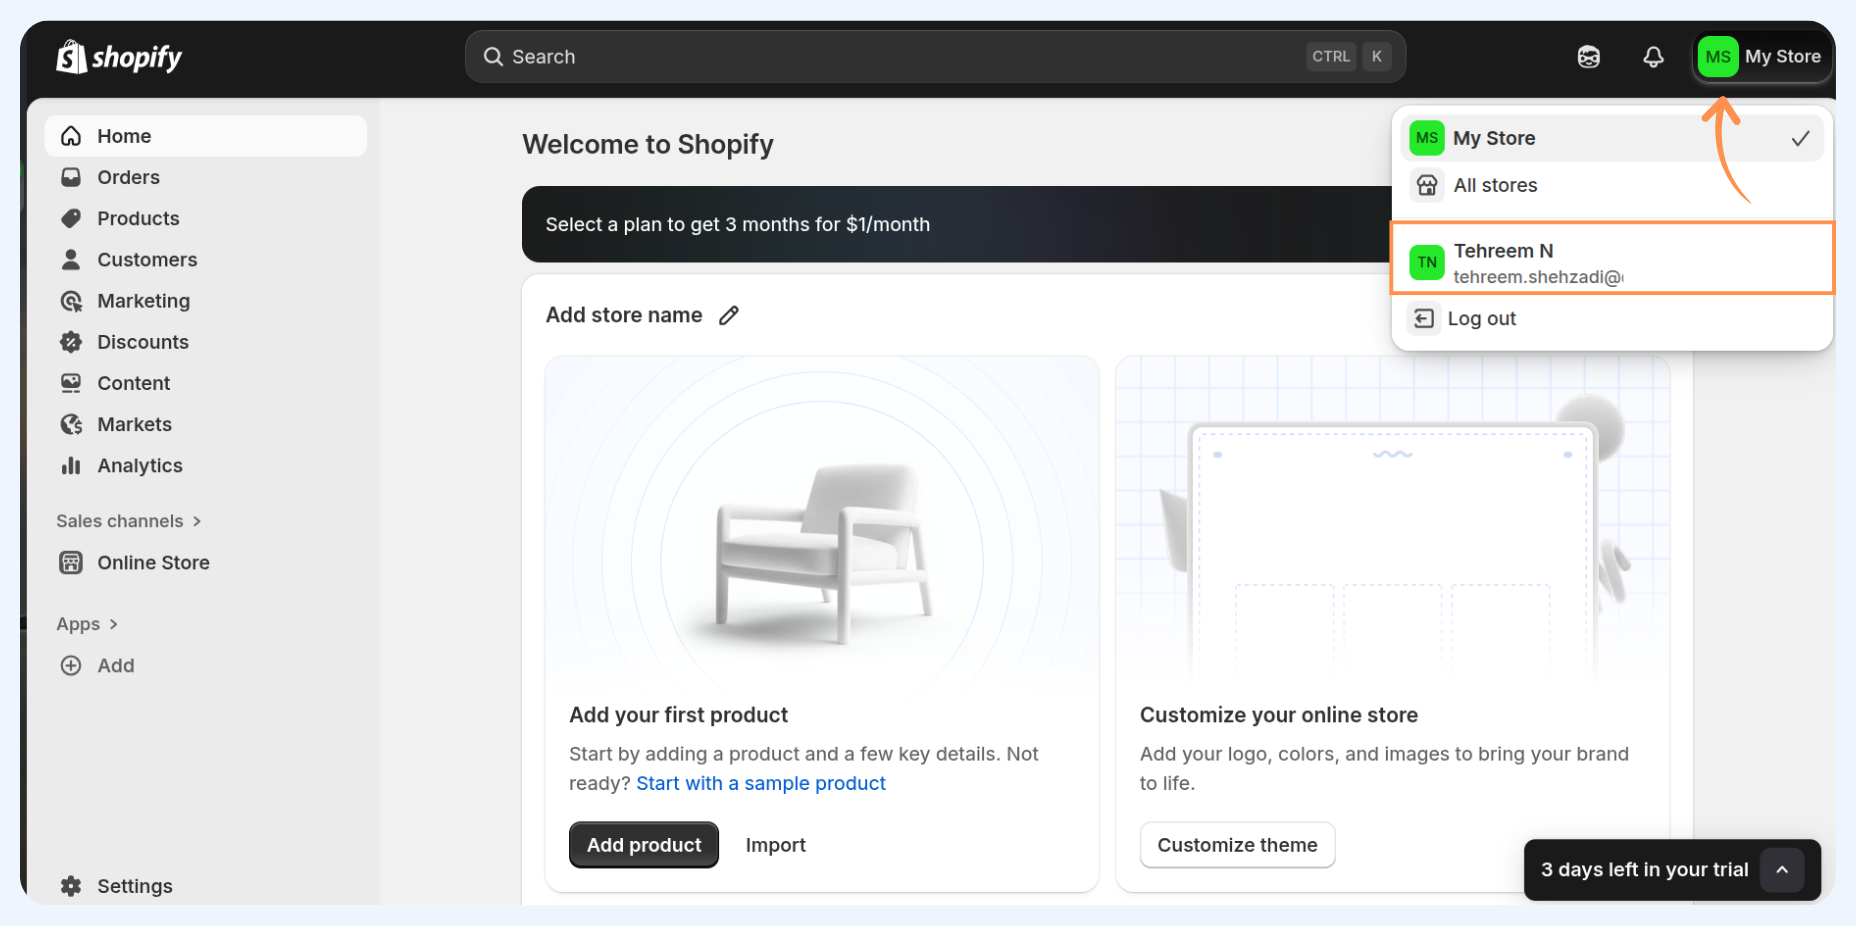
2
Once logged in, you’ll be directed to your Shopify account. From there, click on your profile icon in the top-right corner and select your profile .
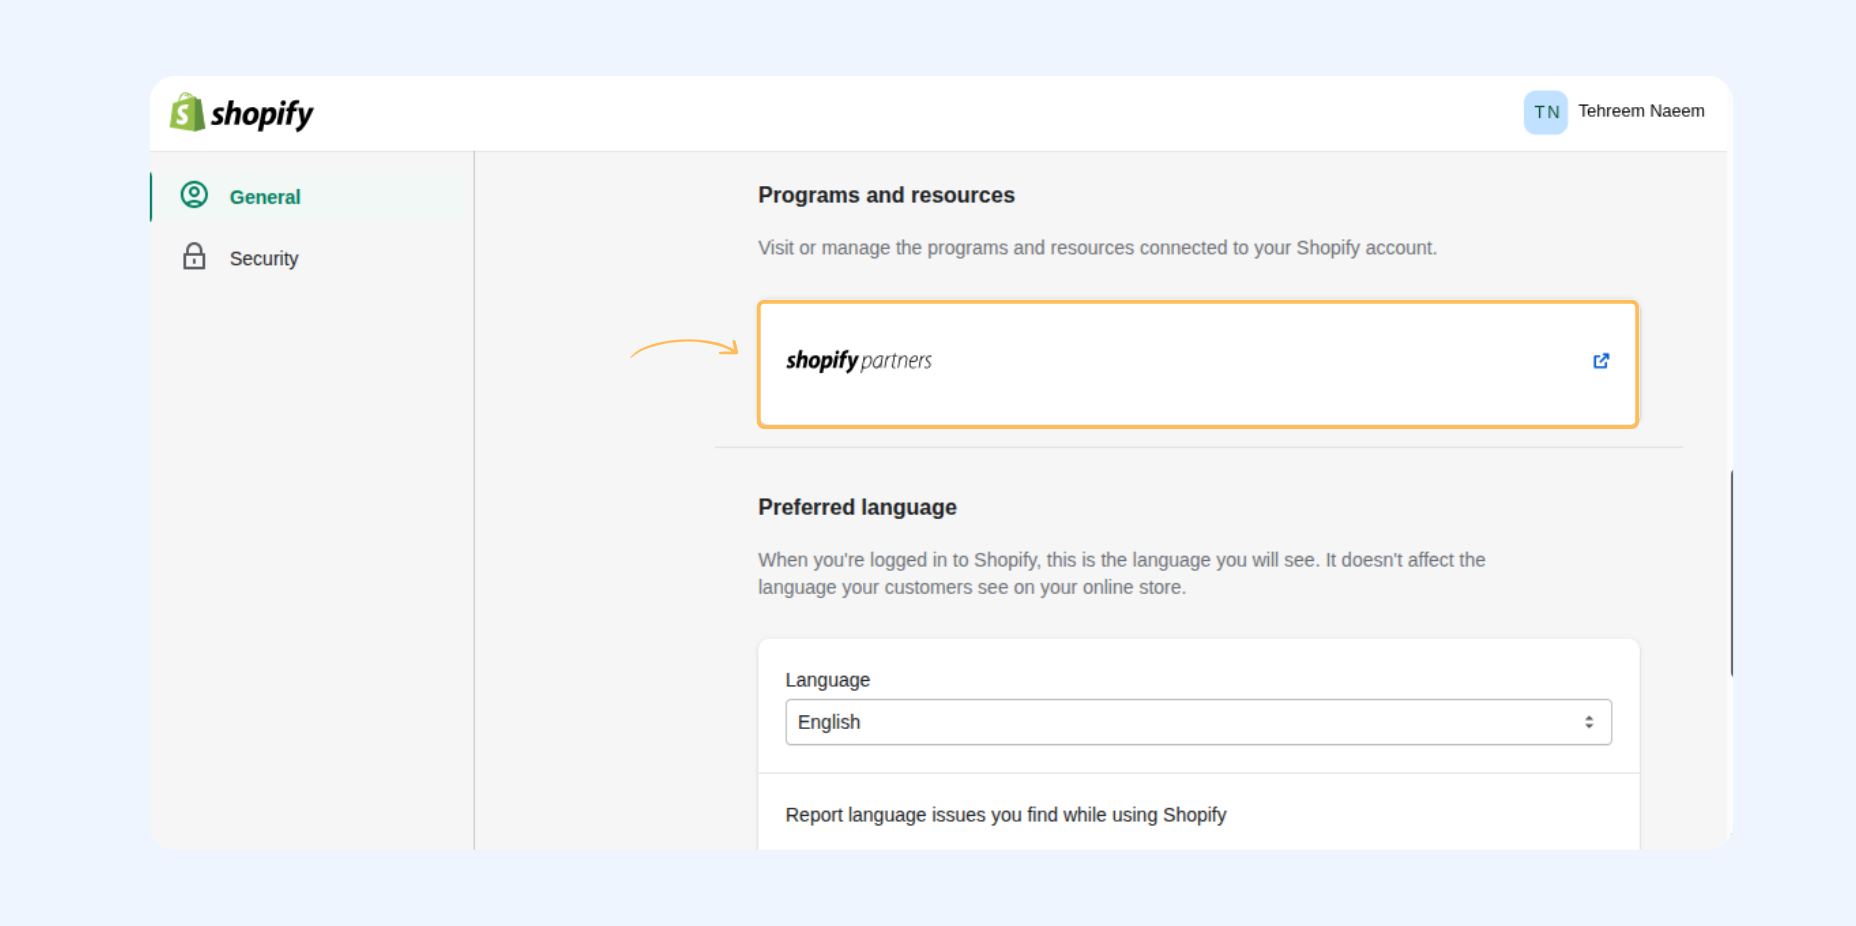
3
In the General section of your account, click on the blue icon link in the Shopify Partners section (as shown in the image below) to go to the Shopify Partners page.
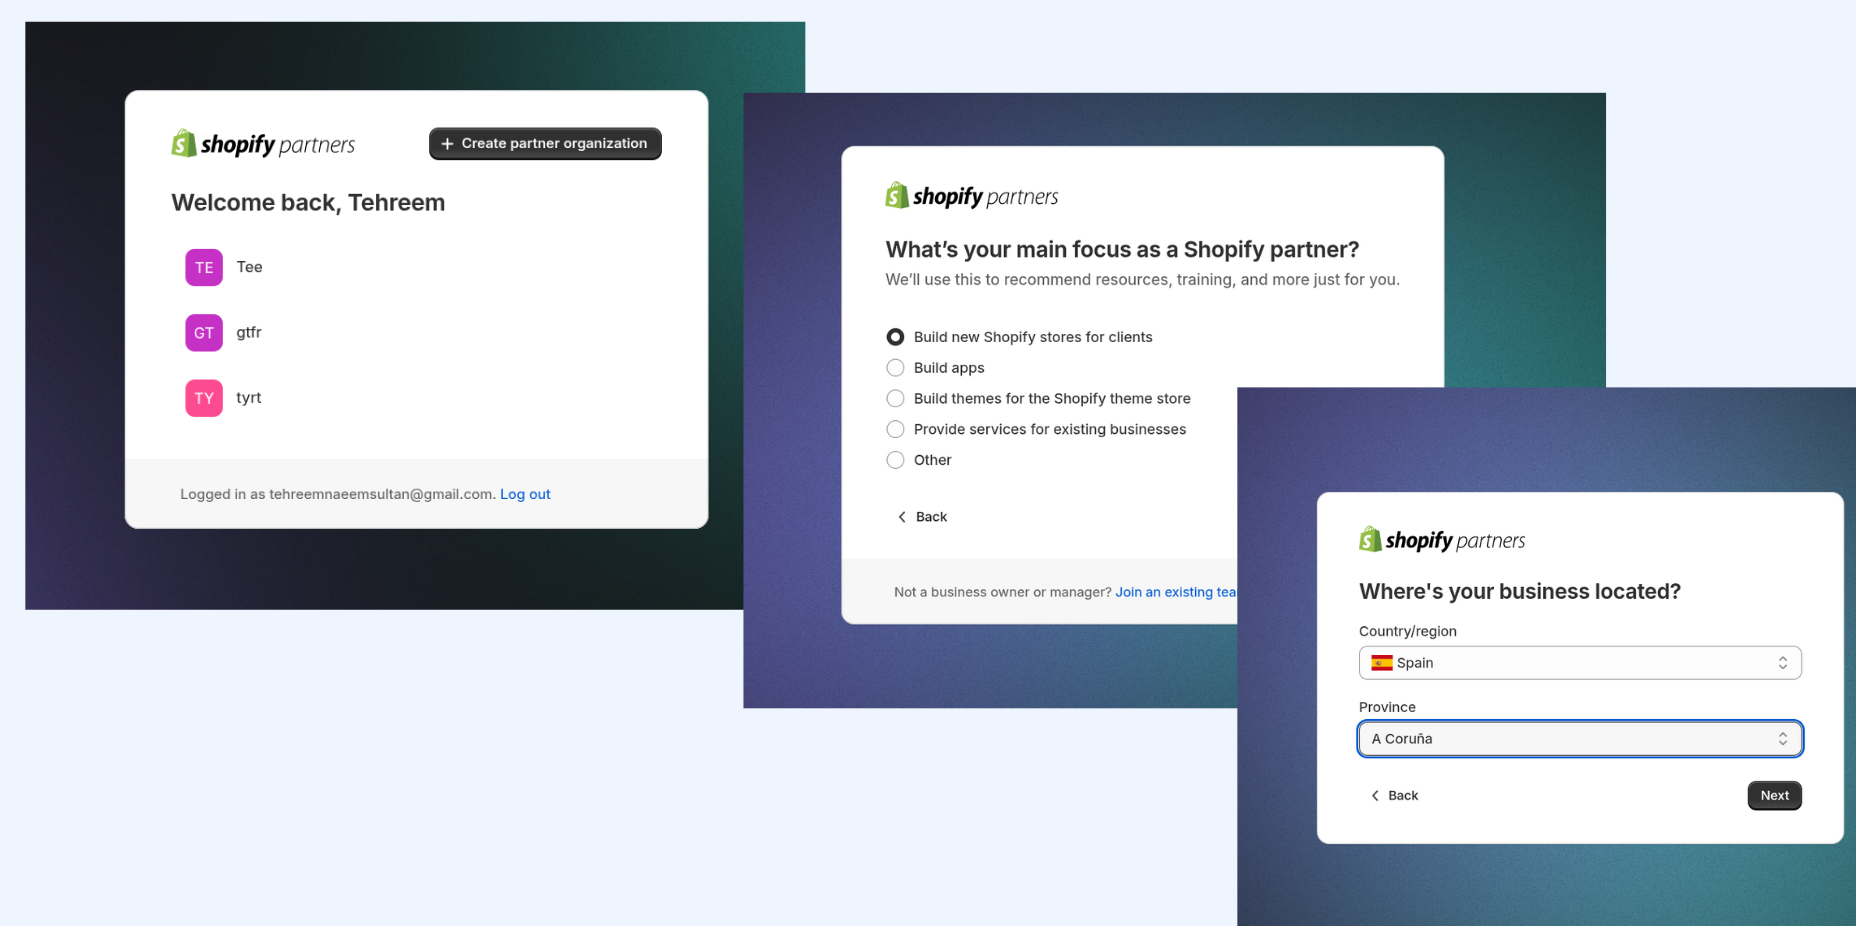
4
In the Shopify Partners box, select your existing Organization or create a new one if you don’t have it set up yet. This ensures your Shopify store is properly linked under the correct partner account before continuing.
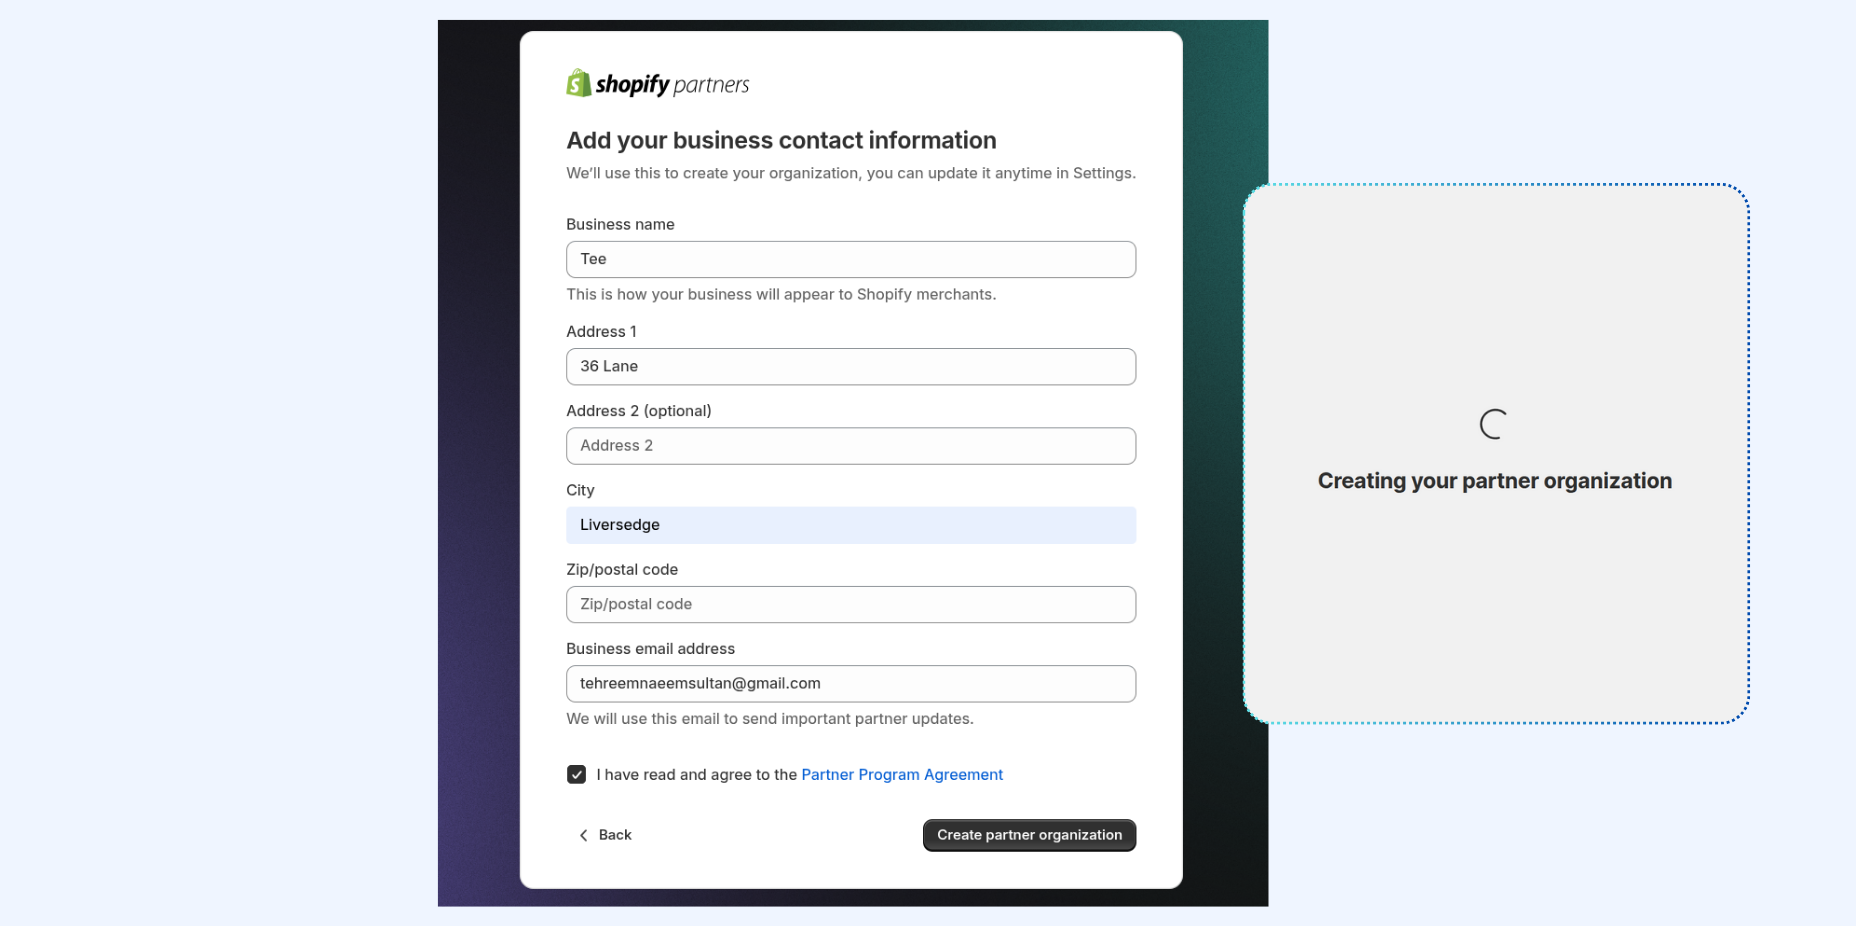
5
Add your business contact information, including your company name, email address, and website URL. This information helps identify your business within the Shopify Partner setup.
Create a new App
1
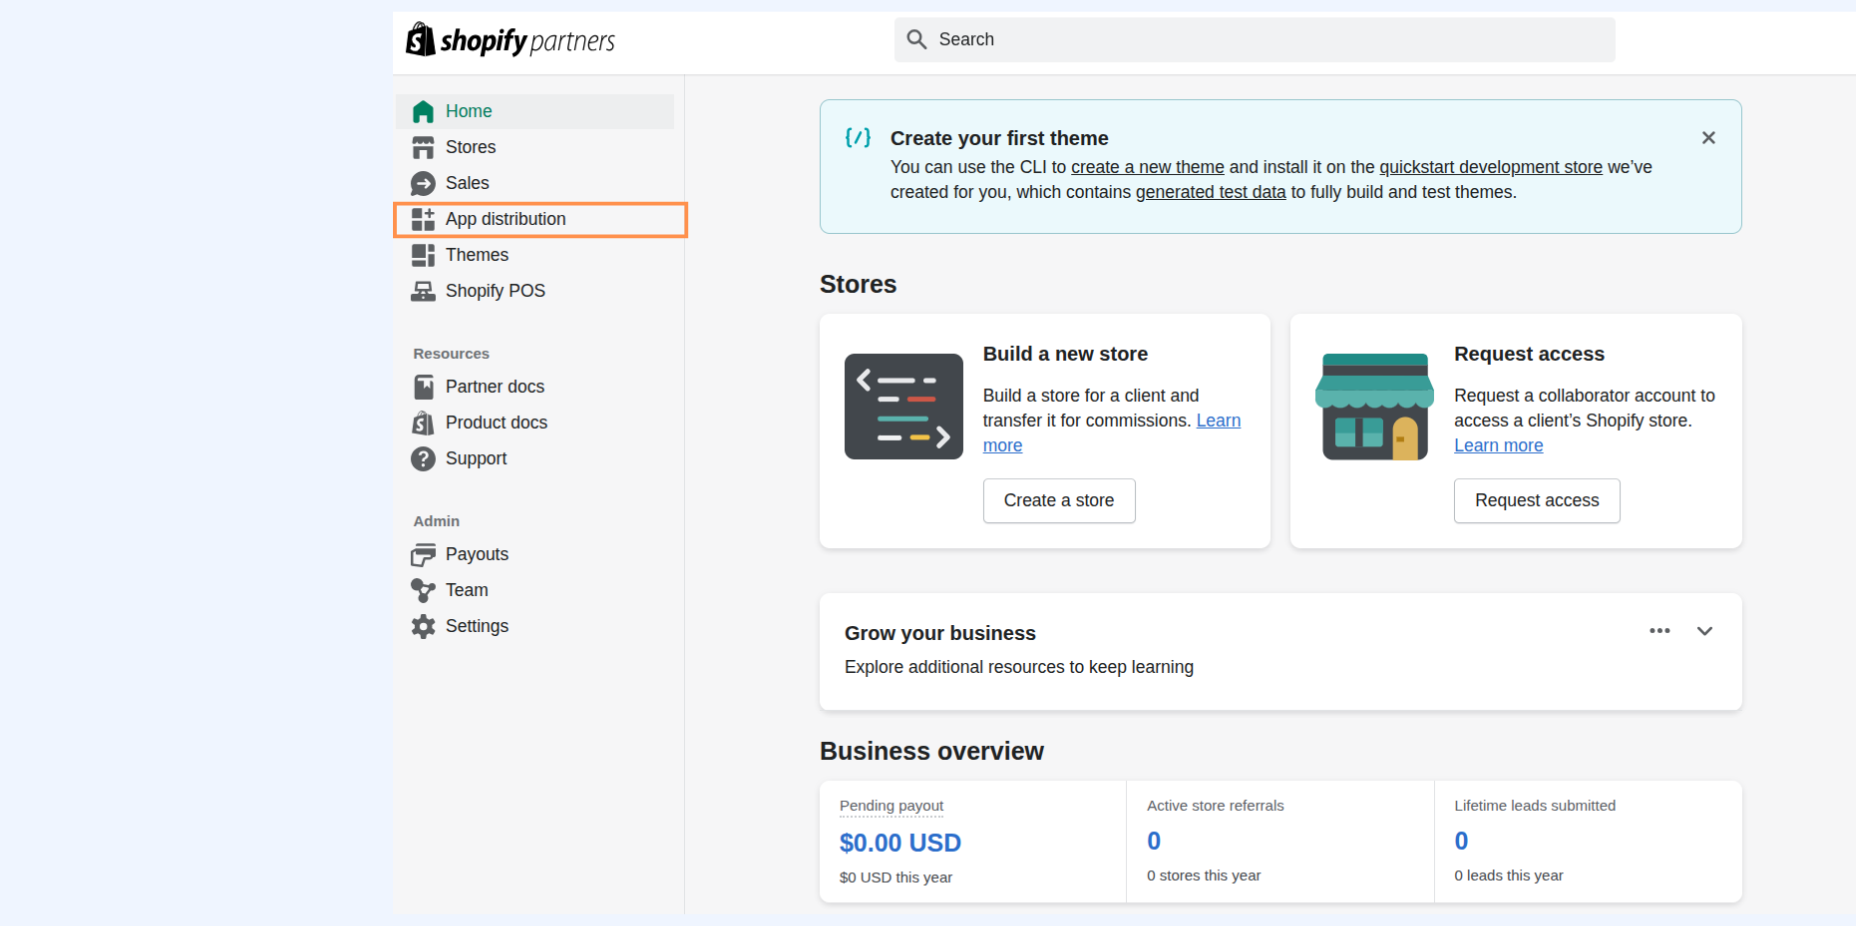
Once logged in, head to Apps Distribution .
2
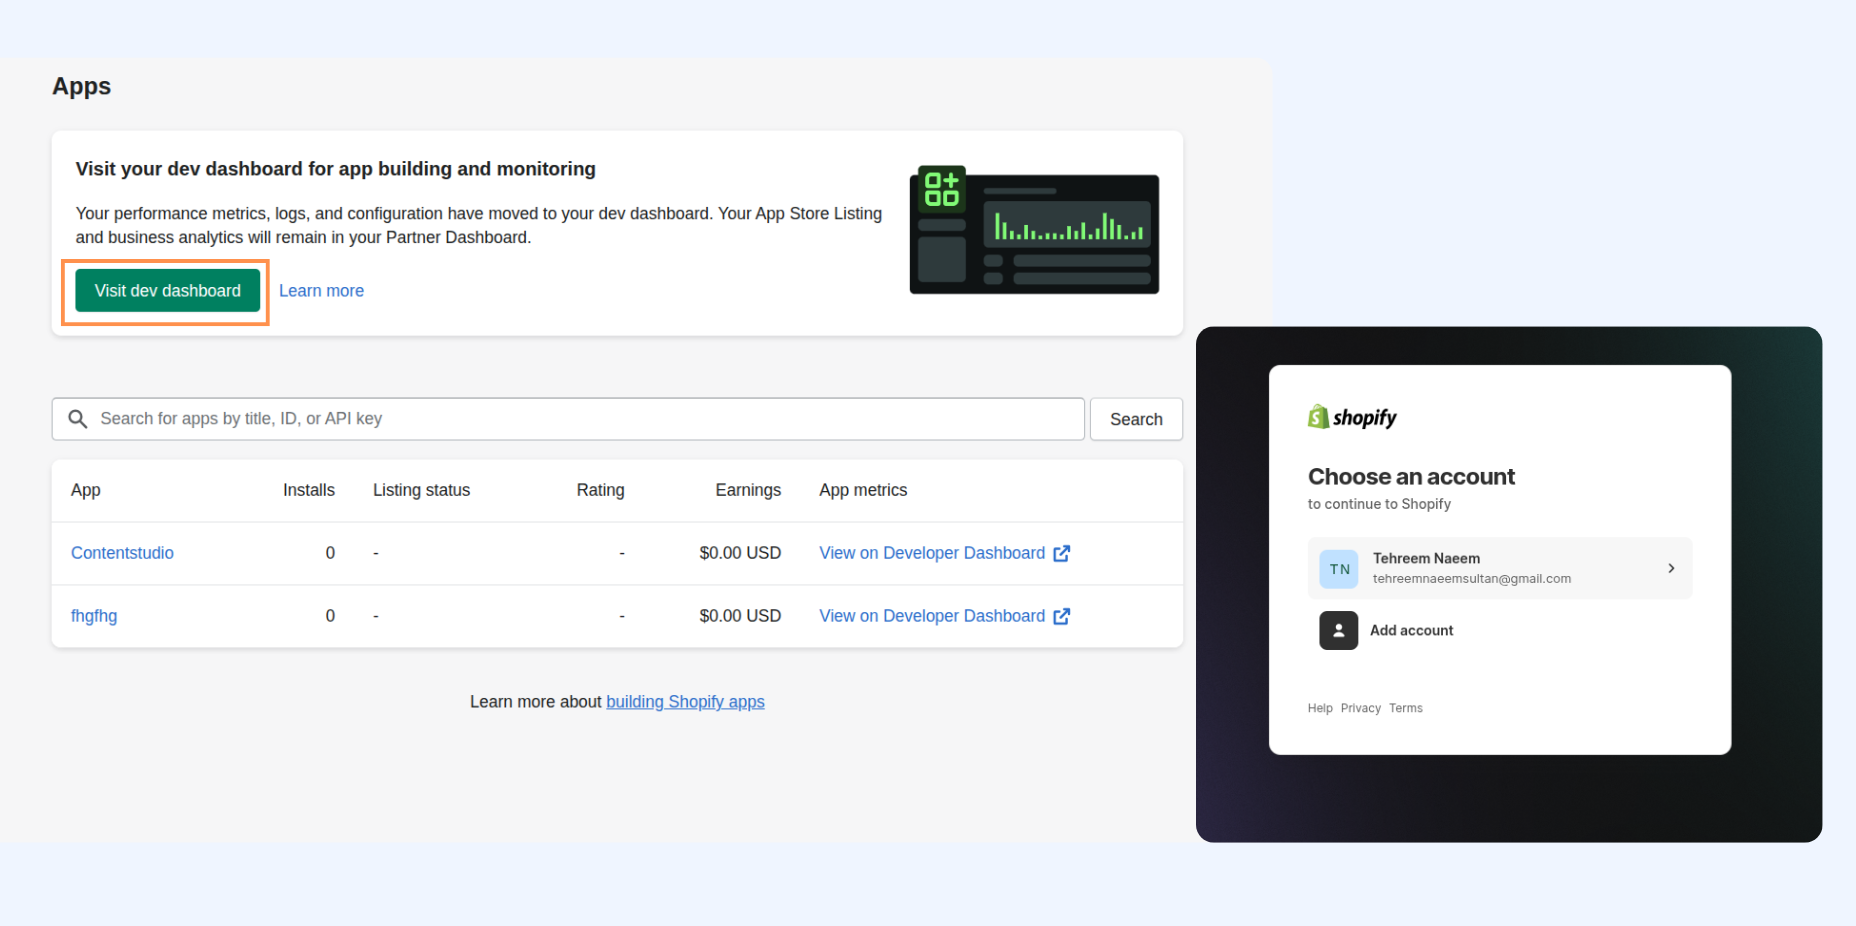
Click on the Visit Dev Dashboard button and choose your Shopify Partner account from the list. If prompted, log in with your partner credentials to continue.
2
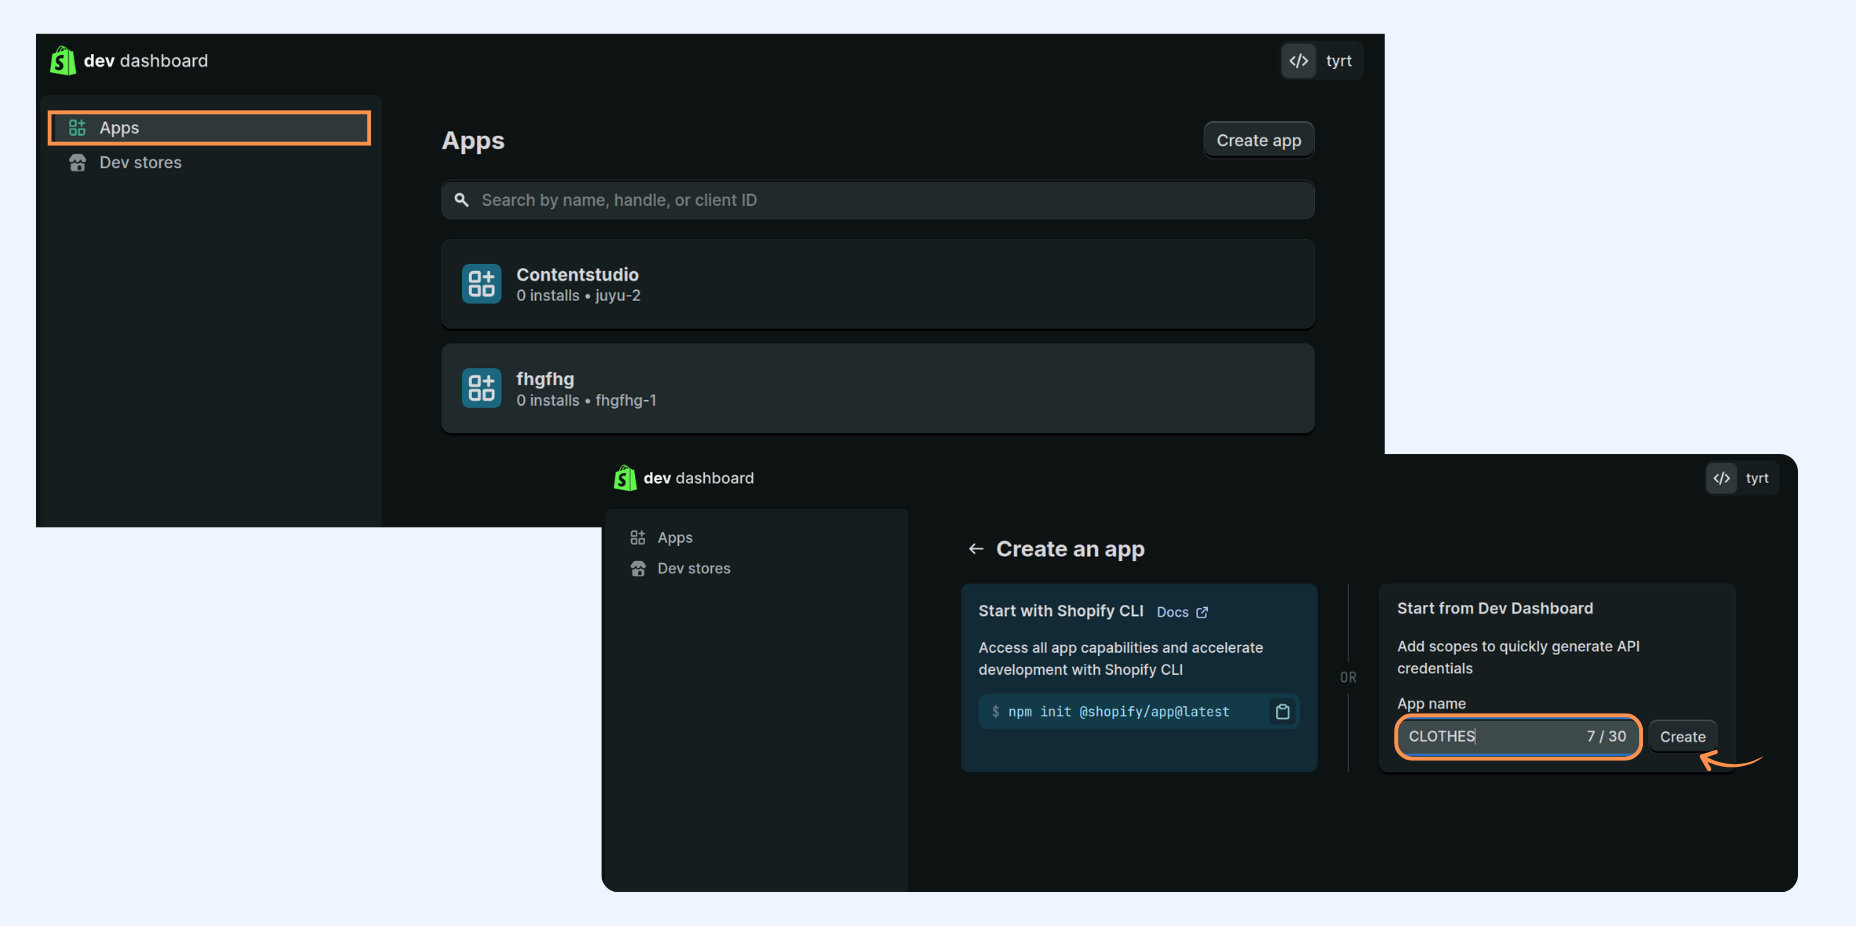
From your dev dashboard, click on Create App, then enter your App name and and click Create to proceed.
1
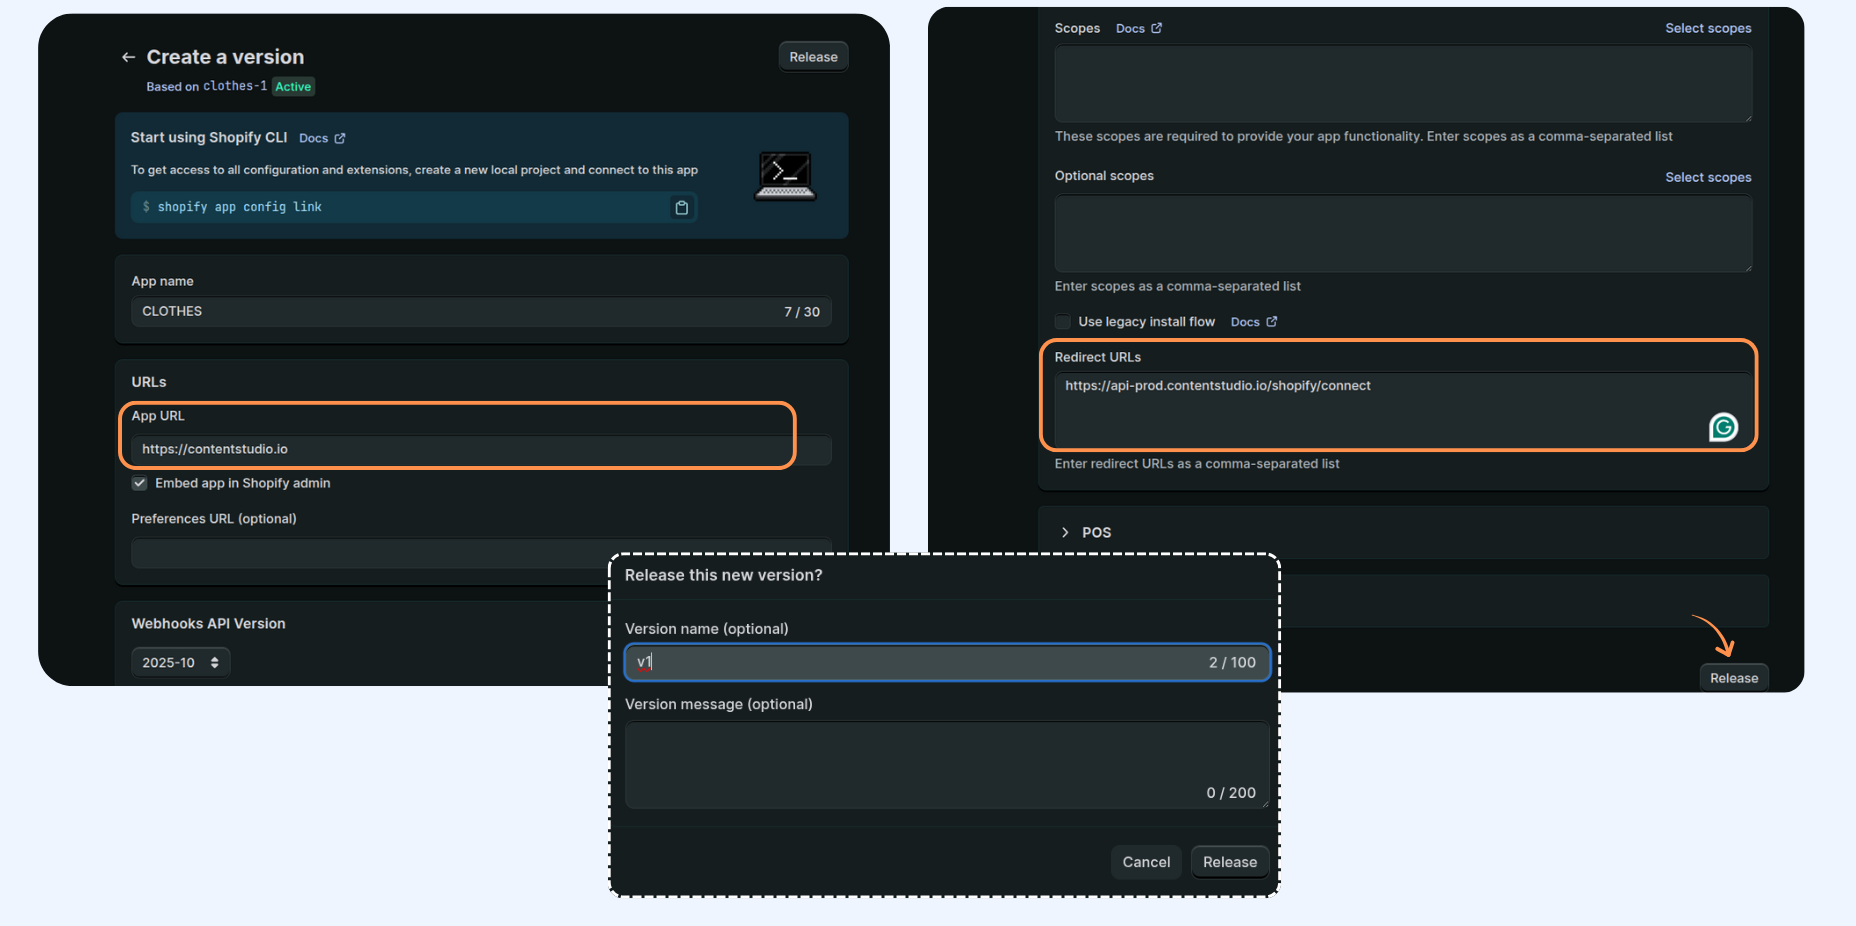
After your app is created, the configuration screen will appear. Fill in the following details:
2
Once done, Enter your version and click on Release button.
Setup Configuration
1
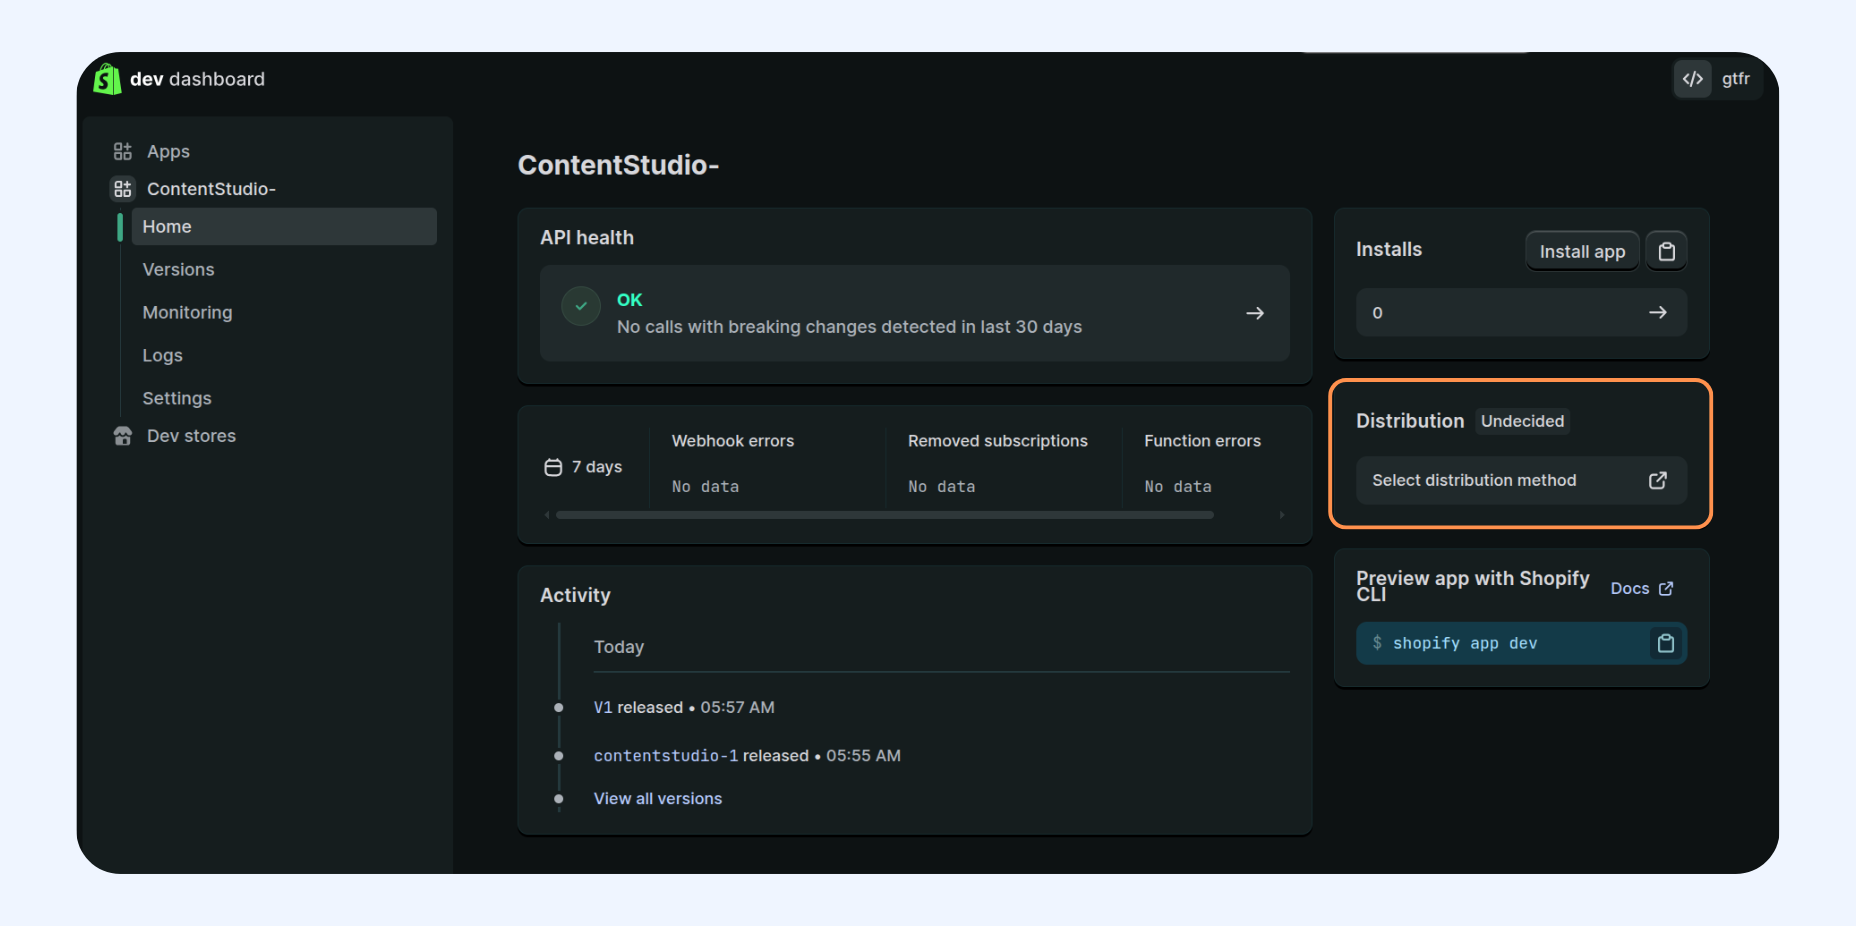
On the Dev Dashboard, go to the Home page of your app. Go to the Distribution section and click on Select Distribution Method.
2
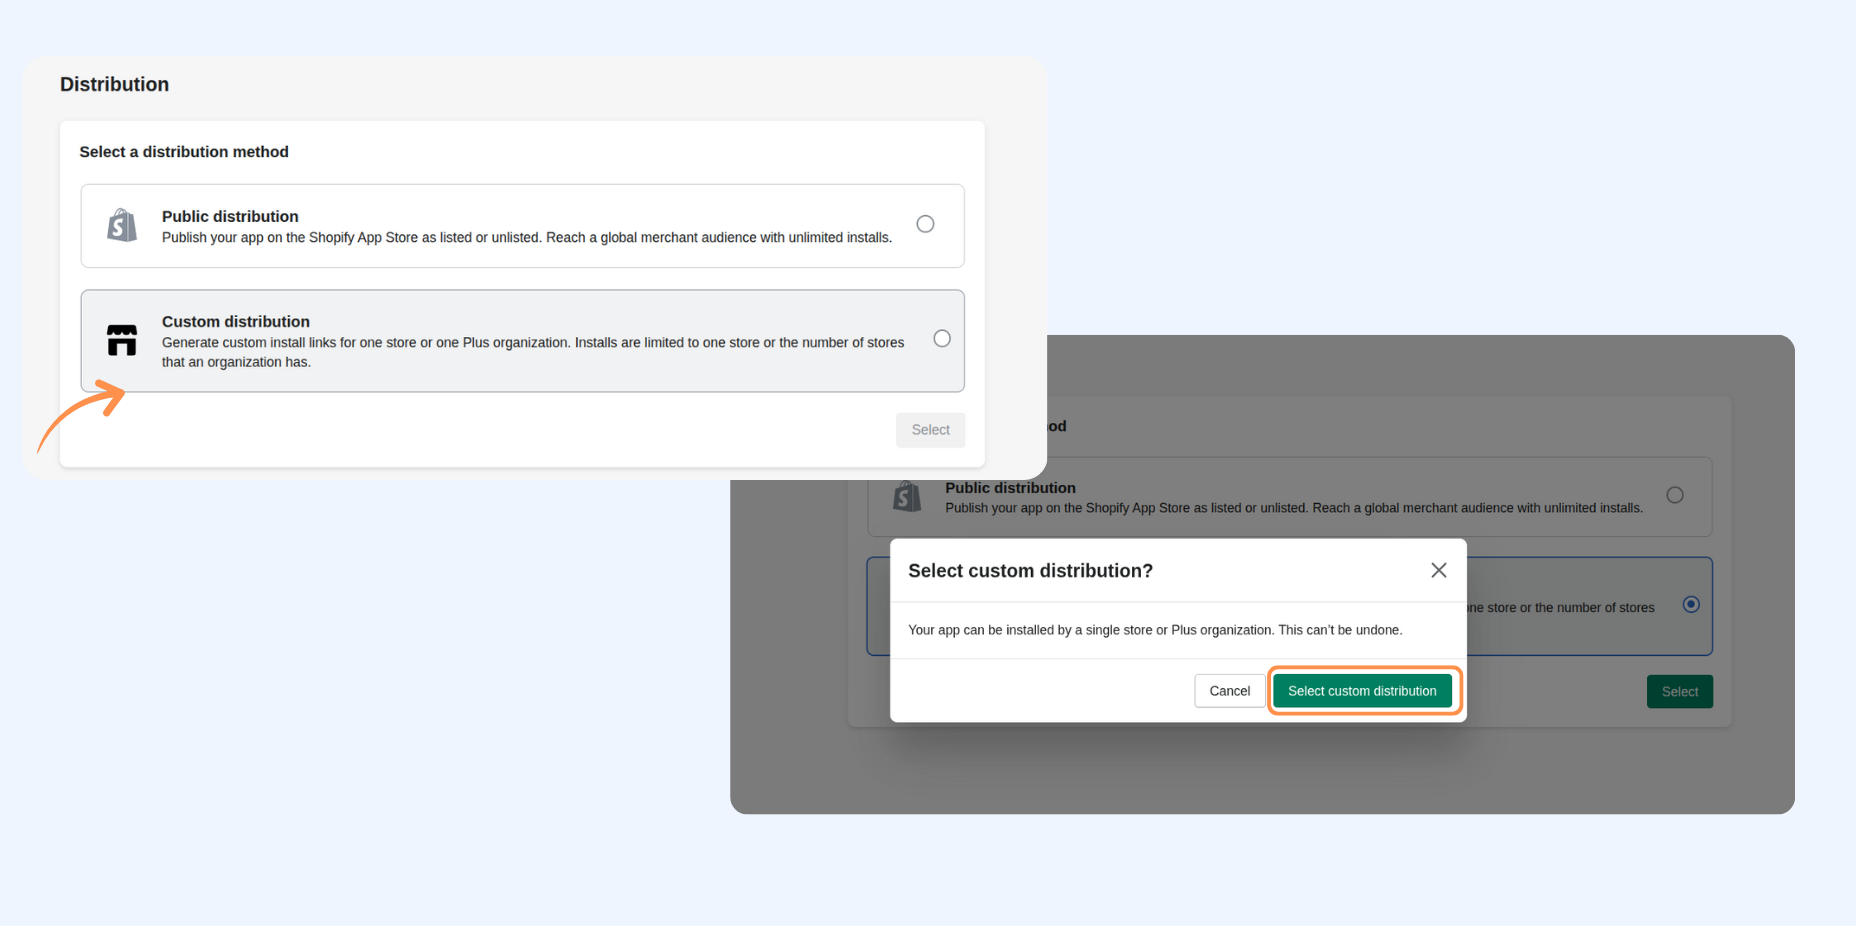
Choose Custom Distribution and click the Select Custom Distribution button to confirm your selection.
3
Add your Shopify store domain here and click on Generate a link.
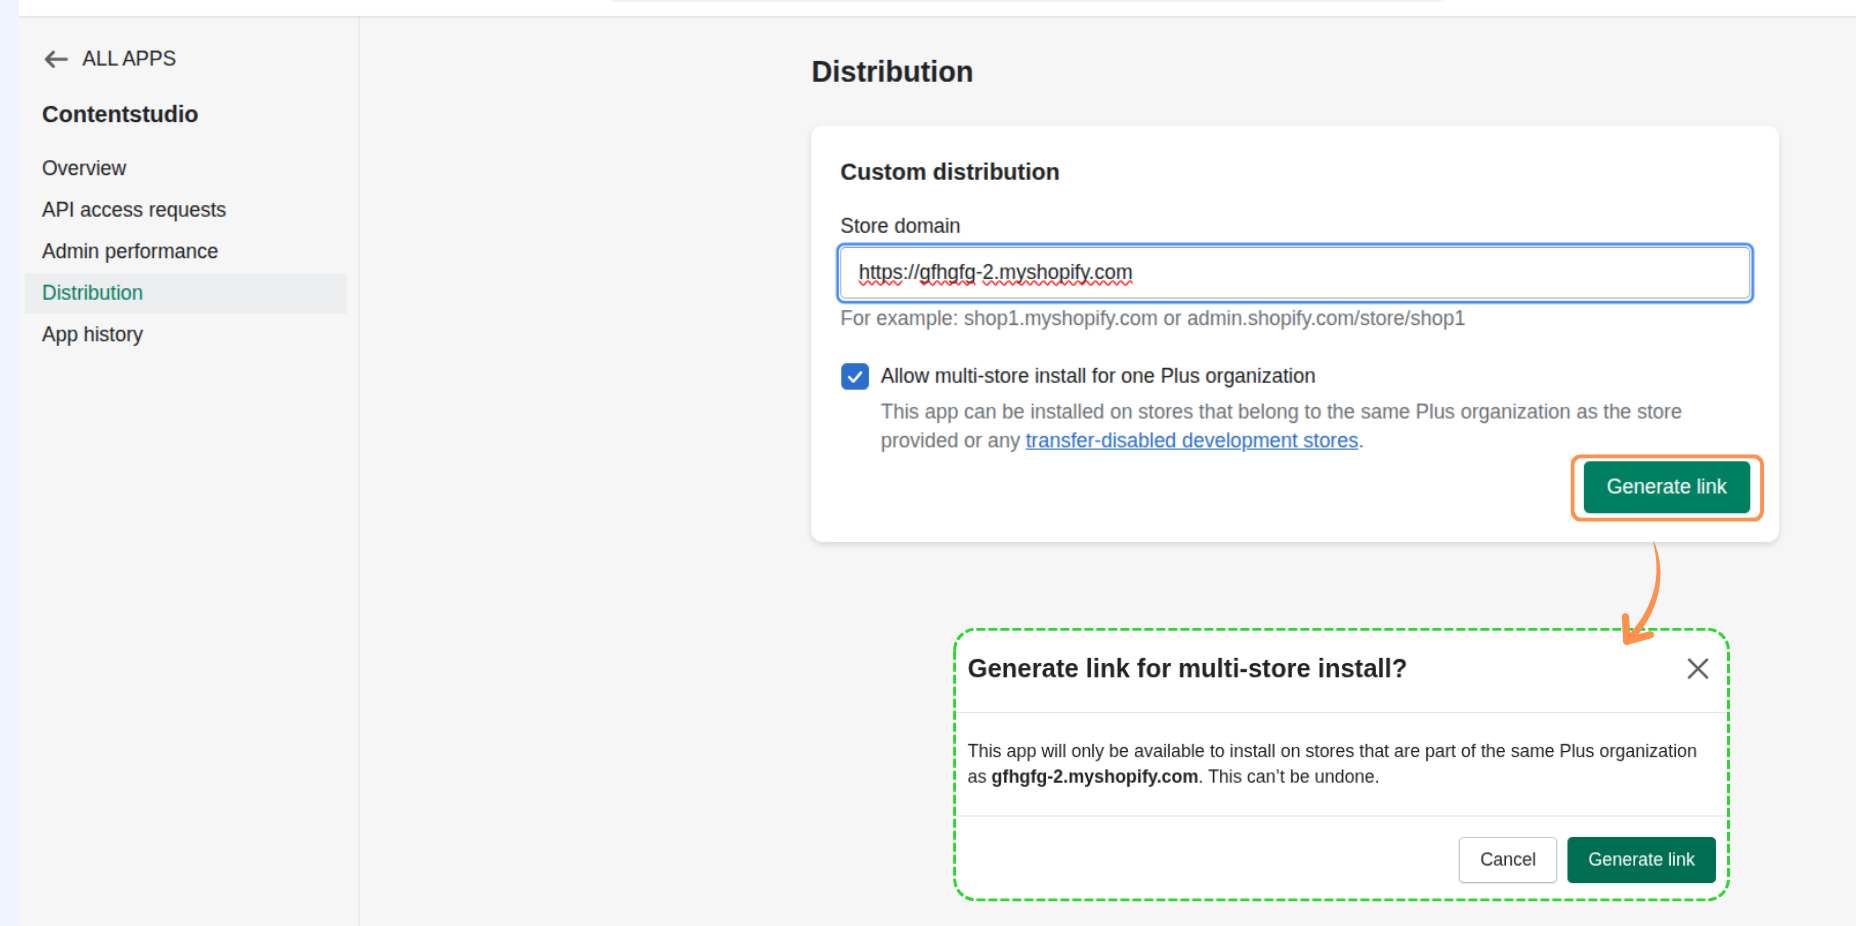
Ensure your store URL is correct because you can't change this later.
3
Copy this link and open it in a new tab. It will redirect you to ContentStudio.

Connect Shopify to ContentStudio
2
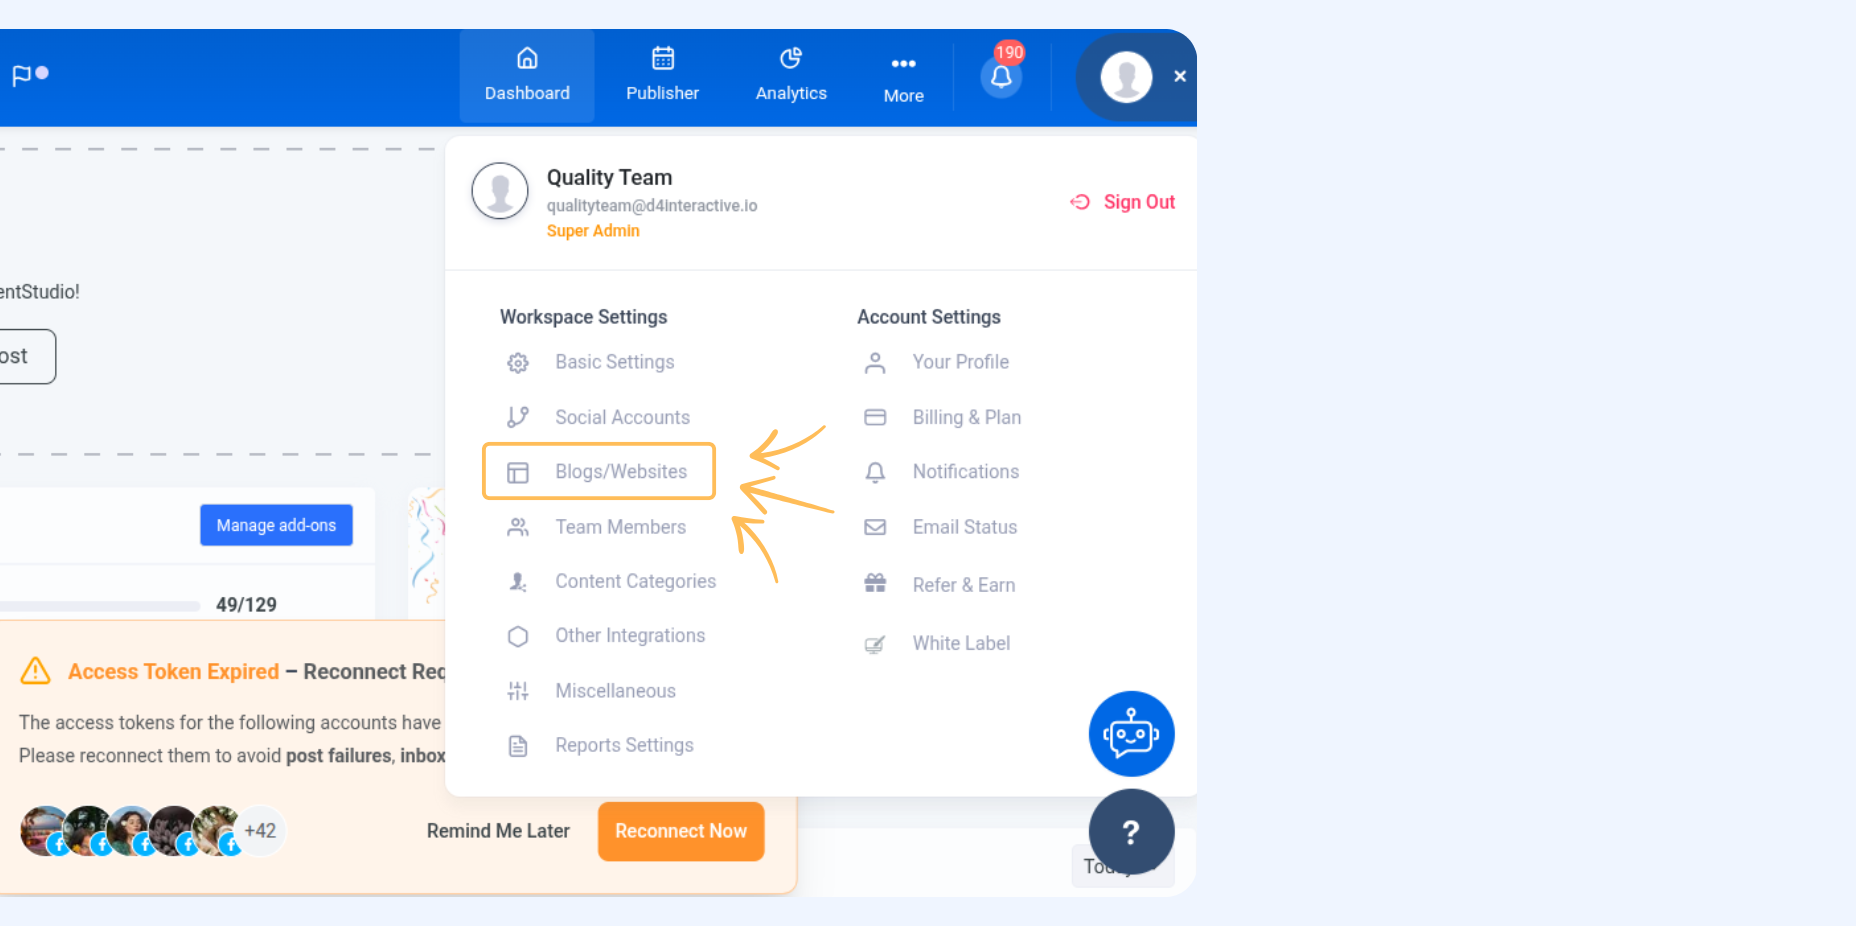
Navigate to Settings → Blogs/Websites → Shopify.
3
Click on Connect a new Shopify Store.

4
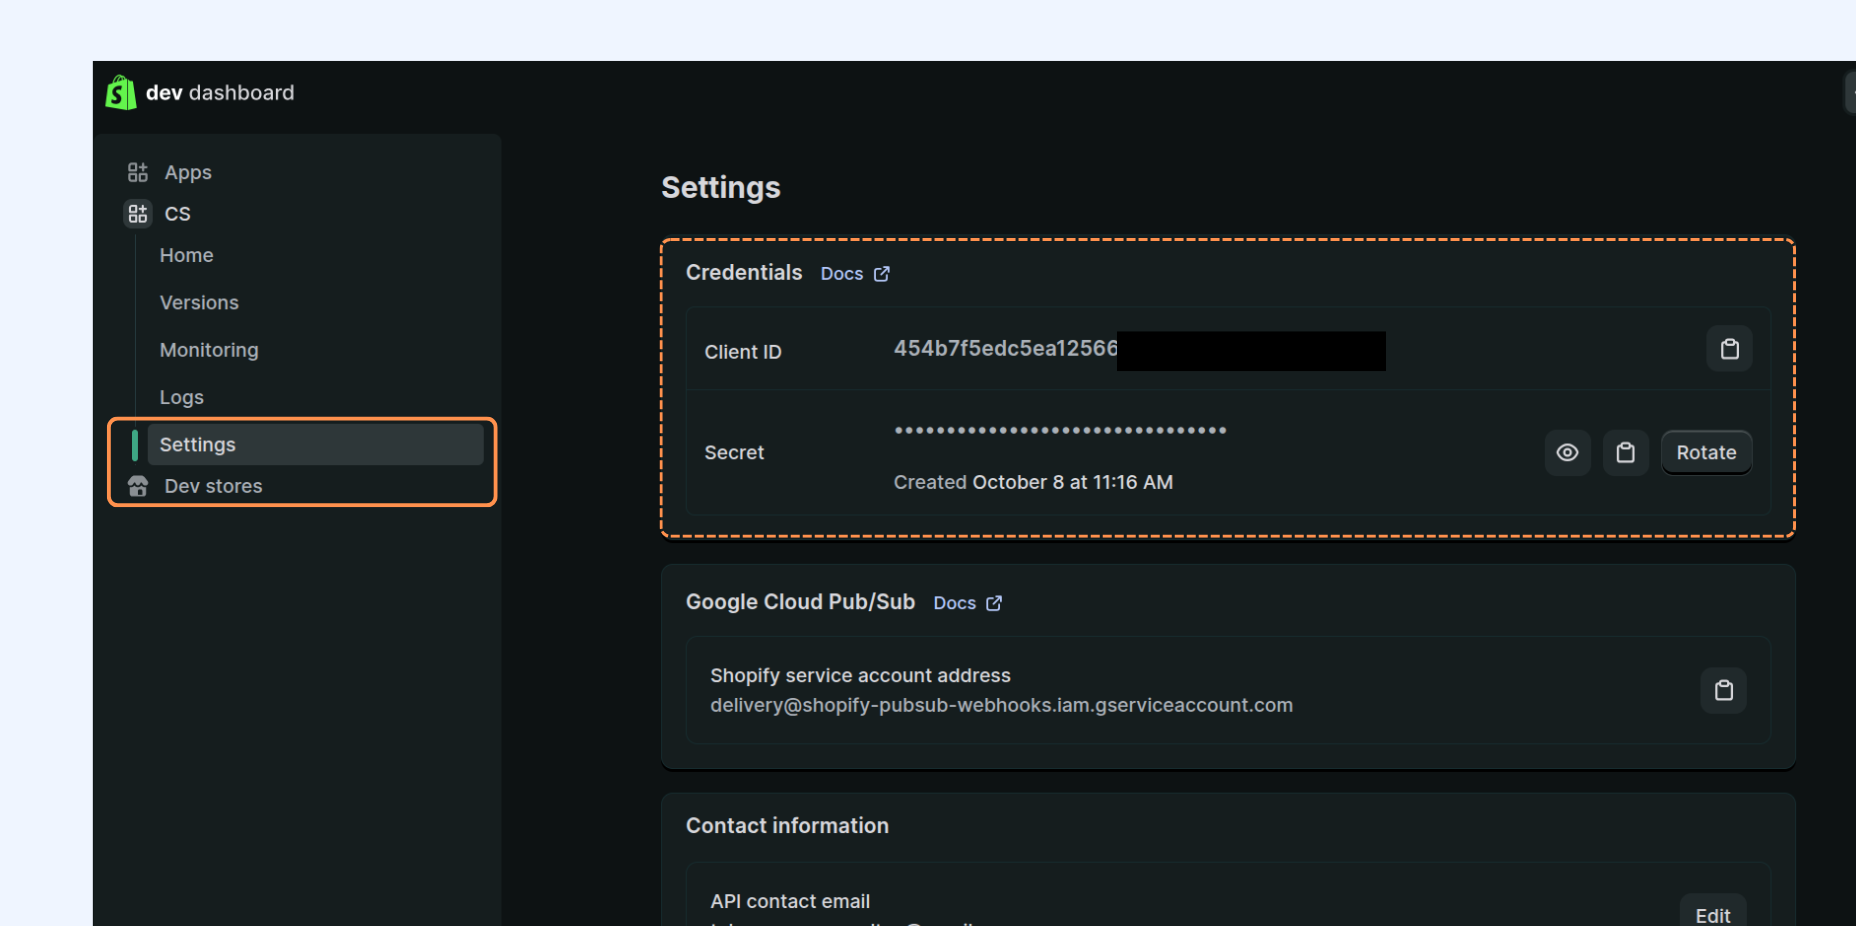
Copy the Client ID and Client Secret Key from the Settings section inside your app in the Dev Dashboard.
5
Add your store name, the copied Client ID, and the Client Secret, as shown in the image below, and then click Connect.

6
Now click on the Install app button to finalize the connection.

7
Select the blog and click on Save.

Your Shopify account has been successfully connected with ContentStudio and can be seen under the Shopify table on the Blog Accounts page in ContentStudio.

Smooth sailing from here — happy publishing!
FAQs
Q1: What is the benefit of integrating Shopify with ContentStudio?
A: You can manage and publish blog content directly from ContentStudio to Shopify, making content marketing more straightforward and effective.
Q2: Do I need a paid Shopify account for this integration?
A: Yes, Shopify requires a paid membership for its services.
Q3: How do I create a Shopify Partners account?
A: Visit the Shopify Partners link, complete the required details, and click Create Account.
Q4: Can I use an existing Shopify account?
A: Yes, log in to your Shopify account, access your profile, and navigate to the Shopify Partners page.


