Getting started with Media Library
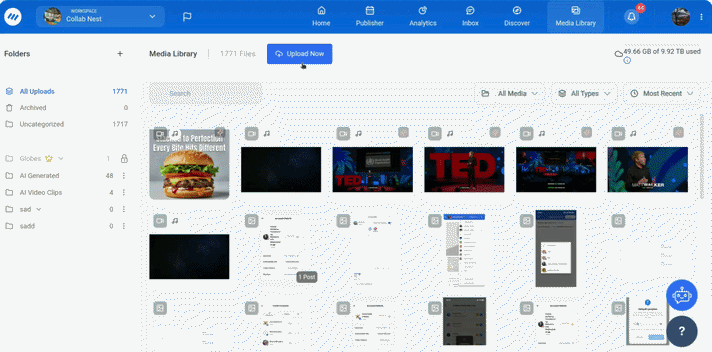
The Media Library helps you upload and organize all your media files like images, videos, and GIFs in one place. You can easily manage your files, create folders, and keep your content organized.
In this Article:
Media Library


How to Create a Folder

How to add Subfolders

Filtering & Sorting
The Media Library offers multiple management tools like Search, Filter, and Sort to help you organize and locate your media files efficiently. You can quickly find specific files, narrow them down by type, or arrange them based on your preferences.
- All Media: Displays all media files in your library, regardless of whether they’re used in posts or not.
- Published Media: Shows media files that are used in posts already published. Files linked to scheduled or draft posts won’t appear here.
- Scheduled Media: Displays media used in posts that are scheduled but not yet published. Deleting these may cause post errors.
- Unused Media: Lists media not linked to any post. These are safe to delete without affecting your content.

- Images
- Videos
- PDFs
- All types

- Most Recent
- Oldest Uploads
- A–Z
- Z–A
- Largest to Smallest

Deleting Media from Media library
The Media Library allows you to permanently delete media assets, whether they are used or unused.
Click on the Delete icon next to the photo you want to remove.
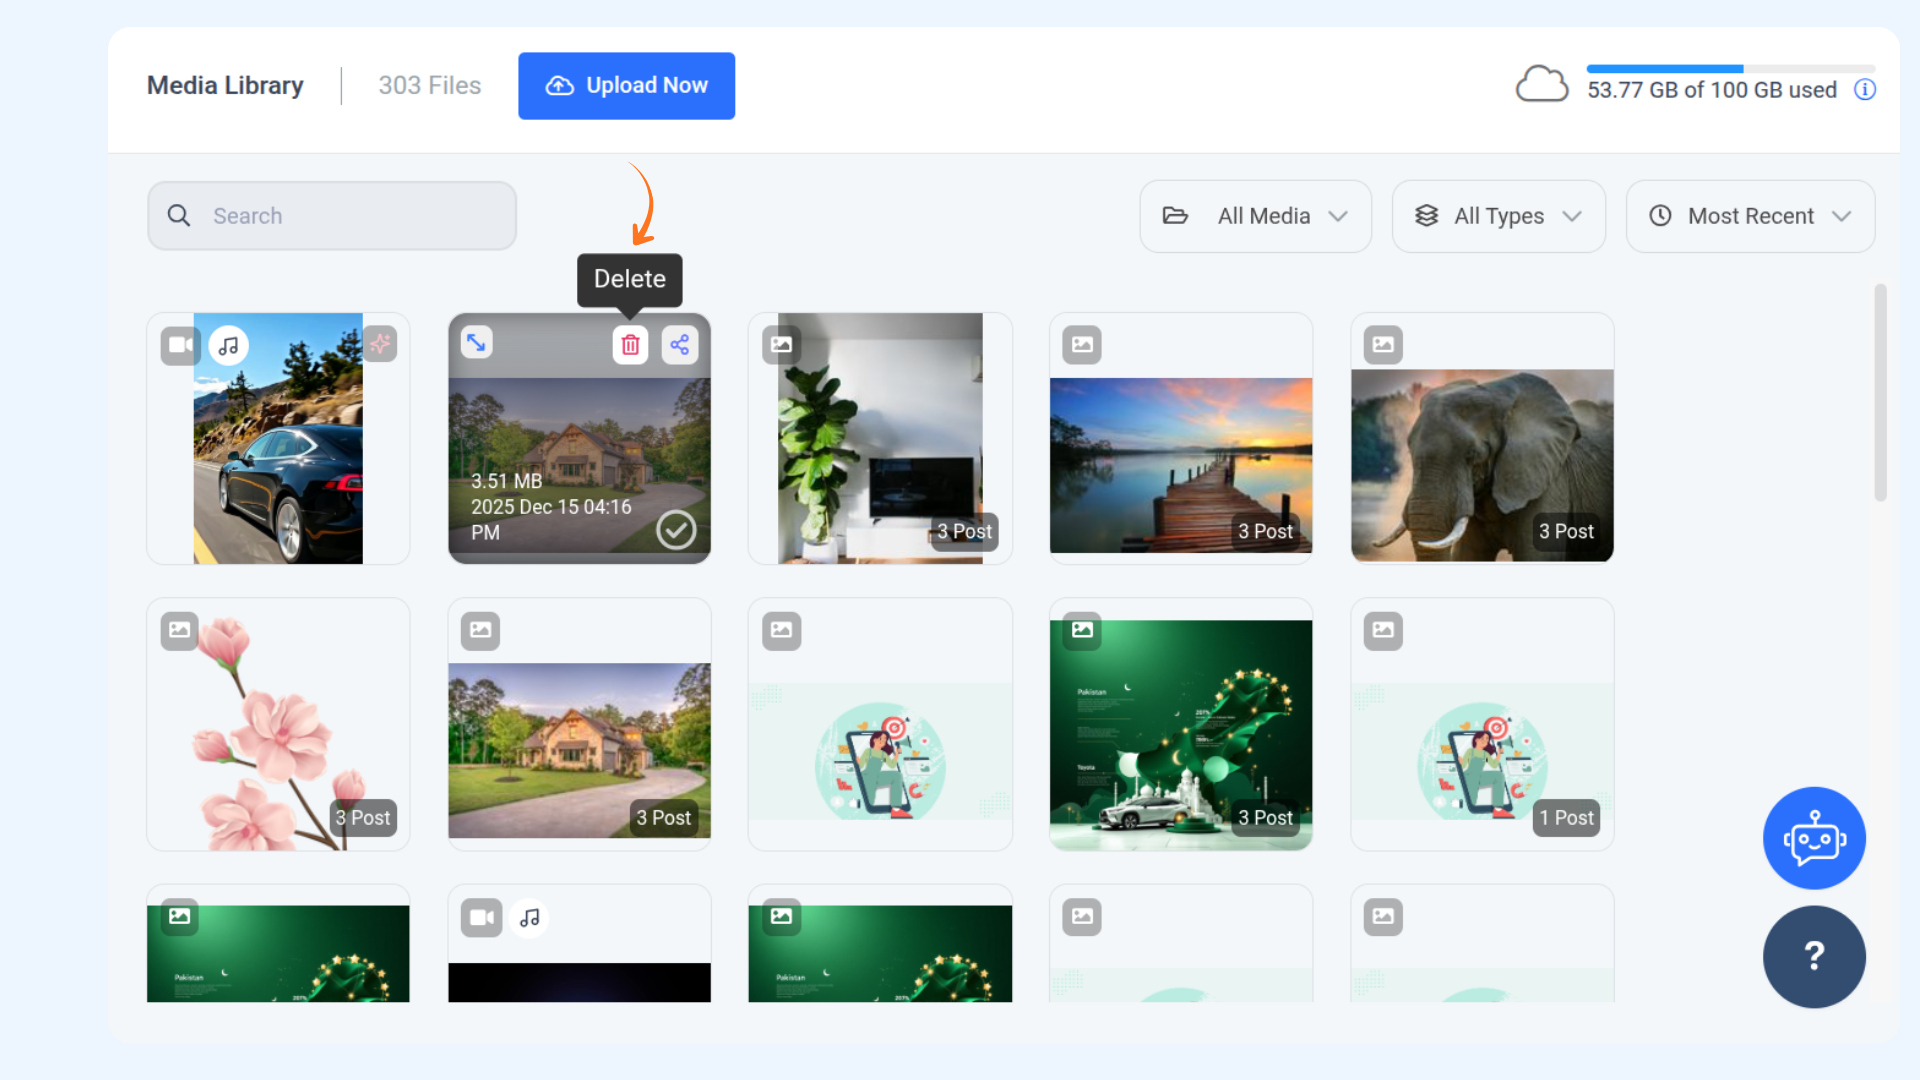
To delete permanently, click Delete permanently . To archive instead, click Archive.
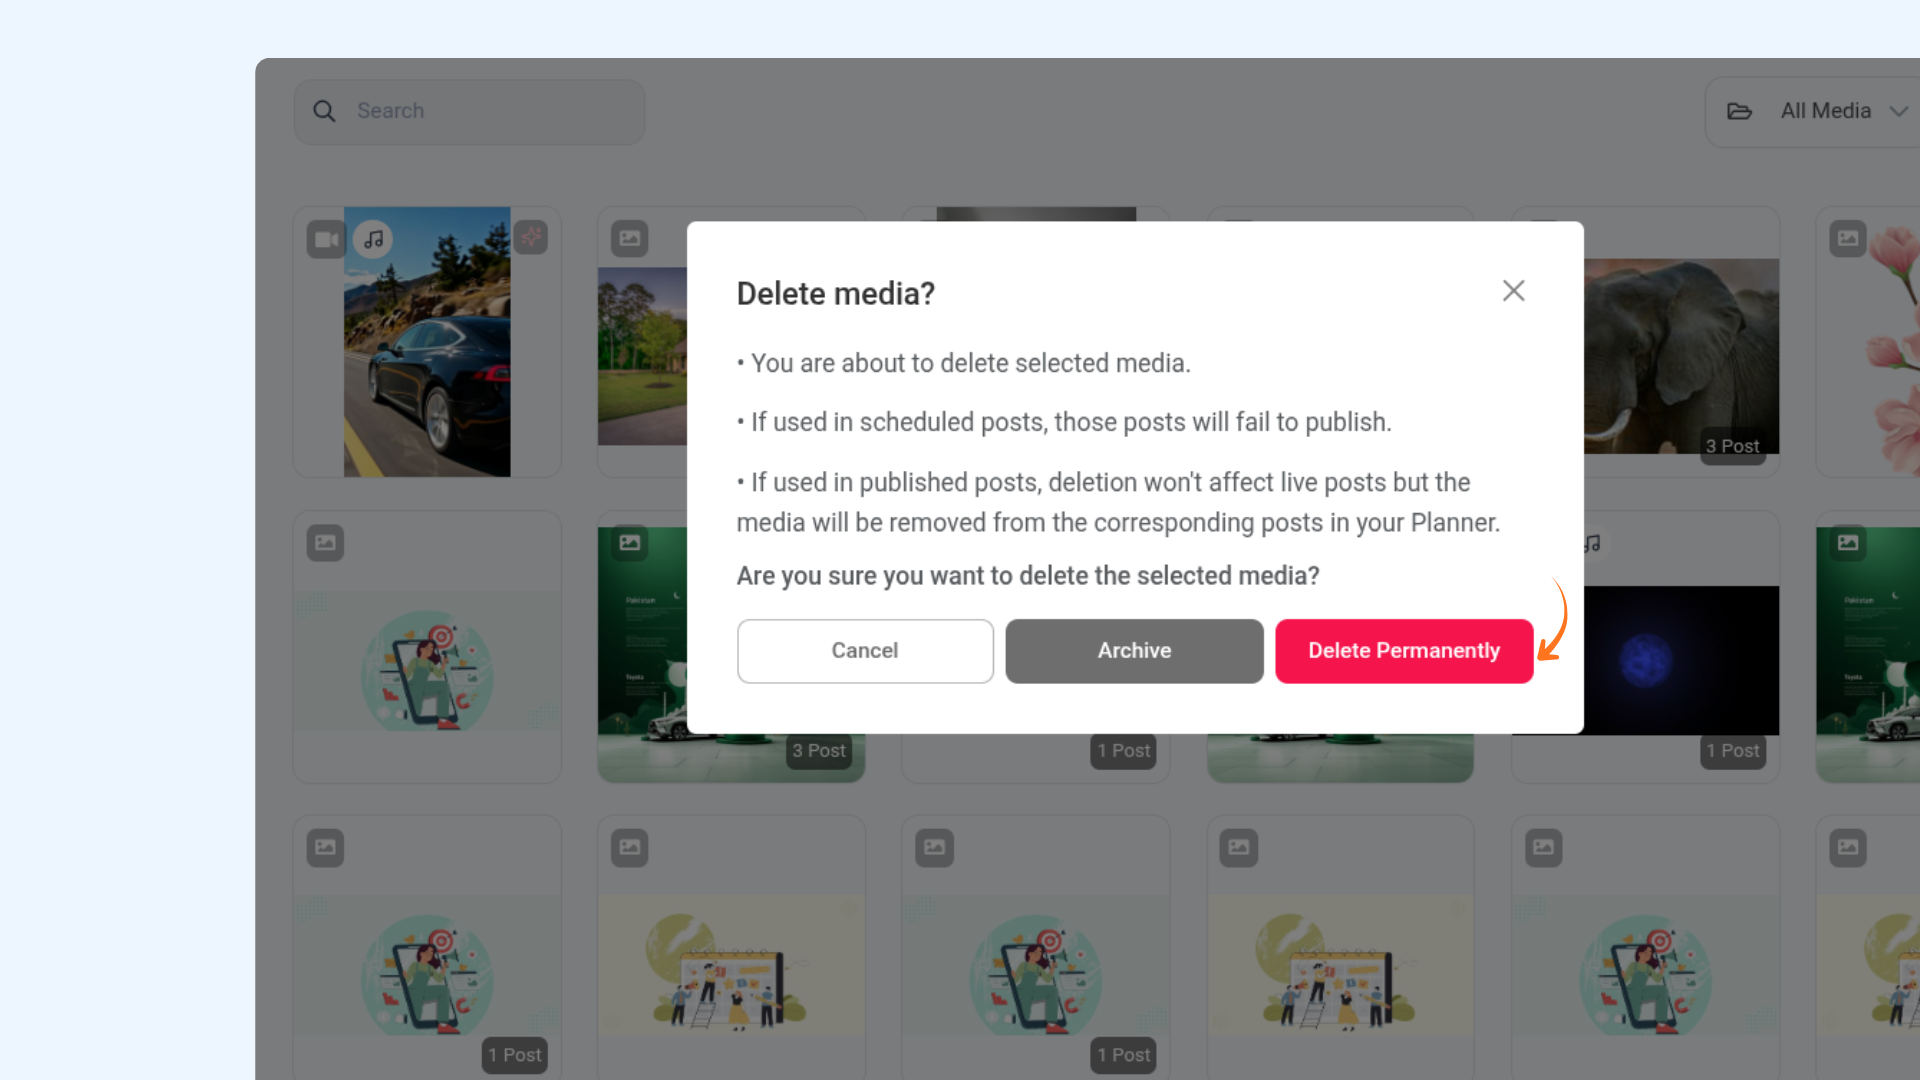
Published and Unused Media Filters
Use the Unused Media filter to view all assets that haven’t been used in any post yet.
- You want to quickly find media that’s ready to be published
- You need inspiration from existing assets instead of creating new ones
- You want to avoid reusing the same media accidentally
This filter ensures you always have a clear view of what is still available for future content.
If your workspace storage is almost full, the Published Media filter helps you free up space without risking the deletion of scheduled or queued content.
Here’s how:
- Select the Published Media filter — this view includes only media already posted to your social platforms.
- (Optional) Sort by Oldest Uploads to make it easier to remove older files first.
- Delete only the published media — since these files are already live on platforms, removing them won’t affect upcoming posts.
FAQs
-
Can I upload multiple files at once?
Yes, you can select and upload multiple images, videos, or documents in one go.
How can I free up storage in my workspace?
You have two simple options:
- Upgrade your storage – you can buy additional storage from the Add-Ons section.
- Clear existing published media – use the Published Media filter to safely delete media that’s already live on your social platforms. This frees up space without affecting your scheduled or queued posts.
-
What file formats are supported in the Media Library?
The Media Library supports formats like JPG, PNG, GIF, MP4, and PDF.
-
Will deleting a file remove it from my published posts?
No, deleting a file used in a published post won’t affect it. However, removing media linked to scheduled or draft posts may cause issues.
-
Can I move files between folders?
Yes, you can easily organize your media by dragging and dropping files between folders.