

Make.com Integration
Make.com is a powerful automation platform that connects ContentStudio with hundreds of other apps, enabling you to automate workflows, save time, and keep your marketing tasks in sync.
With this integration, you can connect ContentStudio to external systems and automate processes such as creating posts, managing accounts, or syncing workspace data — all without manual effort.
In this article:
How to use Make.com with ContentStudio
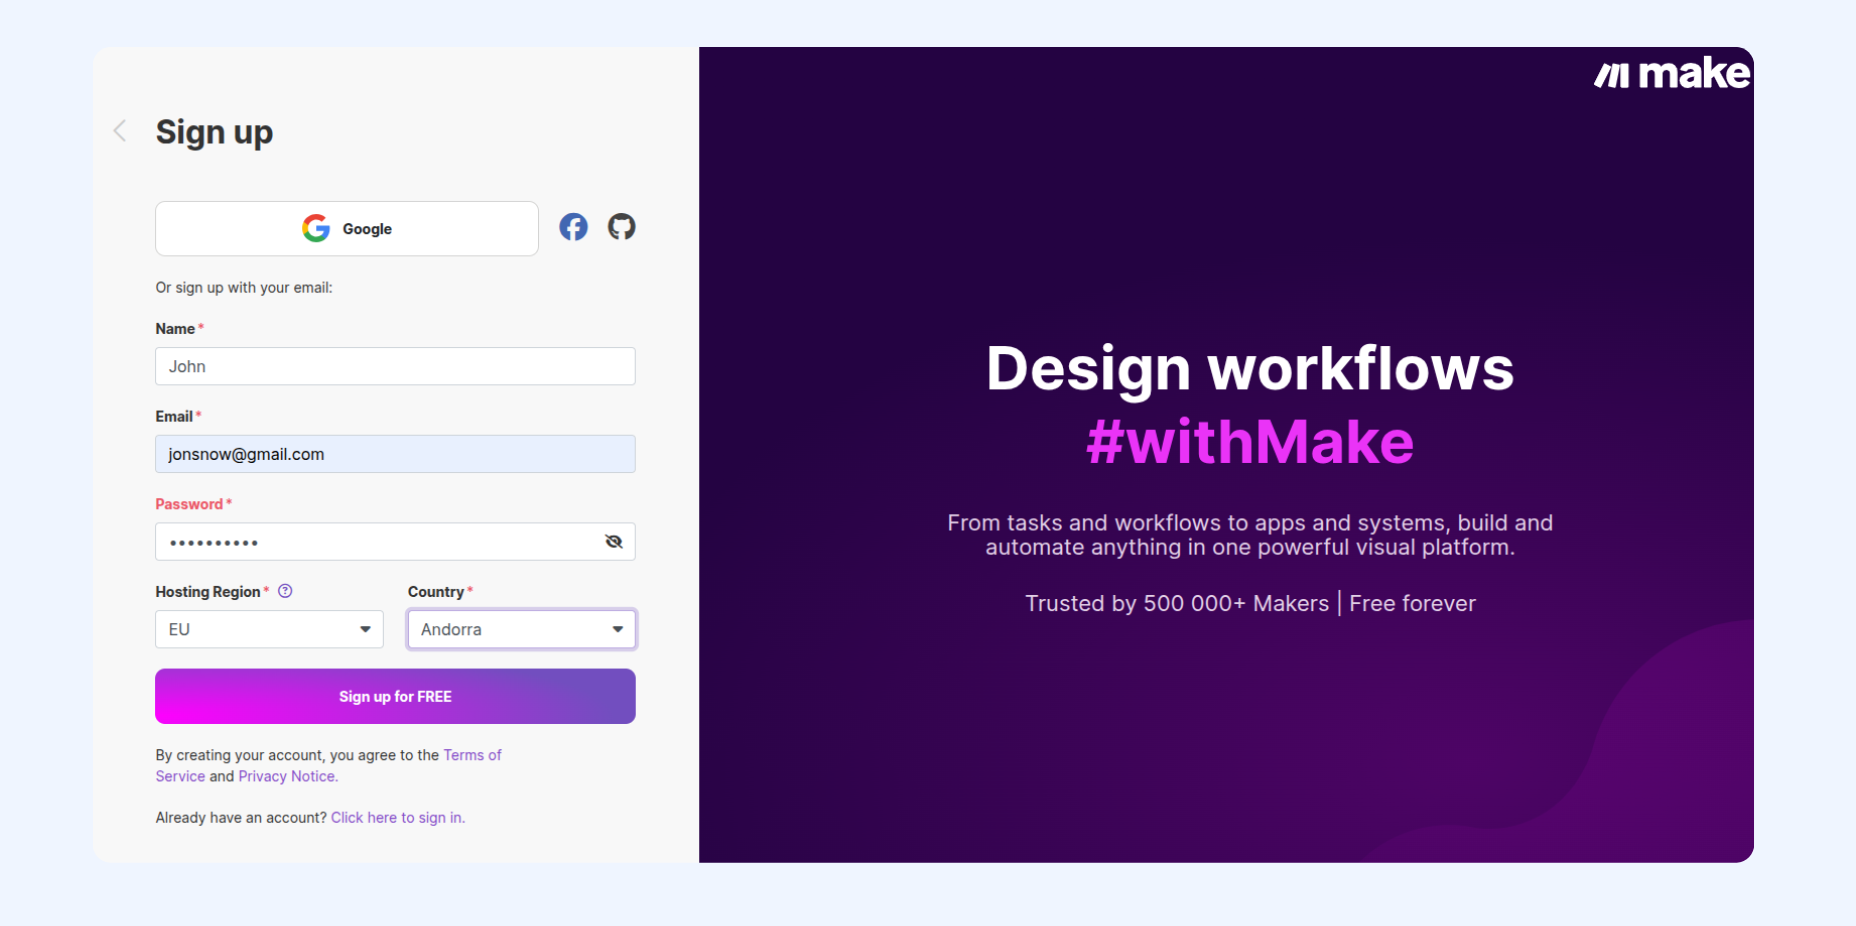
Go to make.com, sign up for a new account and complete the setup.
If you already have an account, simply log in.
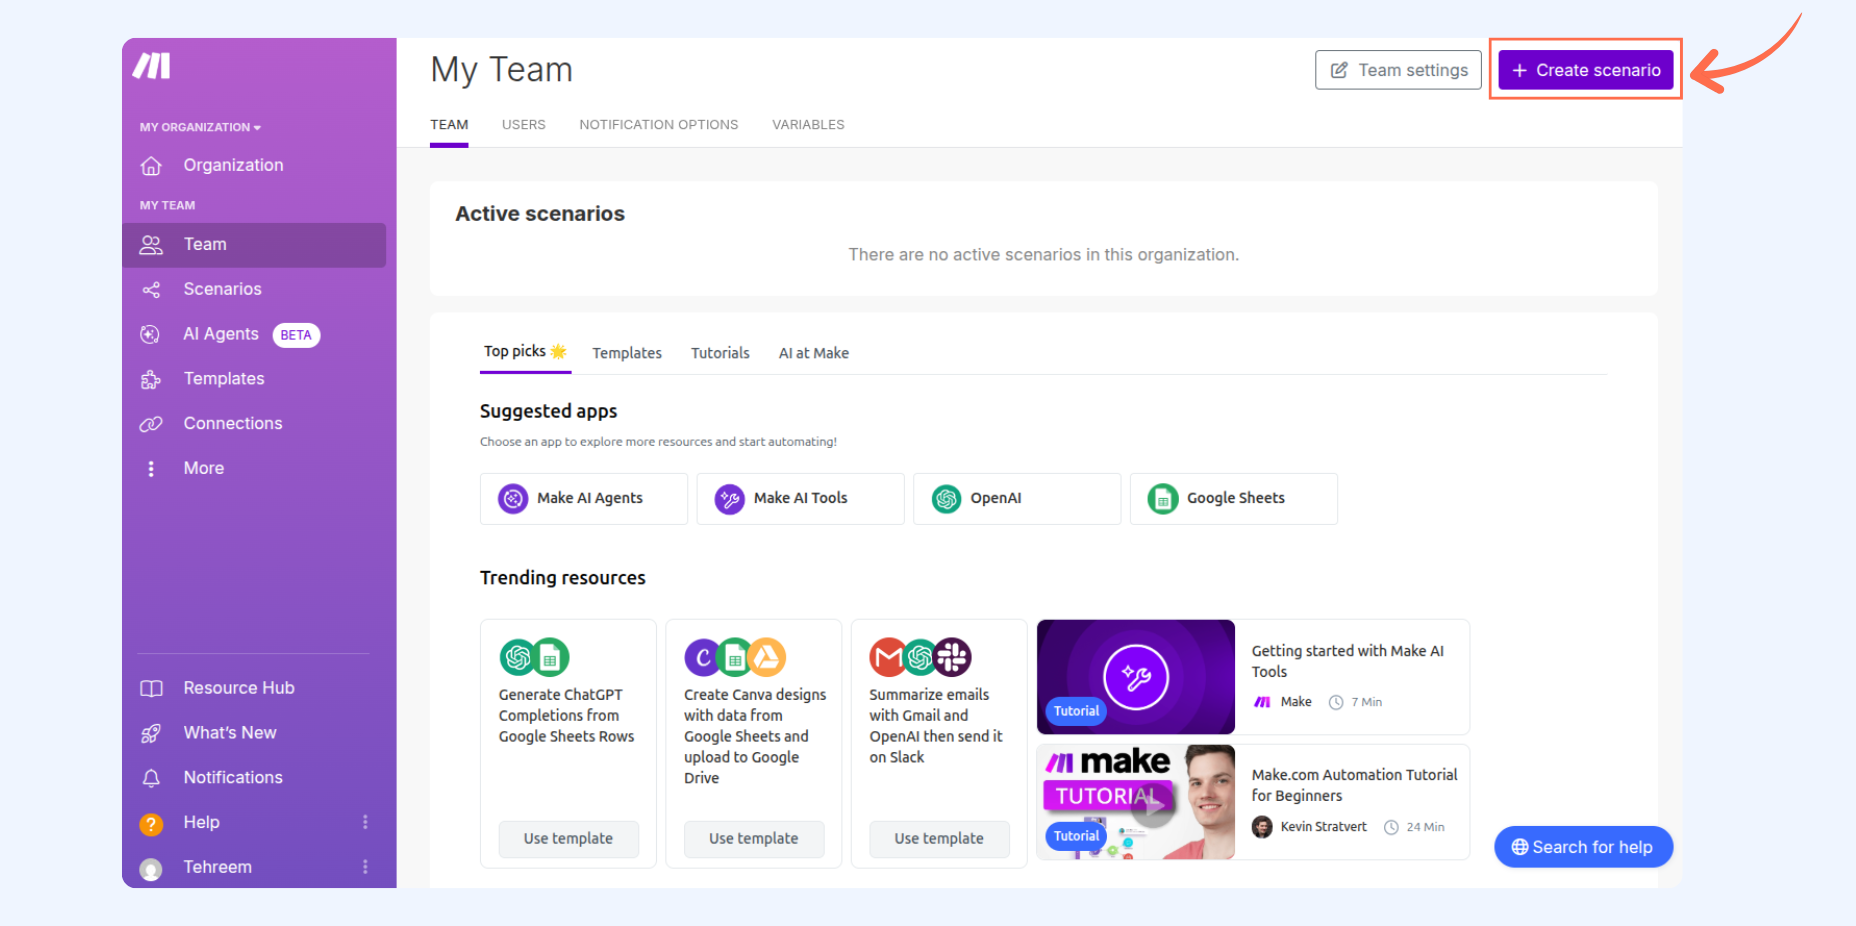
From the Make.com home page, click on Create scenario to start building your workflow.
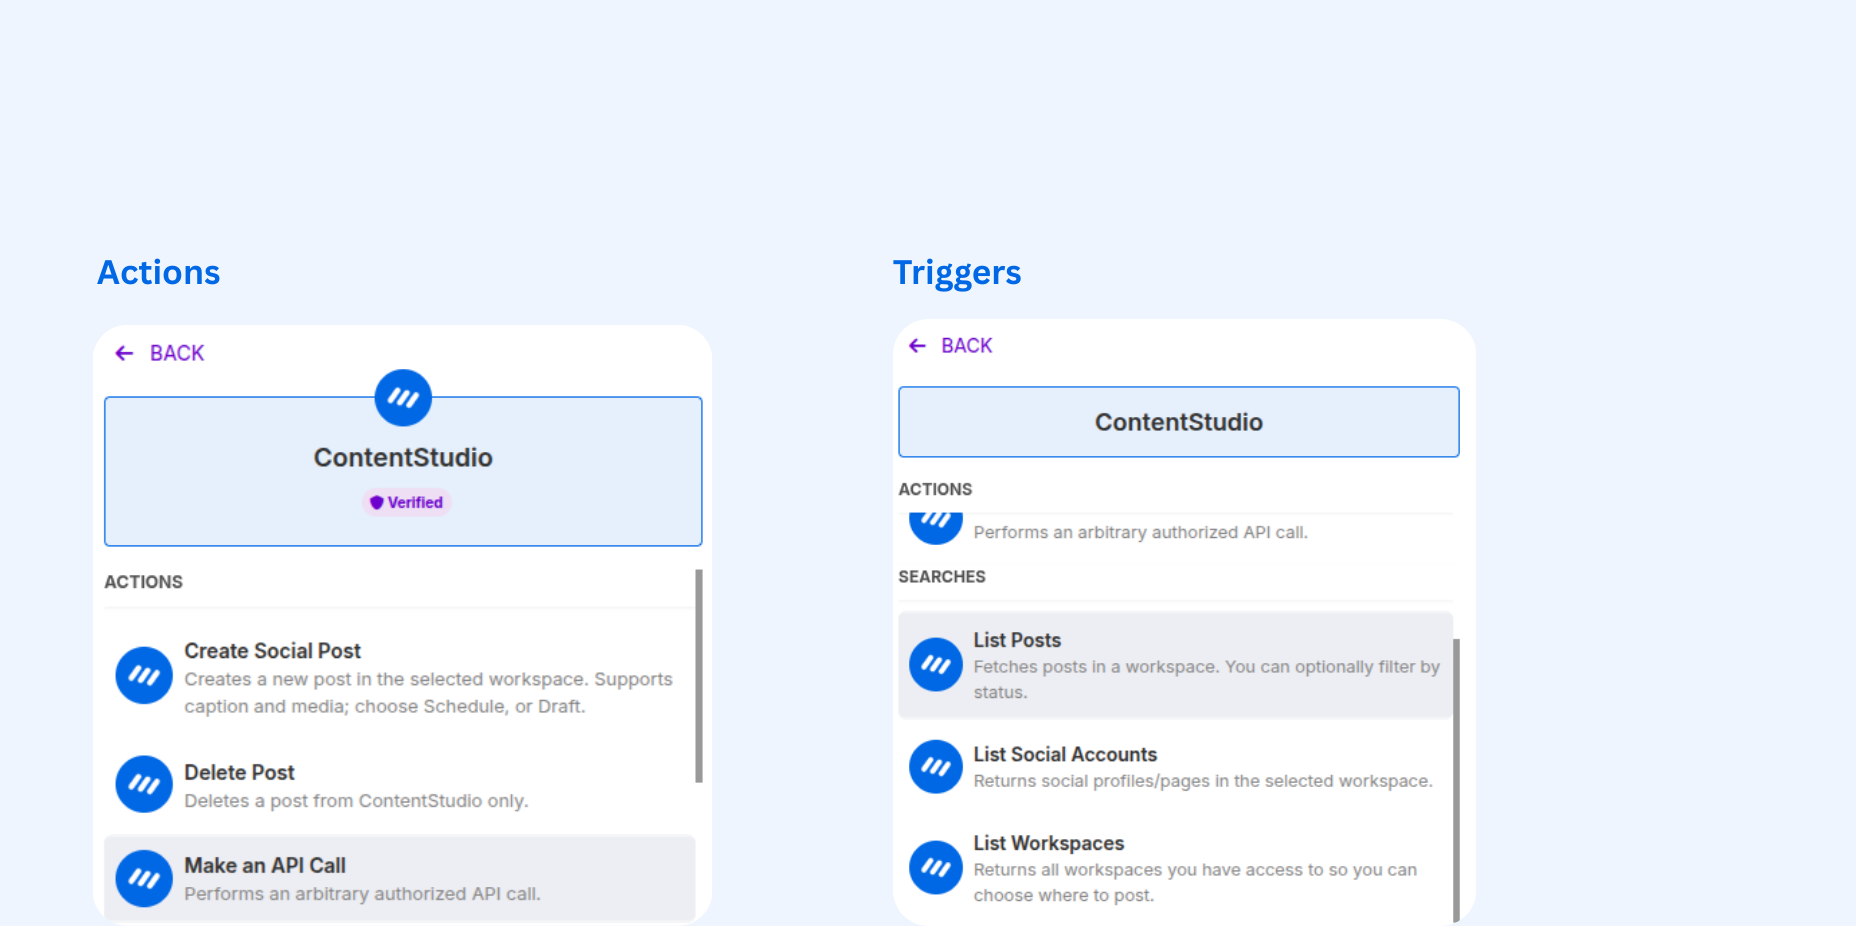
Available Actions & Triggers
Actions
Create Social Post – Create and schedule a new post in ContentStudio (main action most users will use).
Delete Post – Remove an existing post from ContentStudio.
Make an API Call – Use this to call any ContentStudio API endpoint directly, giving you flexibility beyond the pre-built actions.
Triggers
List Workspaces – Retrieve all workspaces connected to your ContentStudio account.
List Social Accounts – Fetch the list of social accounts in a workspace.
List Posts – Get the list of posts available in a specific workspace.
Create a Social Post with Make.com
The Create Social Post action lets you automatically create and schedule posts in ContentStudio from other apps you already use.
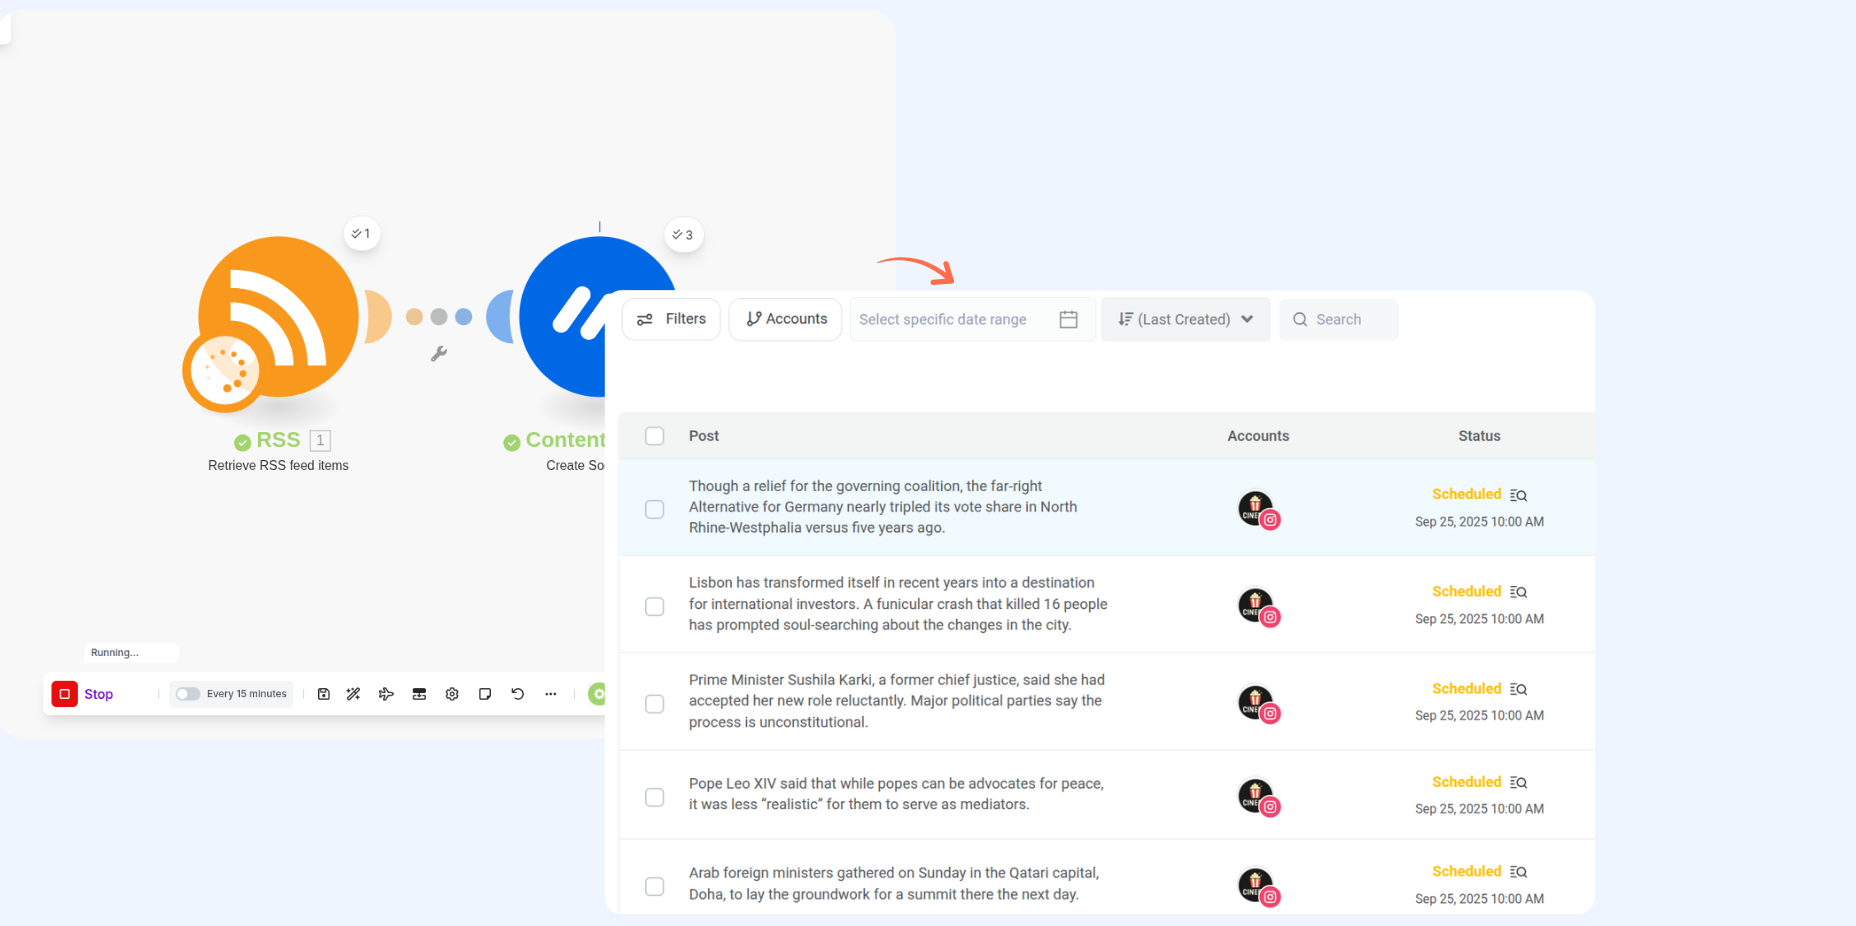
For example, you can connect any RSS feed to ContentStudio so that whenever a new item is published in your RSS feed, a post is created and scheduled automatically.
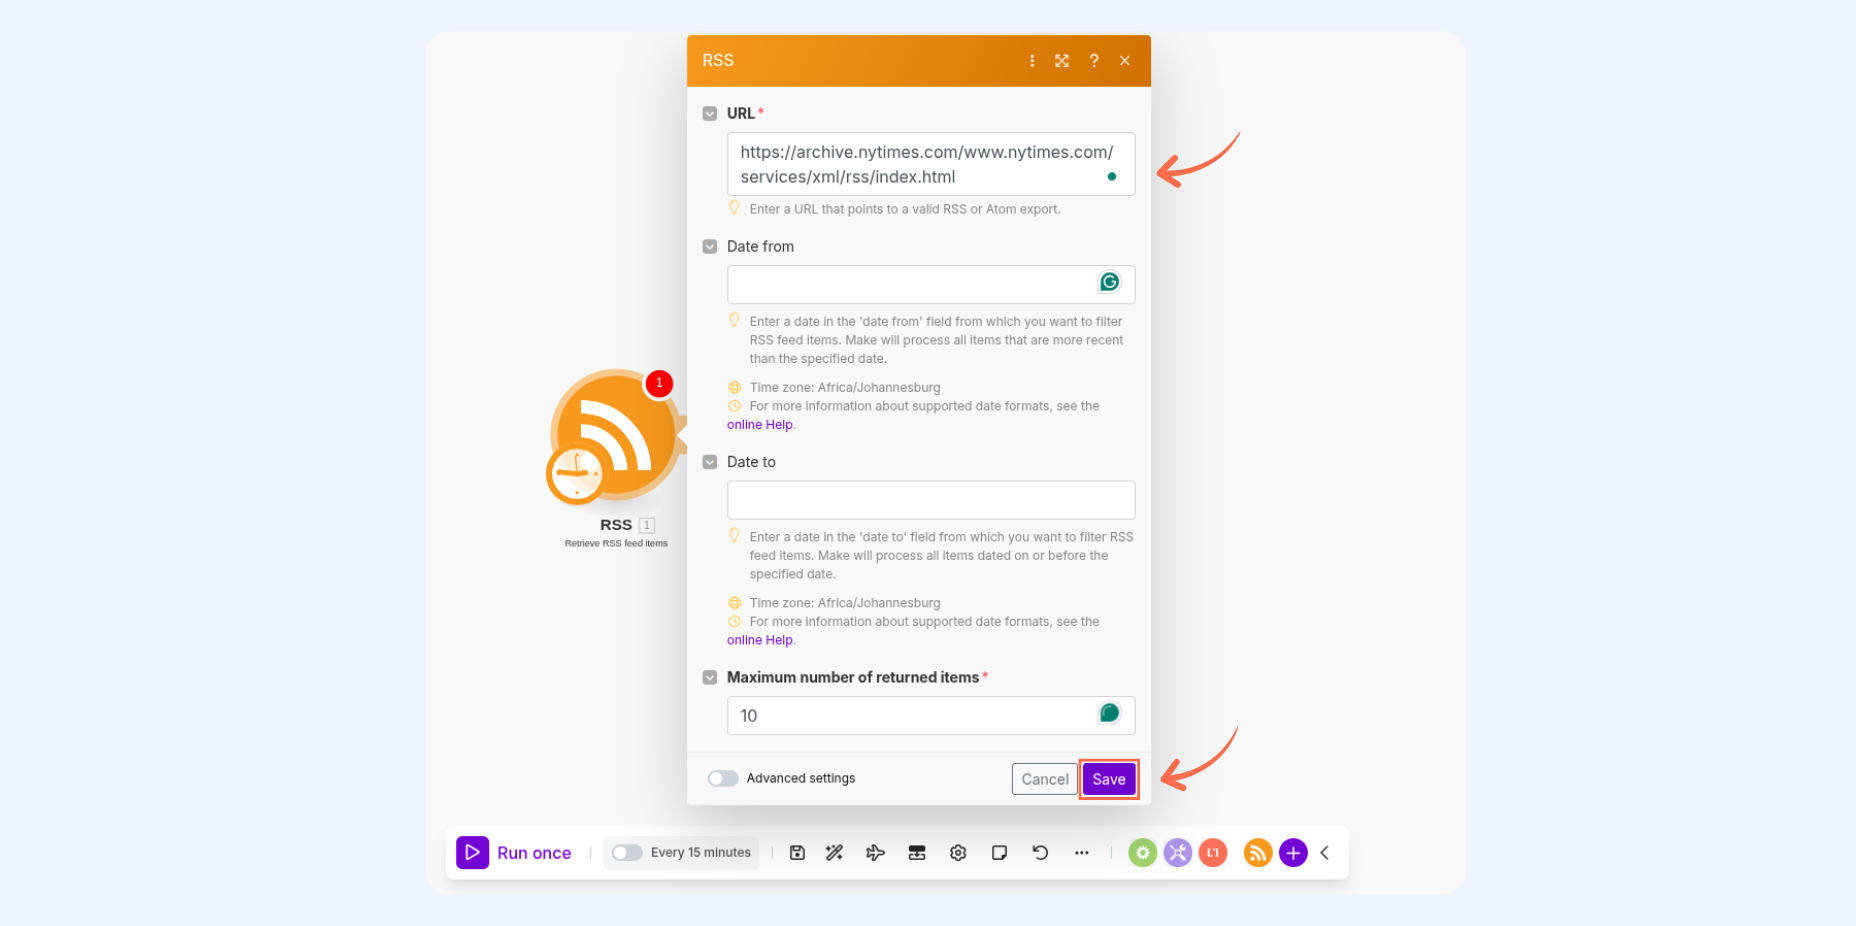
Set up a Trigger
Choose any RSS feed (or any trigger app of your choice).
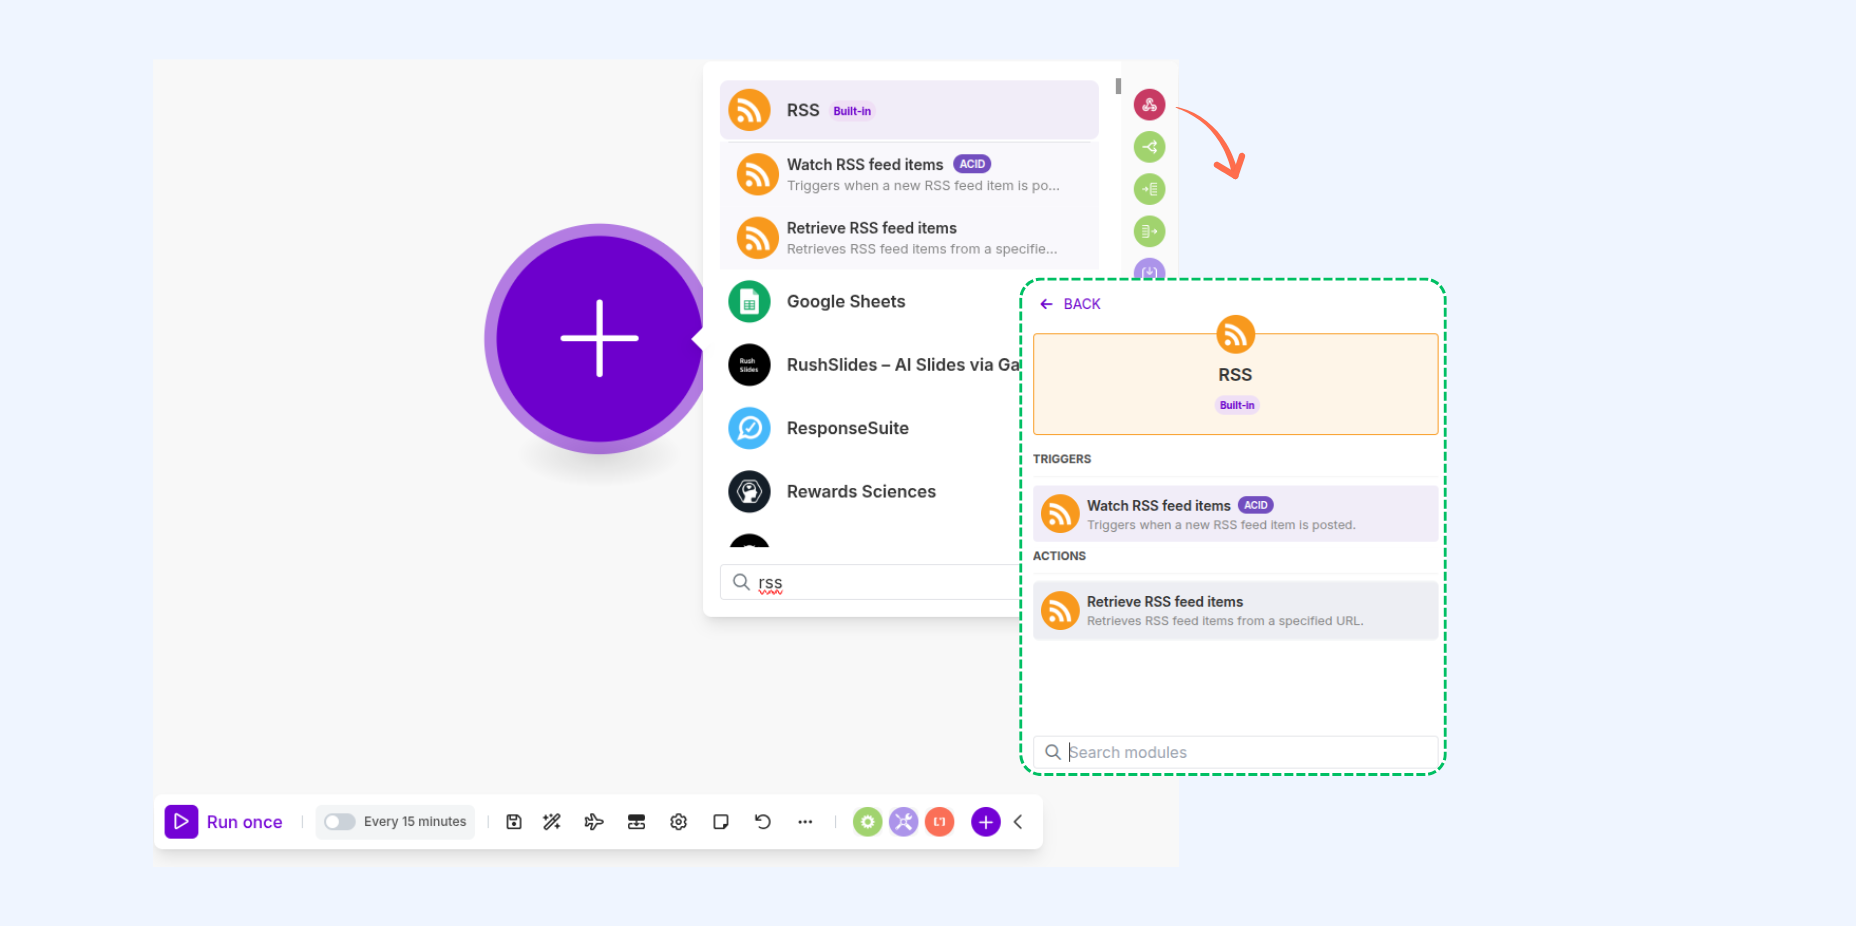
Select the trigger event (e.g., "Retrieve RSS feed items").
Paste your feed URL or complete the setup as required by your chosen app.
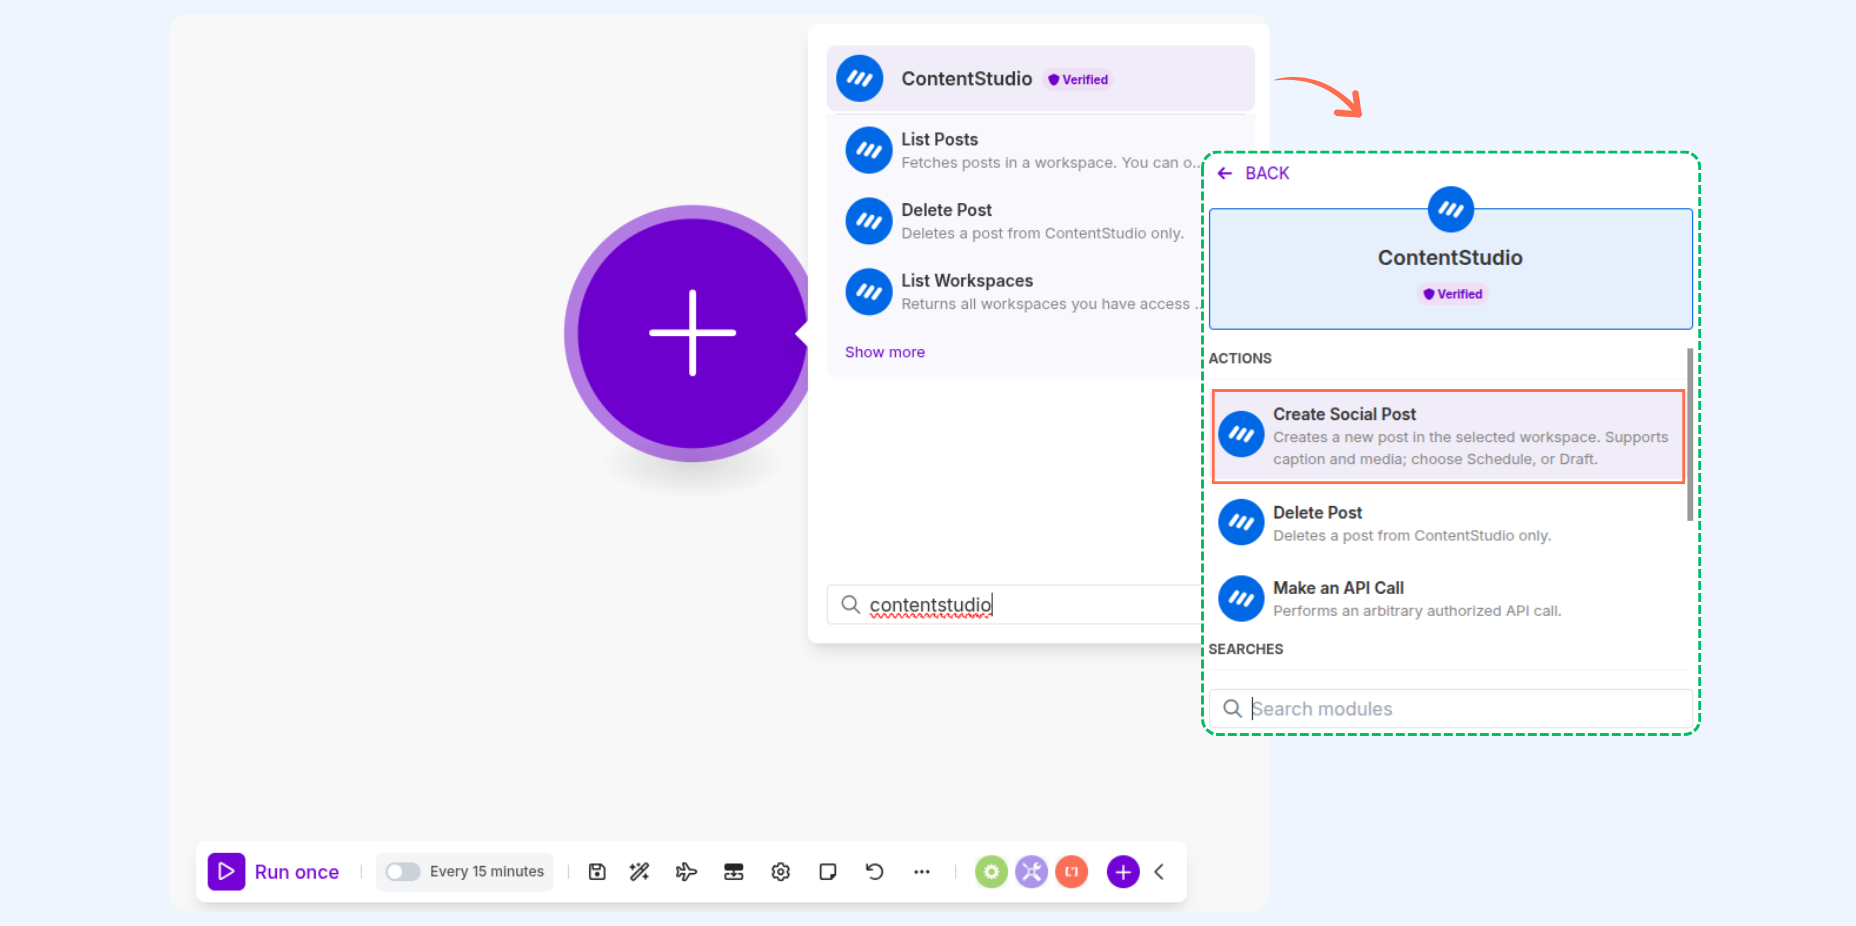
Choose the Action
Select ContentStudio as the app.
Select the event Create Social Post.
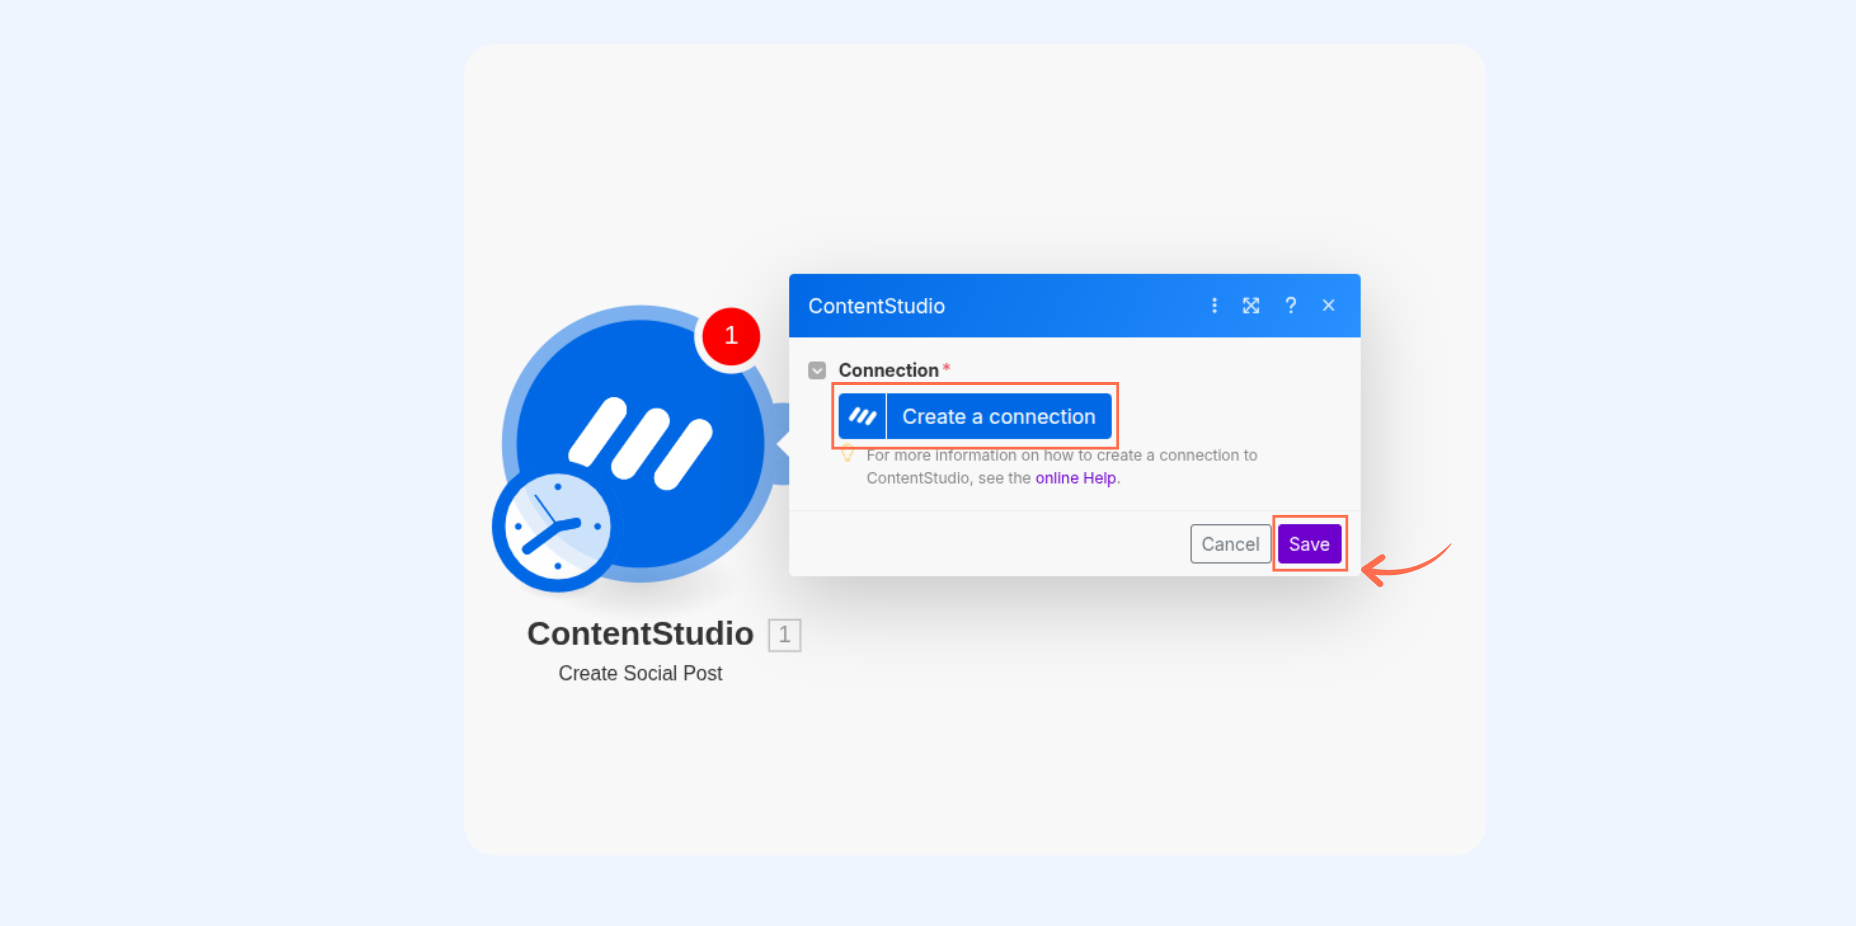
Connect ContentStudio with Make.com
Click on Create a new connection in Make.com.
Open ContentStudio in a new tab.
Go to Settings → API and copy your API Key.
Paste the copied API Key into the Make.com popup window.
For detailed steps on generating your API key, check out the ContentStudio API guide.
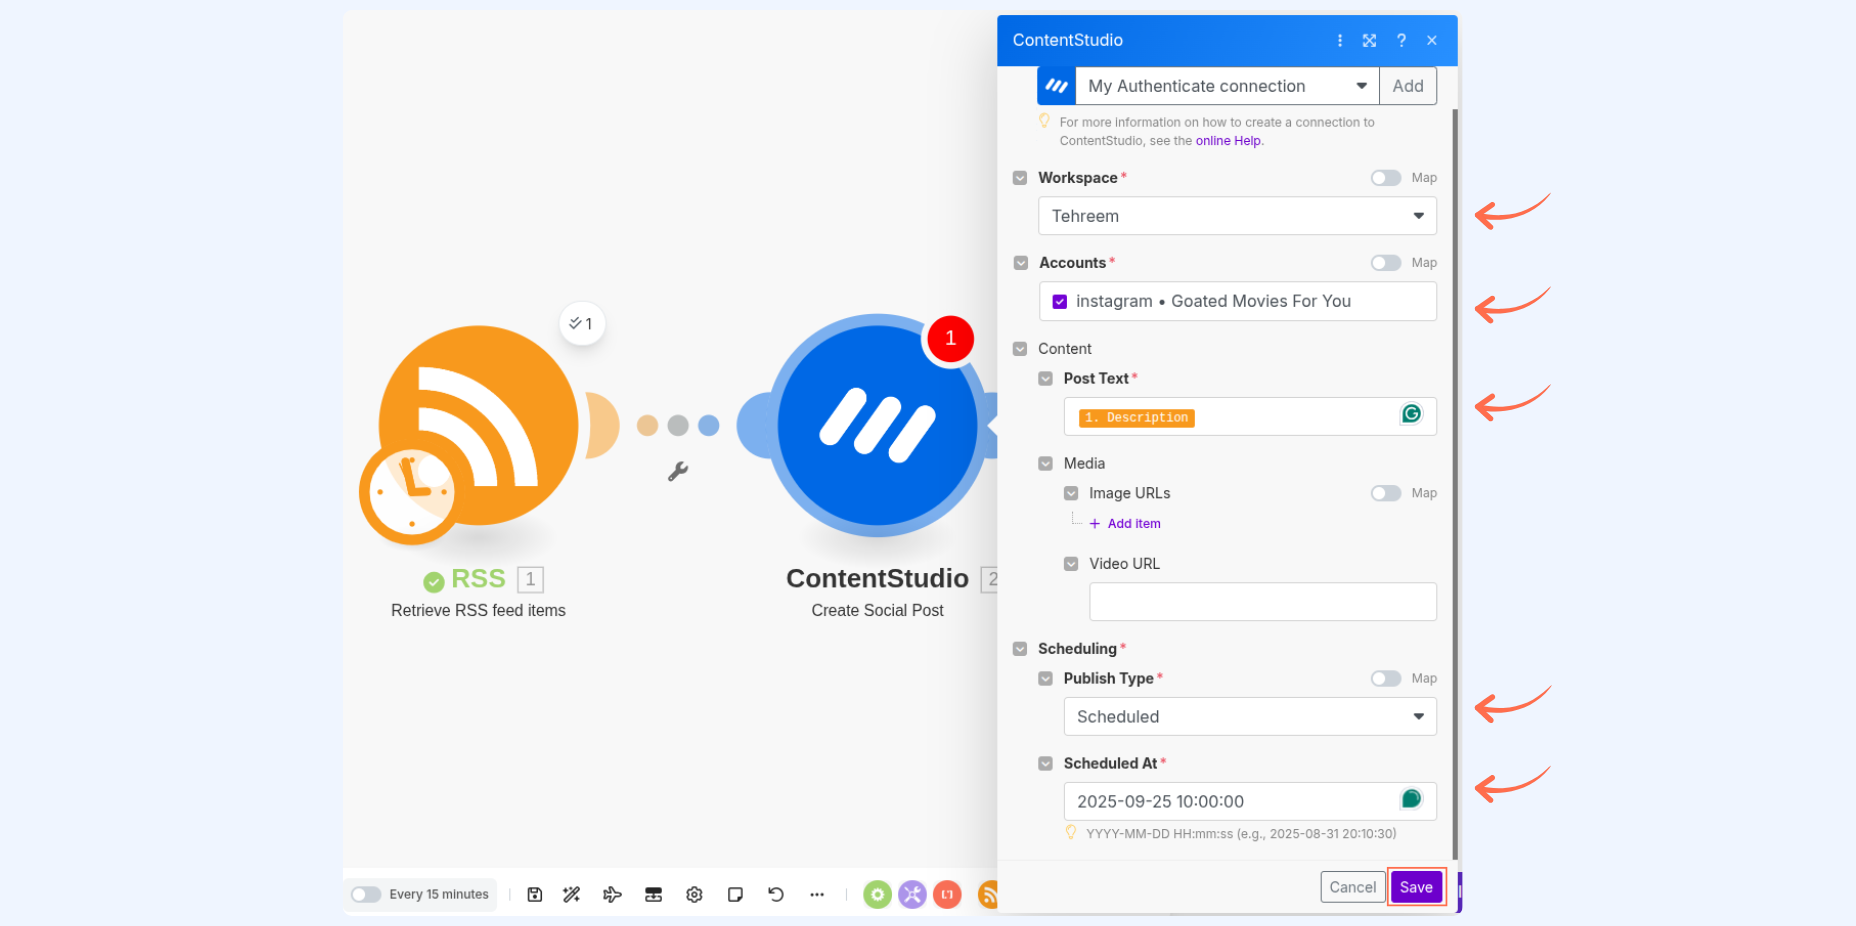
Configure ContentStudio
Select the connected account you want to use (fetched automatically after entering your Workspace ID).
Fill in the required fields such as Workspace ID, Social Accounts (from the dropdown), and Post caption etc. and click Save.
View Your Published Post
Click on Run to execute your scenario in Make.com.
Once your scenario runs successfully, the post will automatically appear in ContentStudio Publisher.
You can review it from Publisher → Posts or Publisher → Calendar inside ContentStudio.
FAQs
Q: Where can I get my API key?
A: You can generate it from your ContentStudio Settings → API. Detailed steps are available in the ContentStudio API guide.
Q: Can I connect multiple ContentStudio accounts in Make.com?
A: Yes. Each ContentStudio account requires its own API key and must be added as a separate connection in Make.com.
Q: What happens if my API key is deactivated or expired?
A: You’ll need to generate a new API key inside ContentStudio and update your connection in Make.com to continue running scenarios.
Q: Which actions can I automate with ContentStudio in Make.com?
A: The supported actions are:
Create Social Post – publish or schedule posts through Make.com.
Delete Social Post – remove scheduled or published posts.
Make an API Call – send custom requests to ContentStudio’s API for advanced use cases.
Was this article helpful?