n8n Integration
ContentStudio provides a powerful API that allows you to automate different tasks using n8n. With this setup, you can connect ContentStudio to other tools, fetch data, and publish content programmatically.
In this article:
Getting Started with n8n and ContentStudio Workflows
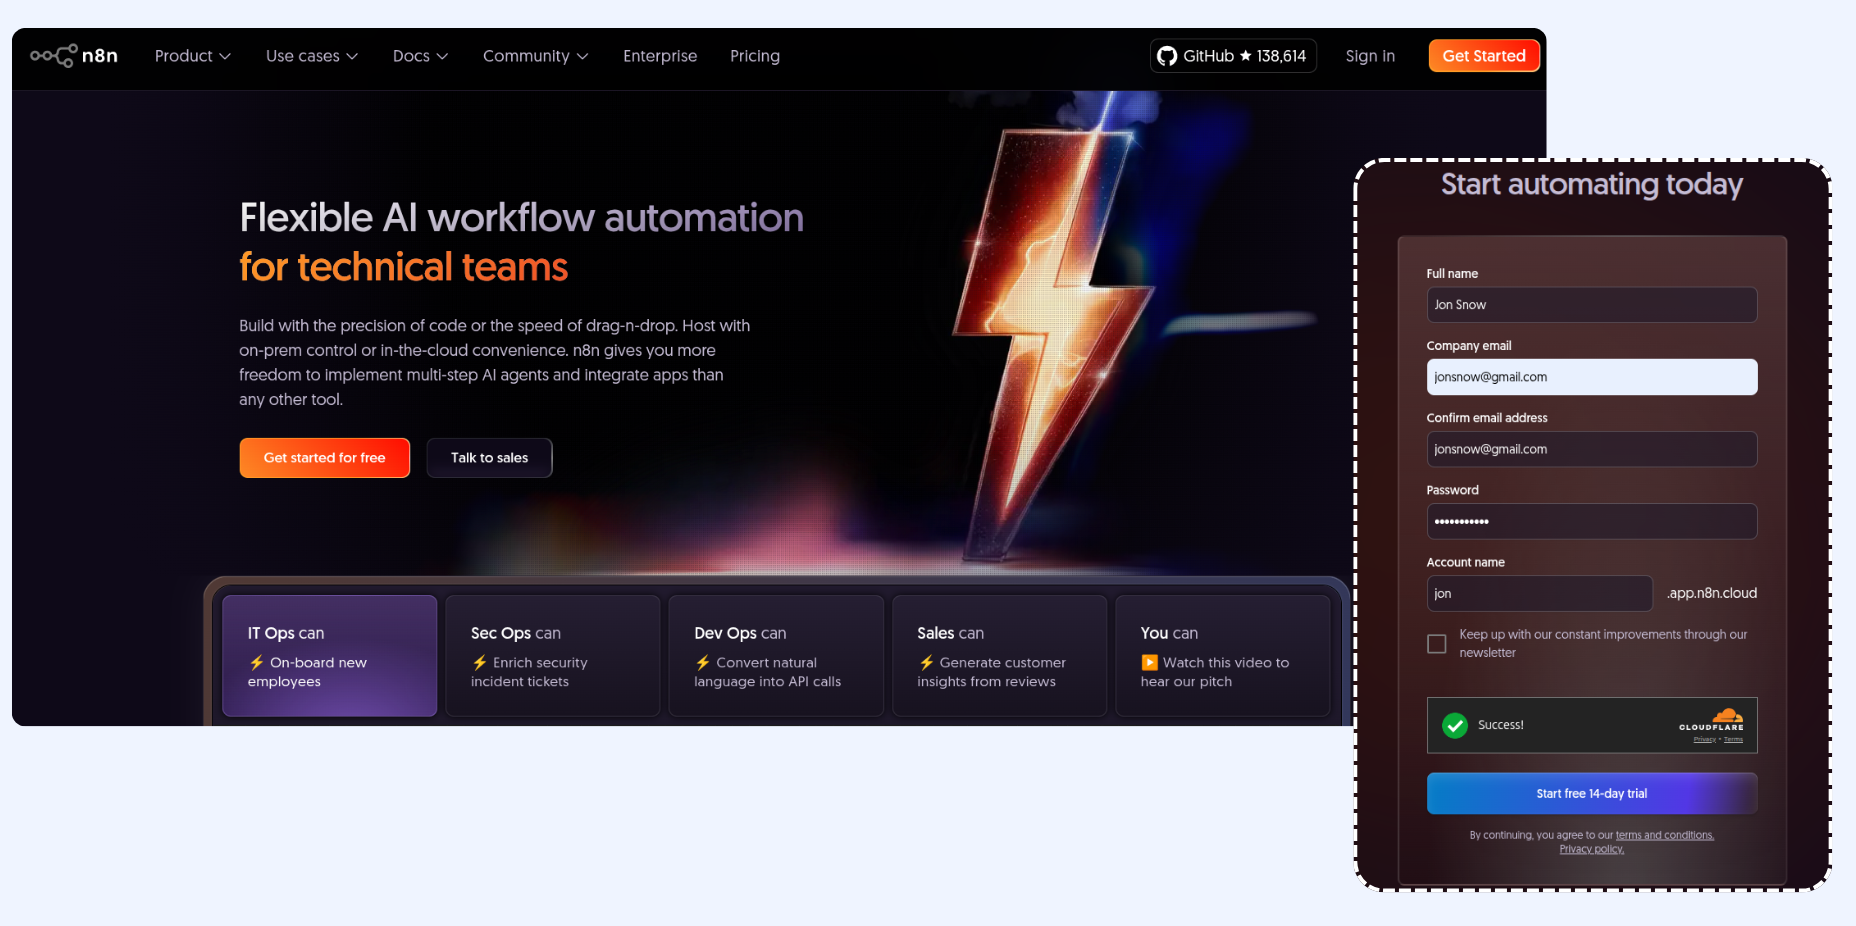
Go to n8n.io, sign up for a new account and complete the setup.
If you already have an account, simply log in.
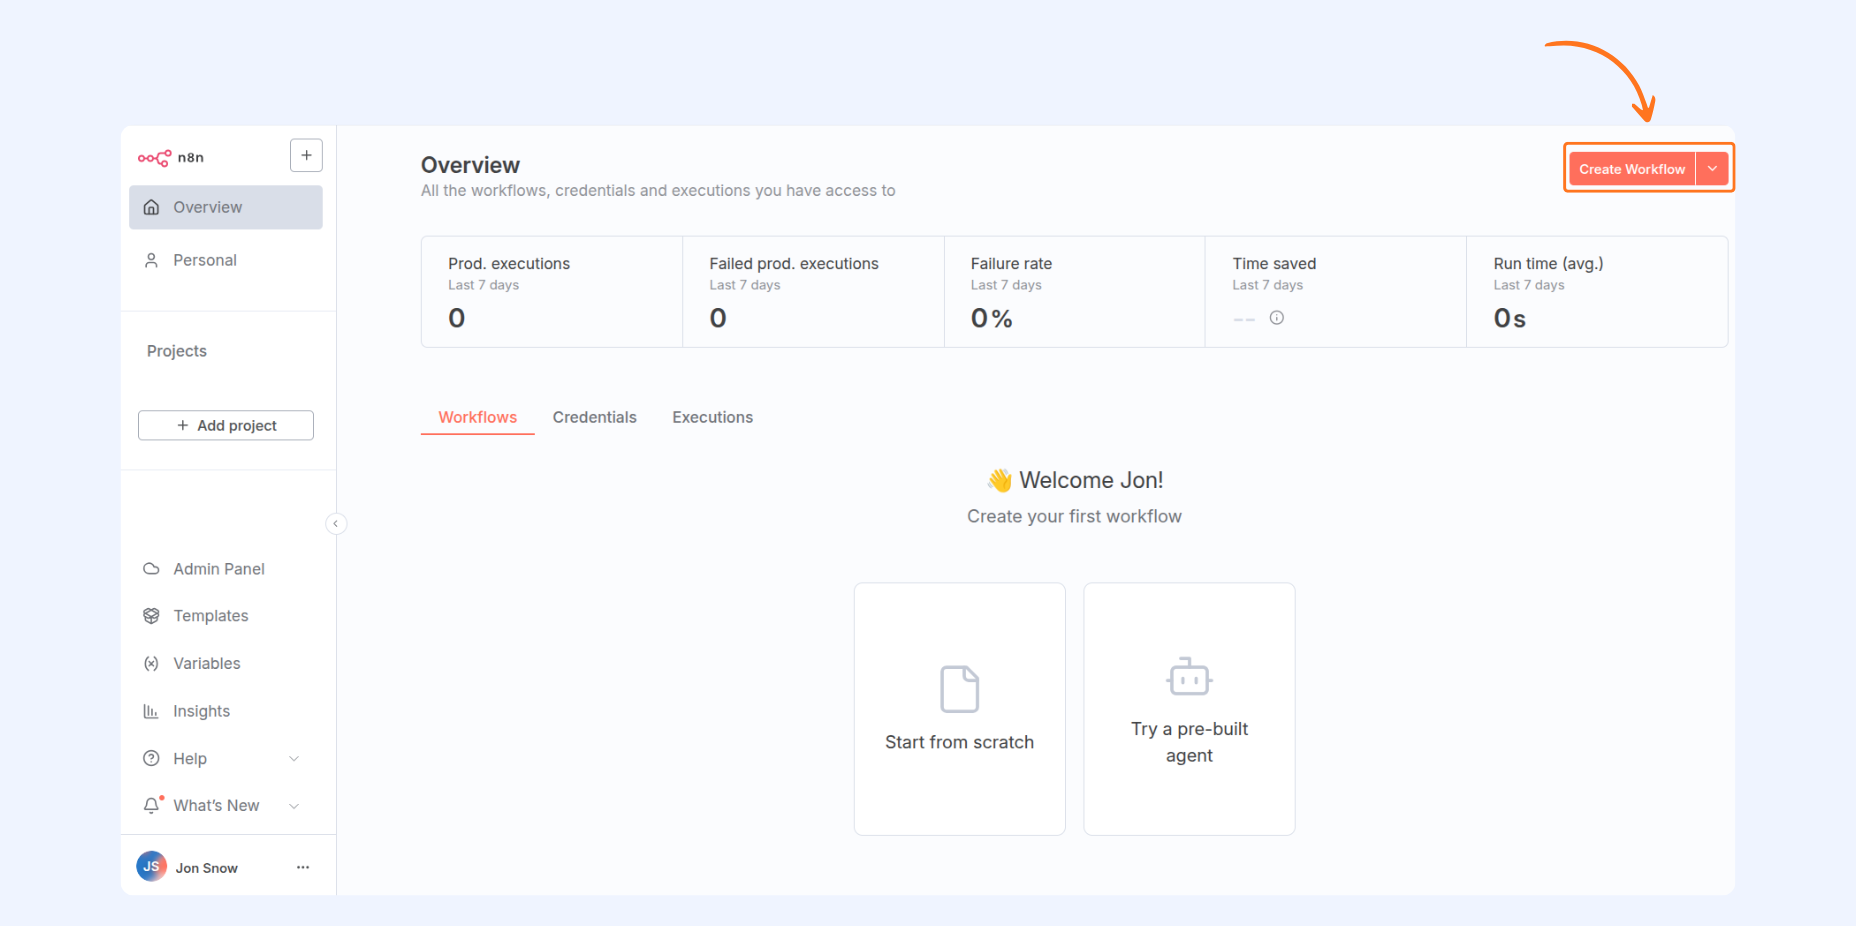
Click Create Workflow from your n8n dashboard to start building your automation.
Automating Workflows with ContentStudio and n8n
API Endpoints Reference
You can automate a wide range of tasks with ContentStudio using n8n workflows — from pulling data to posting on social media. Here’s a simple example case that shows how to connect and publish a post through the API. For full reference, check the ContentStudio API Guide.
Action | Method | Endpoint |
|---|---|---|
Fetch Workspace |
|
|
Fetch Social Accounts |
|
|
Create Post |
|
|
List Posts |
|
|
Delete Post |
|
|
Get Authenticated User Info |
|
|
Create a Social Post with n8n
Add a Trigger
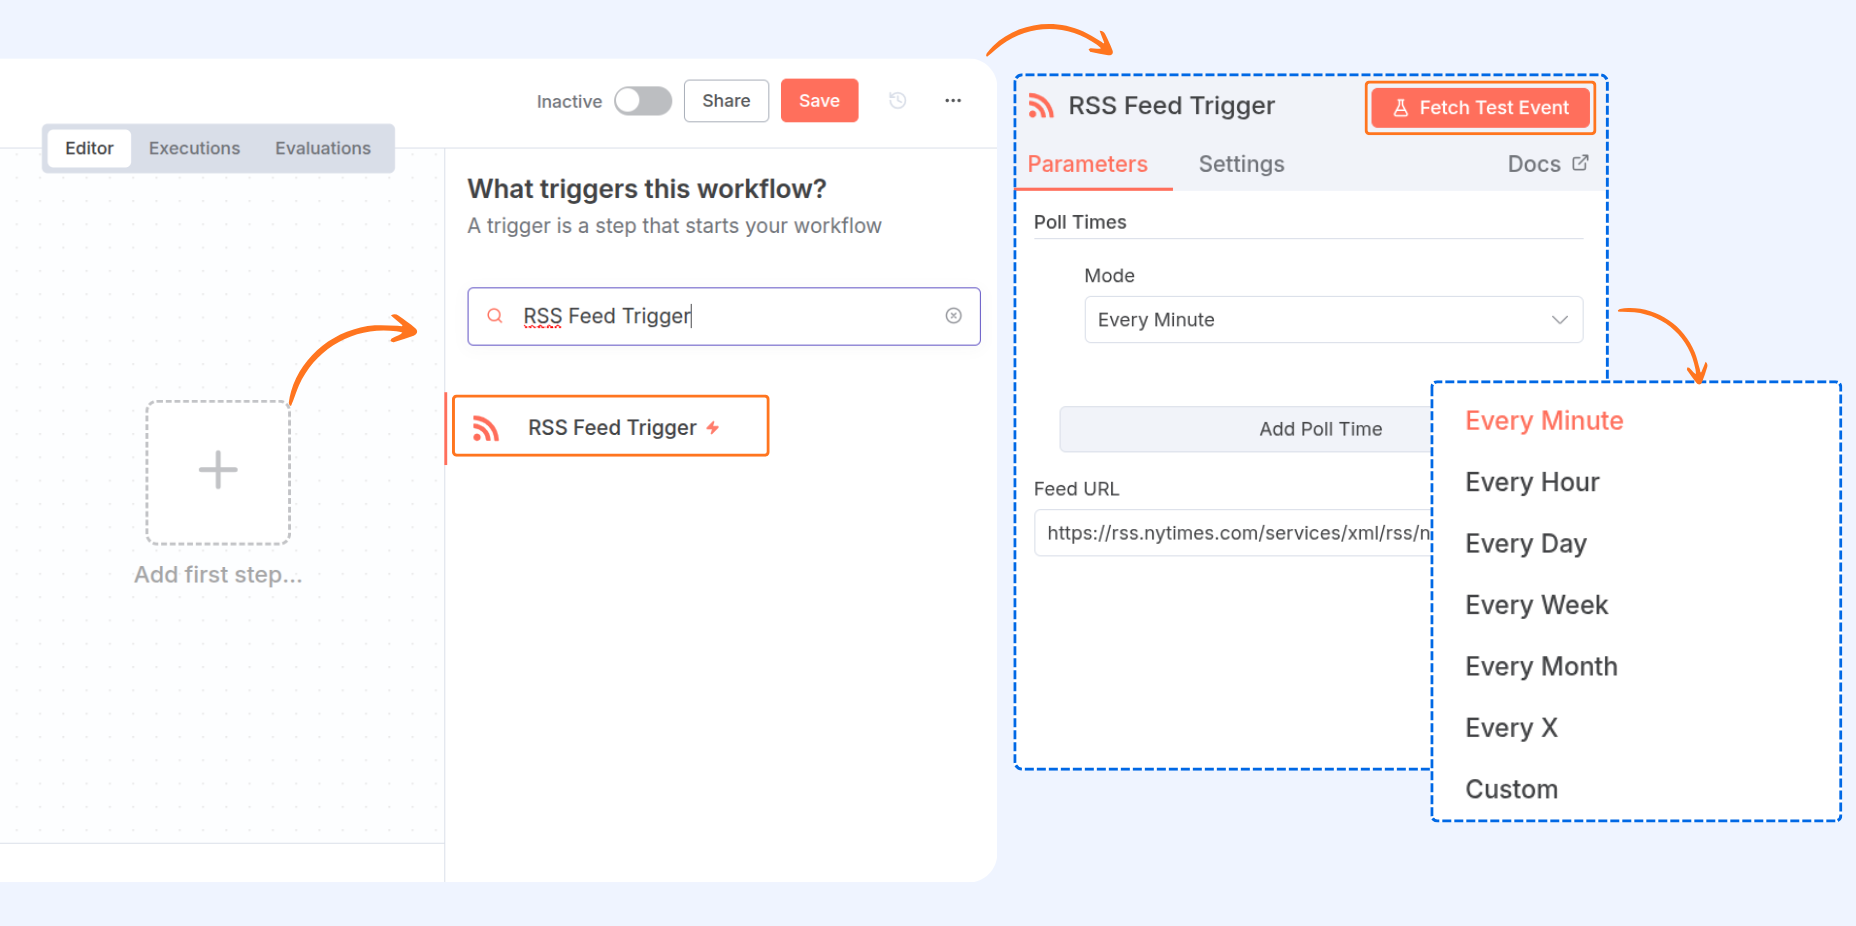
Add your first step by selecting any trigger that fits your use case — for example, the RSS Feed Trigger to pull content automatically from a feed.
Enter the Feed URL and choose the Mode (e.g., every minute, every hour, etc.).
Click Fetch Test Event to make sure data is coming in.
Fetch Your Workspace
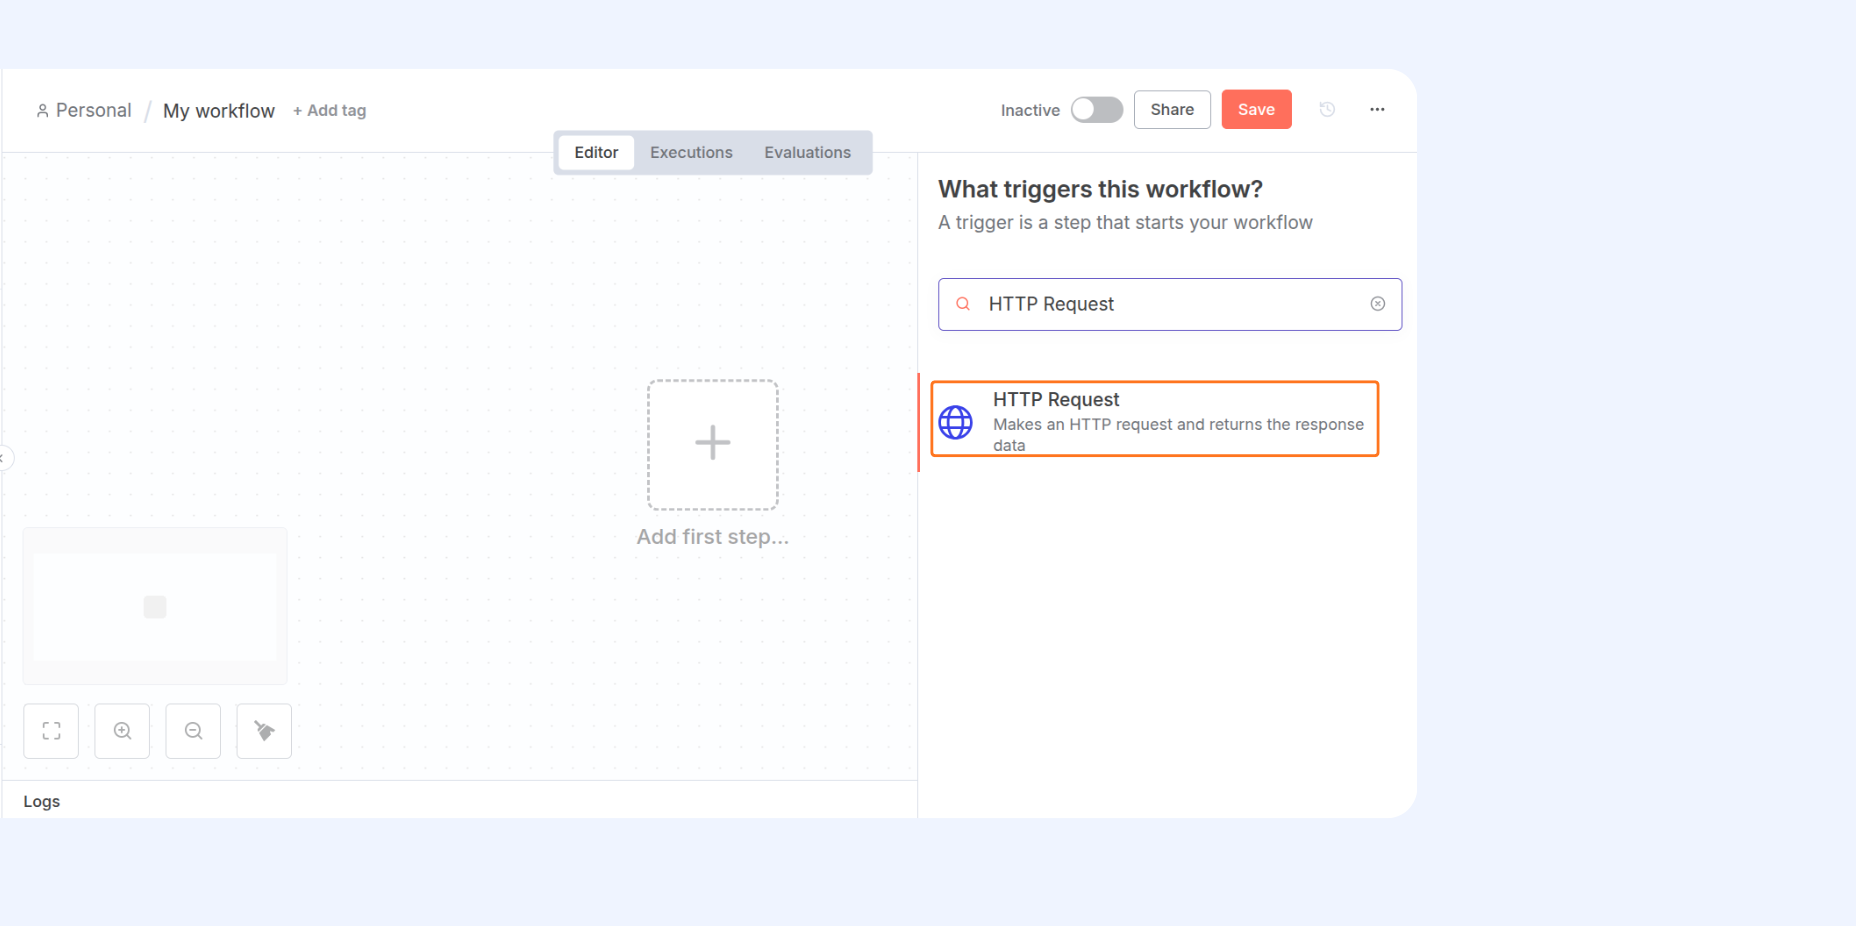
Add a new step → choose HTTP Request.
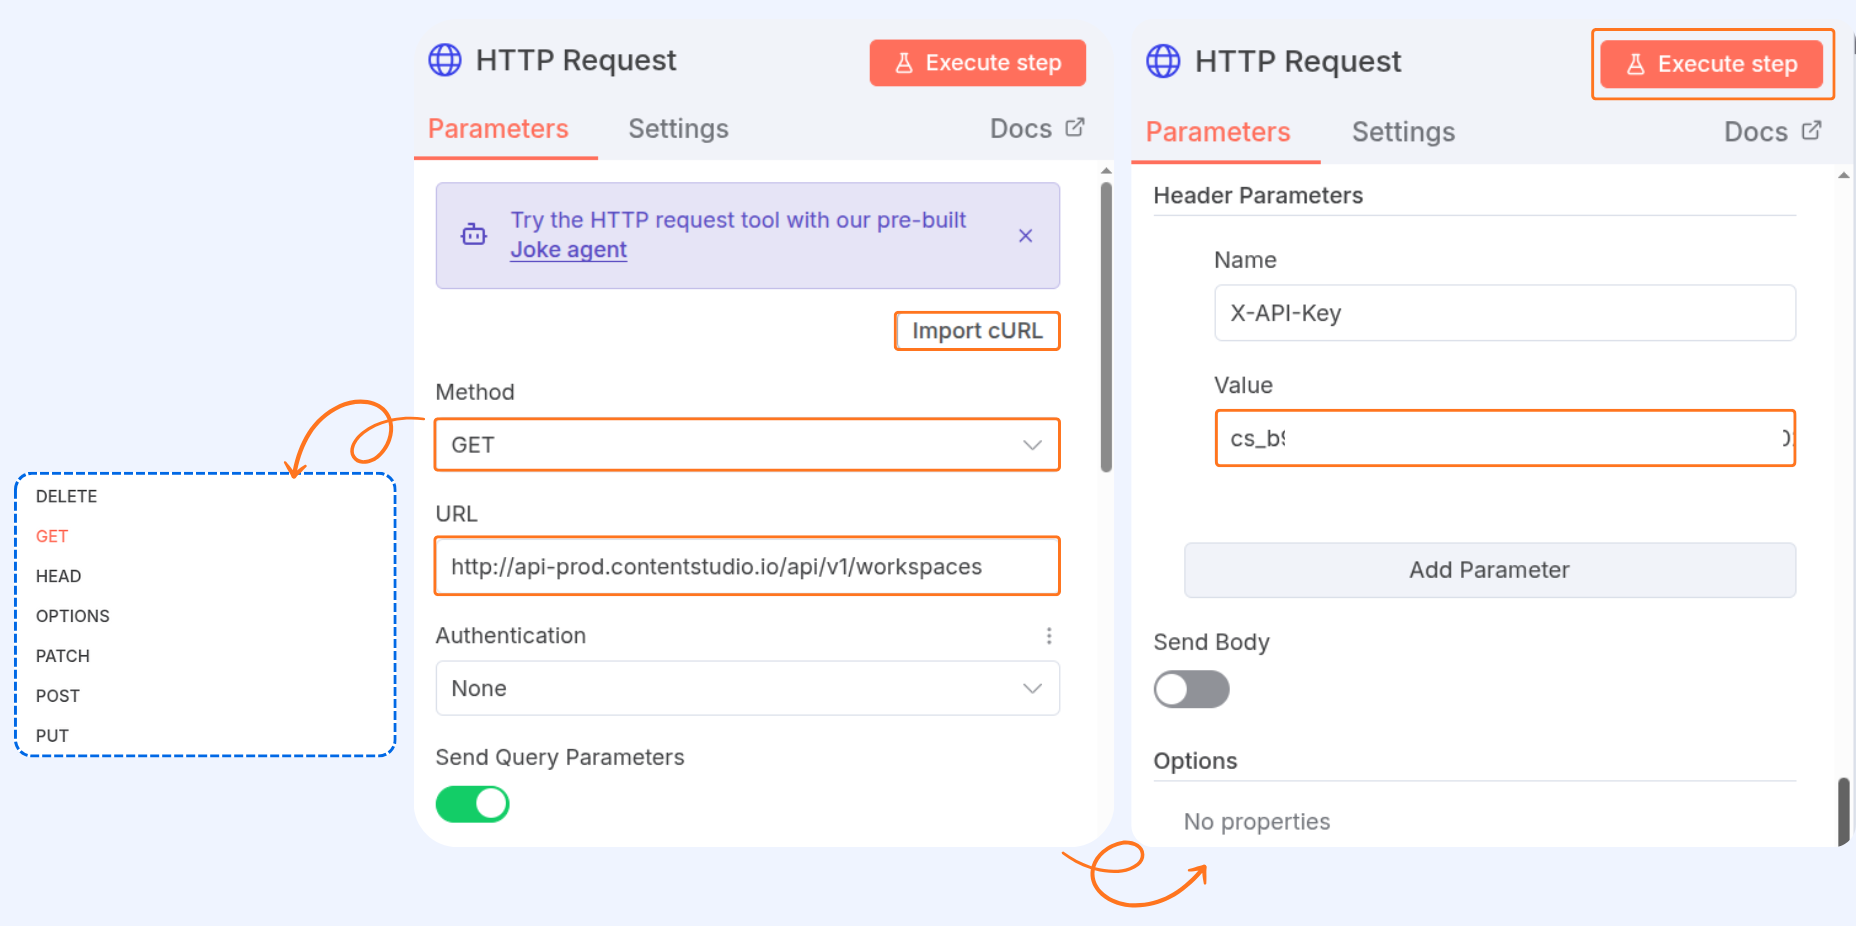
Either import the
cURLfrom the ContentStudio API Guide – Workspace section, which will auto-fill the fields, or set them manually (enter the endpoint URL and fill in the required fields yourself).Add your API Key and click Execute Step to fetch Workspace details.
Fetch Connected Social Accounts
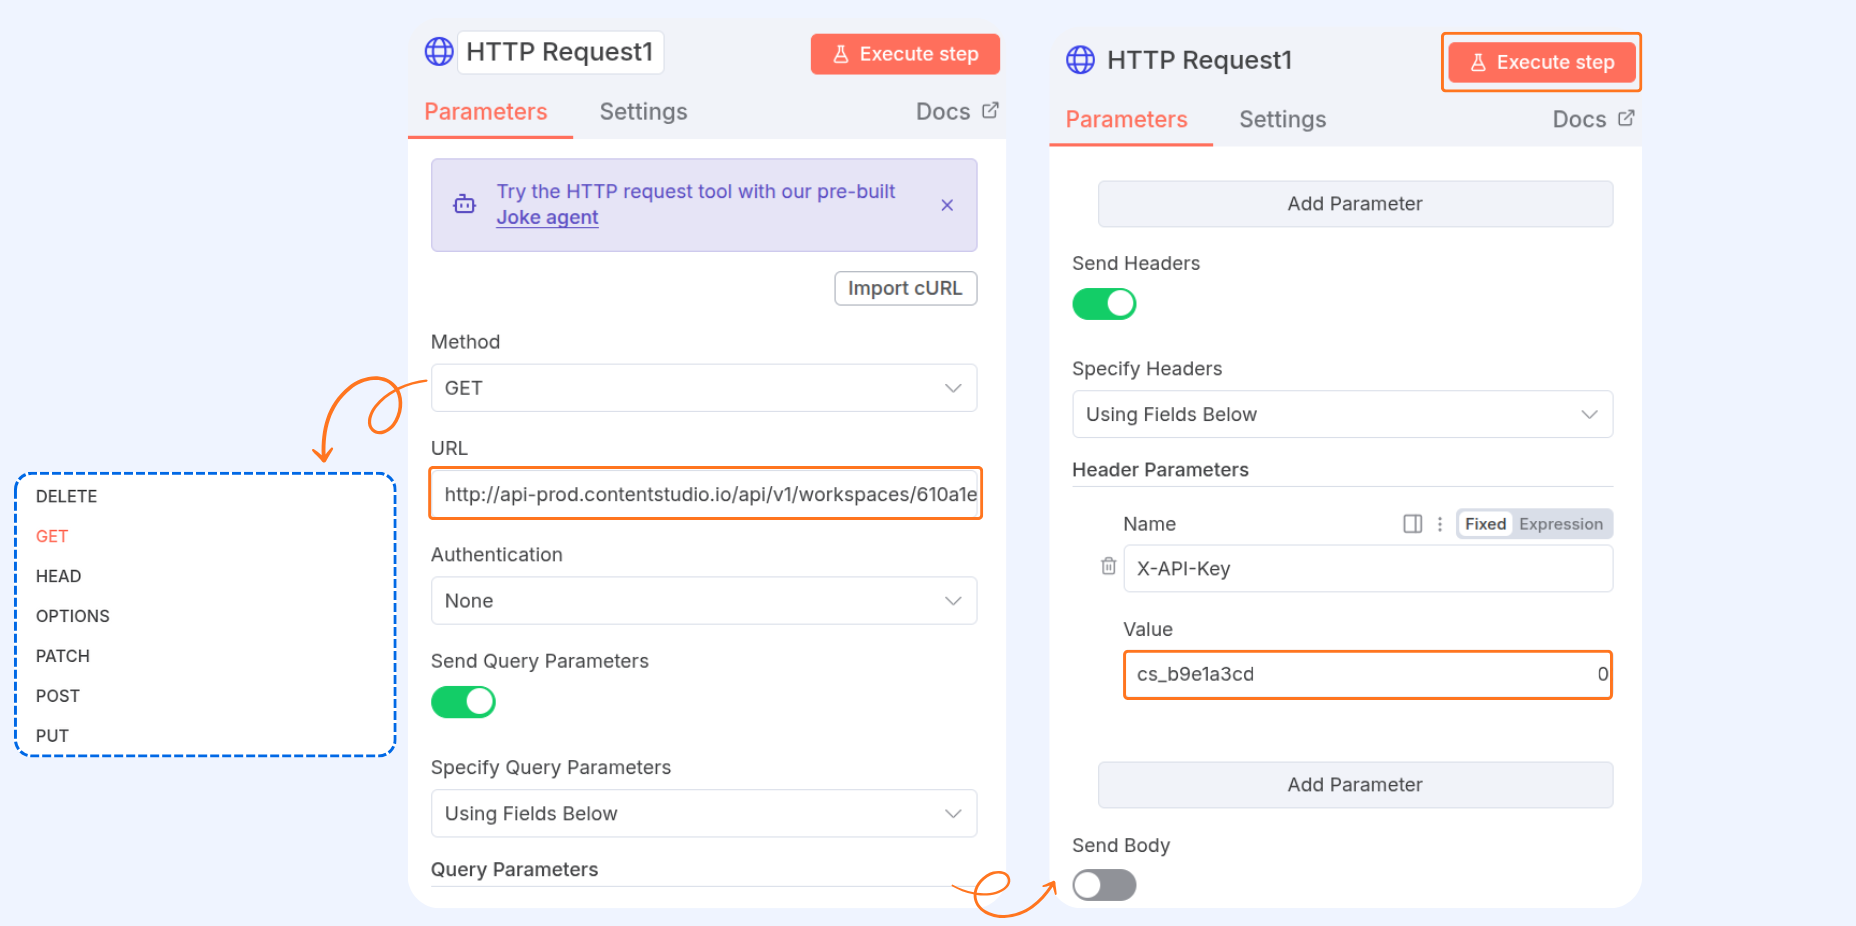
Add another HTTP Request step.
Either import the
cURLfrom the API Guide or fill the fields manually.Add your API Key and click Execute Step to pull all connected accounts.
Create a Social Media Post
Add another HTTP Request step.
Either import the
cURLfrom the API guide under Posts → Create a new social media post, or fill the fields manually.
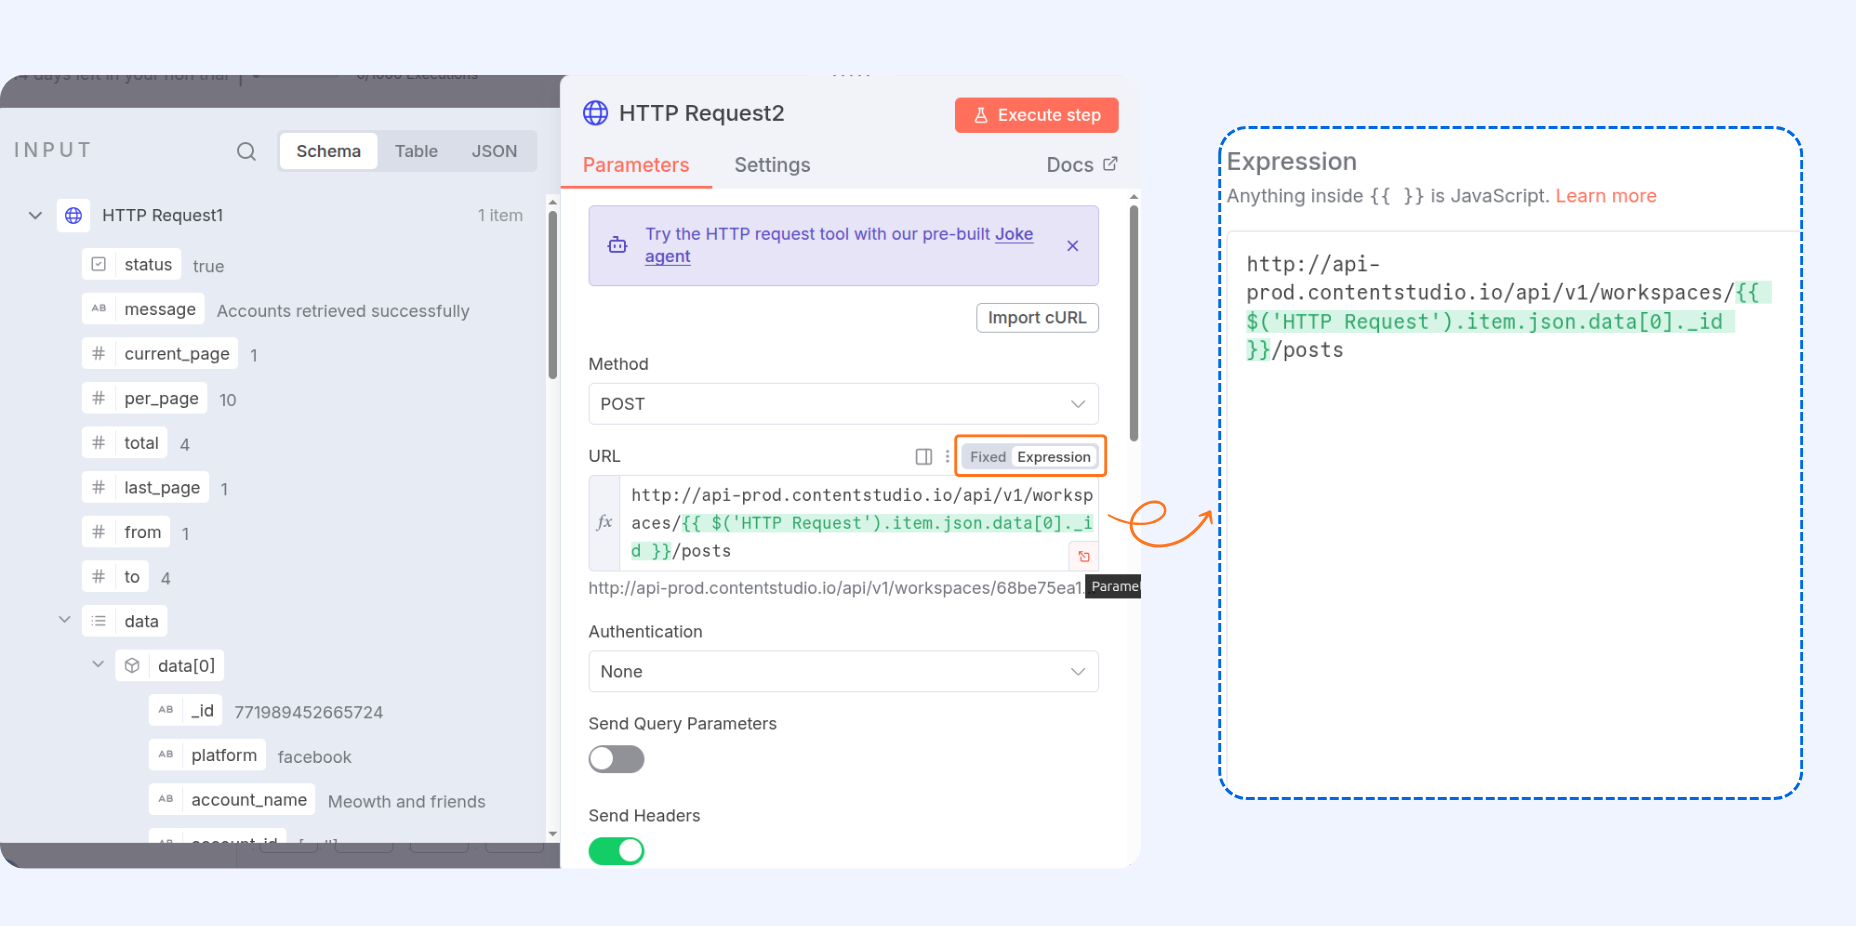
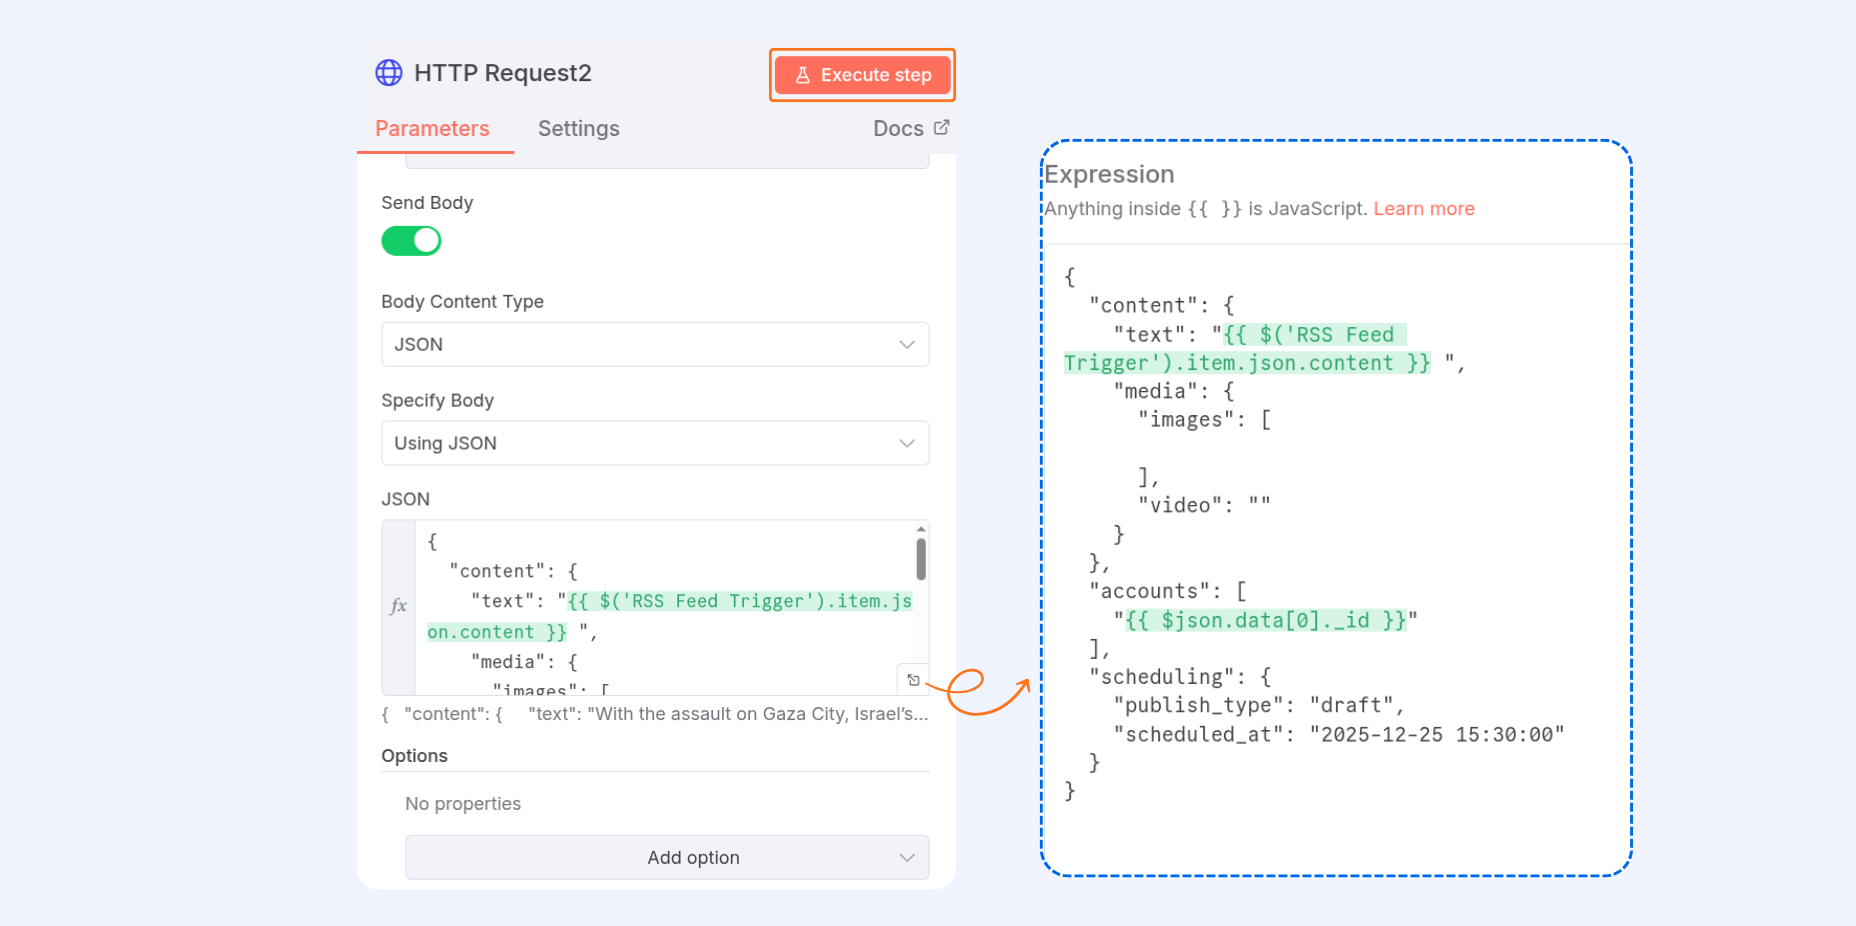
3 Add your API Key and configure the JSON body. Here’s a quick reference for the fields: | ||
Field | Description | Example |
|---|---|---|
| Main text or caption of the post | "New blog post is live!" |
| Image or video URLs (optional) | ["https://img.url/1.jpg","https://img.url/2.png"] |
| Account IDs to publish the post | [12345,67890] |
| Timing for post (draft, now, or future) | "2025-09-20T10:00:00Z" |
4 Click Execute Step to send the post to ContentStudio. |
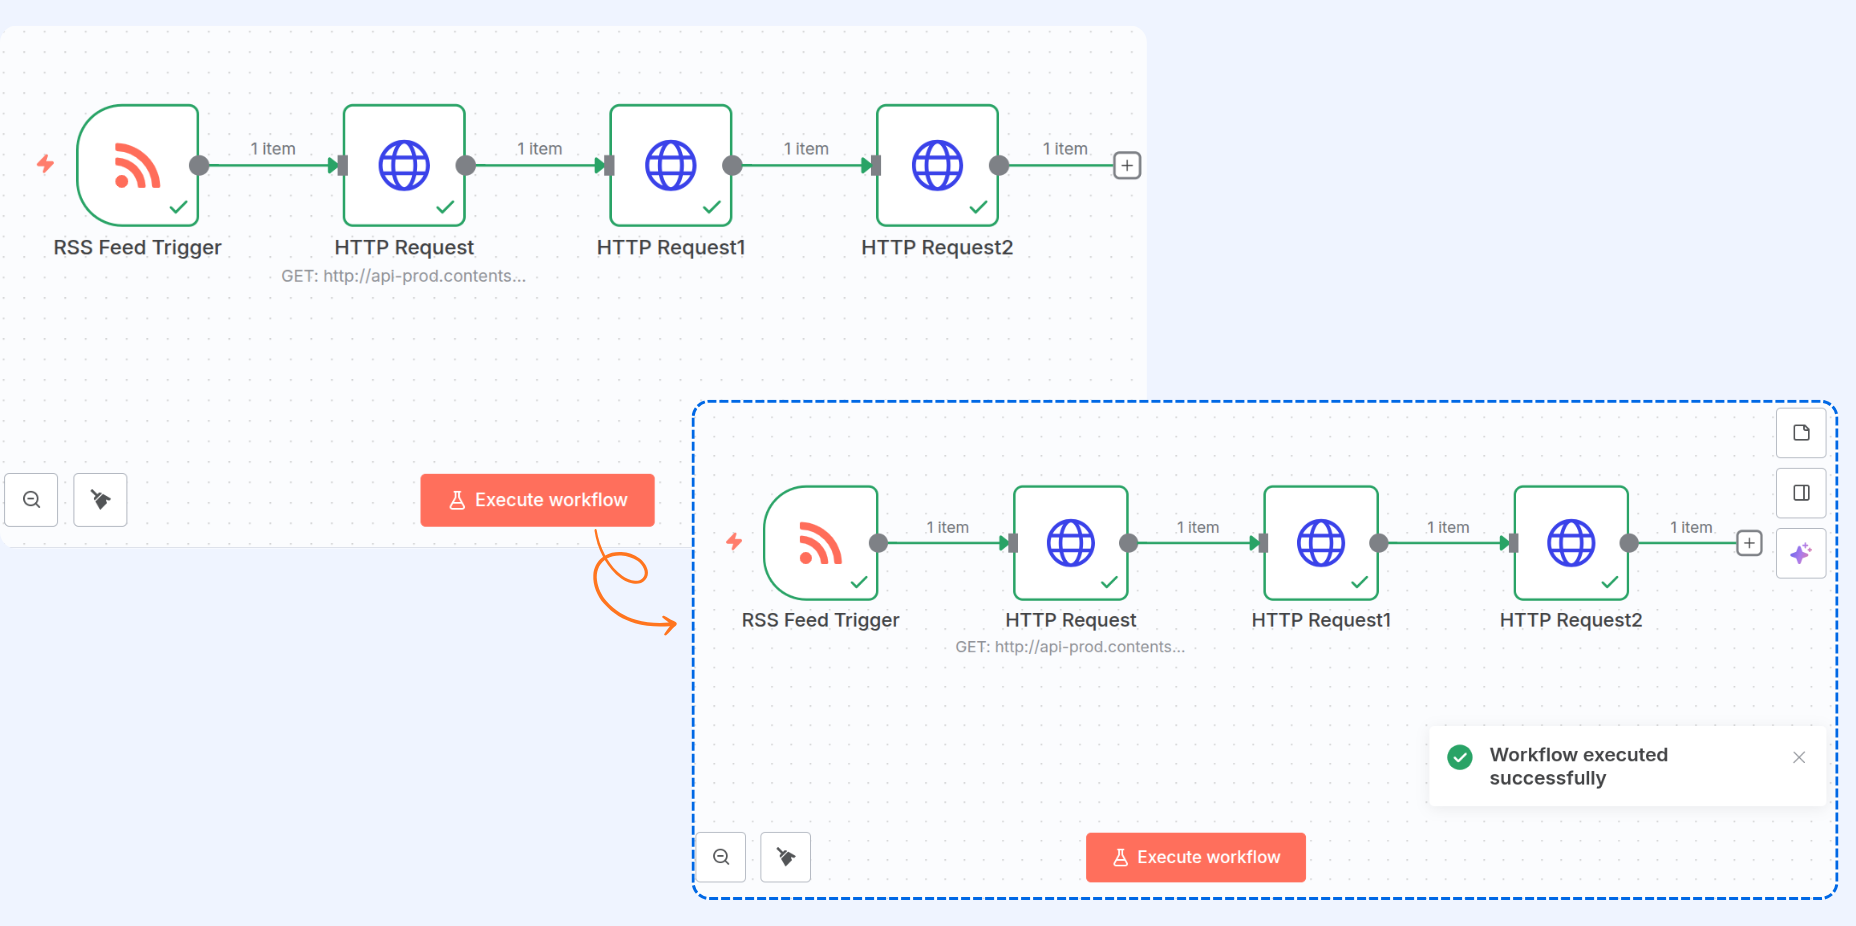
Finally, click Execute Workflow to run the automation.
Related Articles
FAQs
Q: Can I schedule posts instead of publishing immediately?
A: Yes, in the JSON body, use the scheduling field to set draft, immediate, or a future time.
Q: Can I post to multiple accounts at once?
A: Yes, just include multiple account IDs in the accounts field of your request.
Q: Can I add multiple images or videos?
A: Multiple images are supported, but only one video can be added per post.
Q: What happens if my API key stops working?
A: You’ll need to generate a new API key from ContentStudio settings and update your workflow.
Q: Do I need to validate the JSON body before sending?
A: Yes, always check your JSON format. Even a missing comma or quote can break the request.
Was this article helpful?