

Video Clipping
ContentStudio now makes it easier than ever to turn long-form videos into short, engaging clips using AI. With the new Video Clips & Highlights feature, you can quickly extract the most impactful moments from podcasts, interviews, and other long videos—ready to be shared as Reels or Shorts.
This guide walks you through the complete process, from selecting your video to reviewing and scheduling the generated clips.
In this Article:
Create Video Clips & Highlights
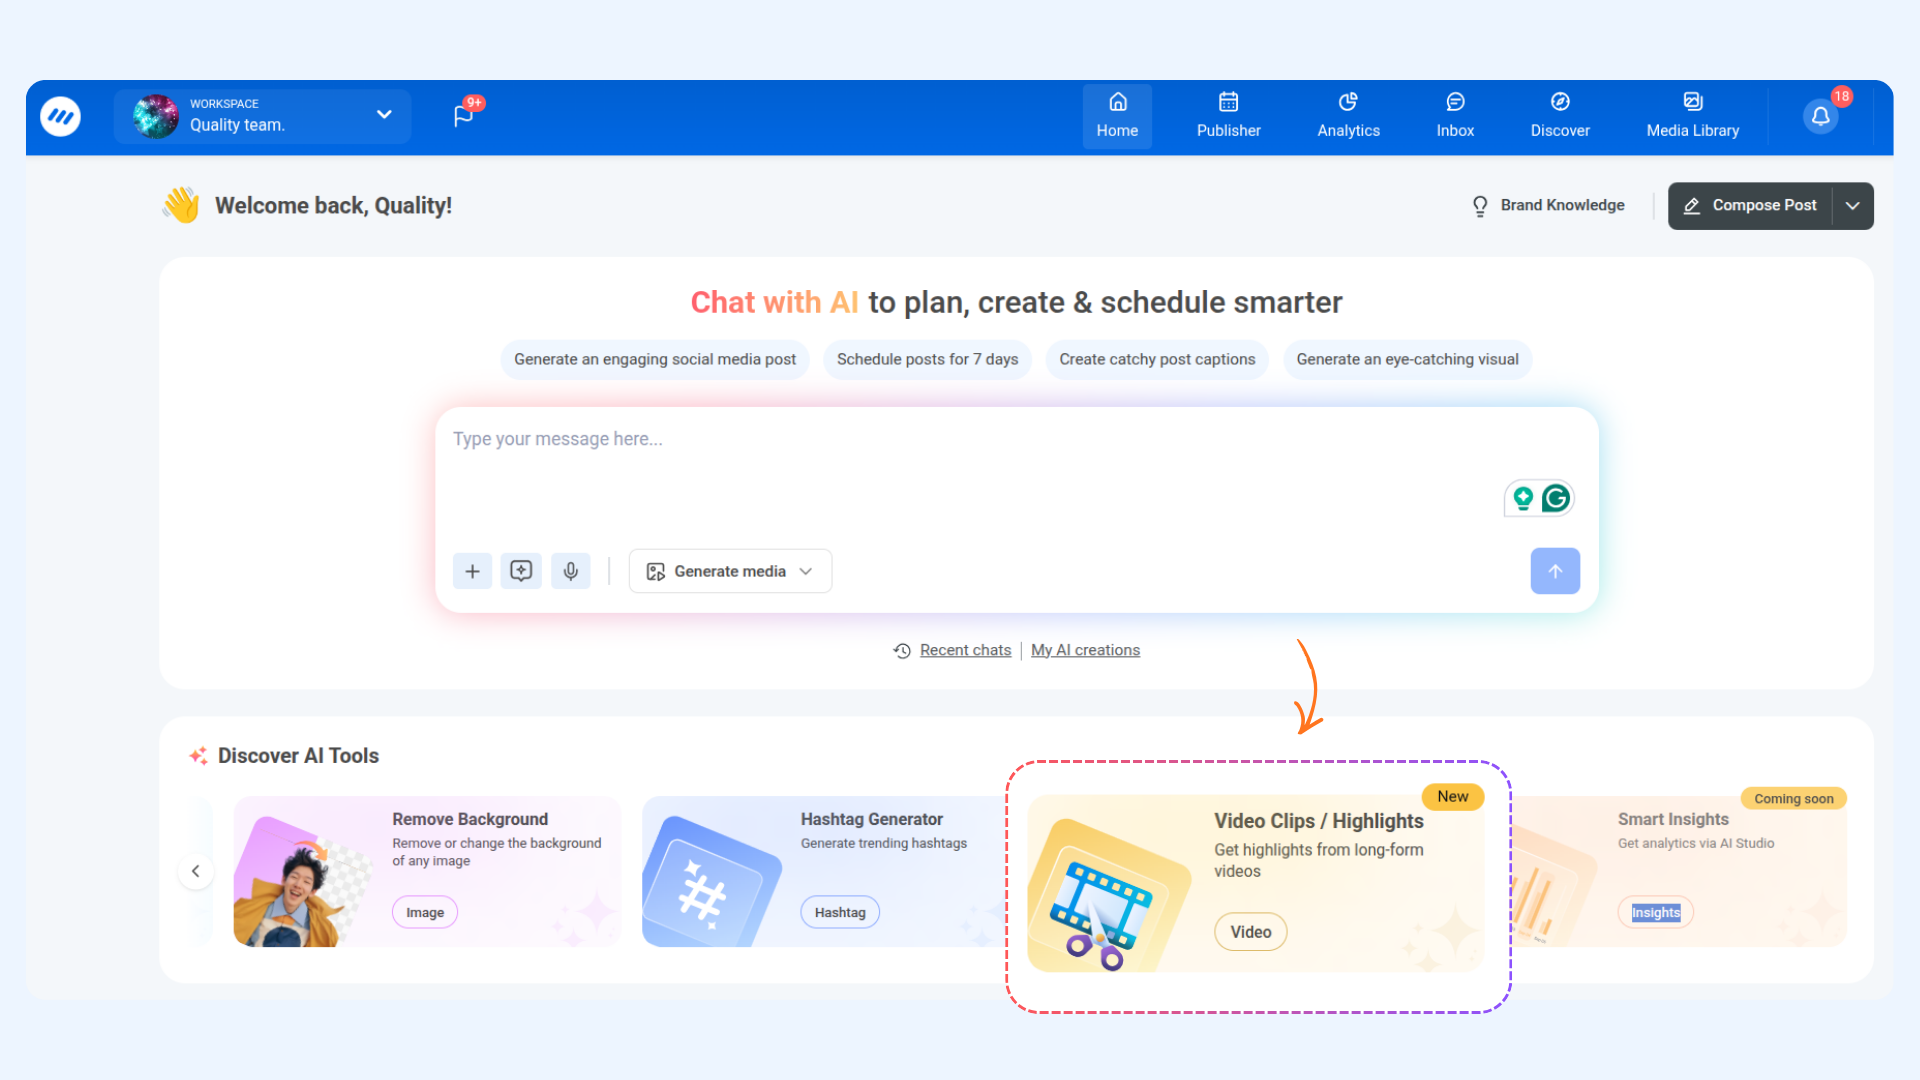
From the Home page, navigate to Discover AI Tools and click on the Video Clips card.
Upload or Fetch Your Video
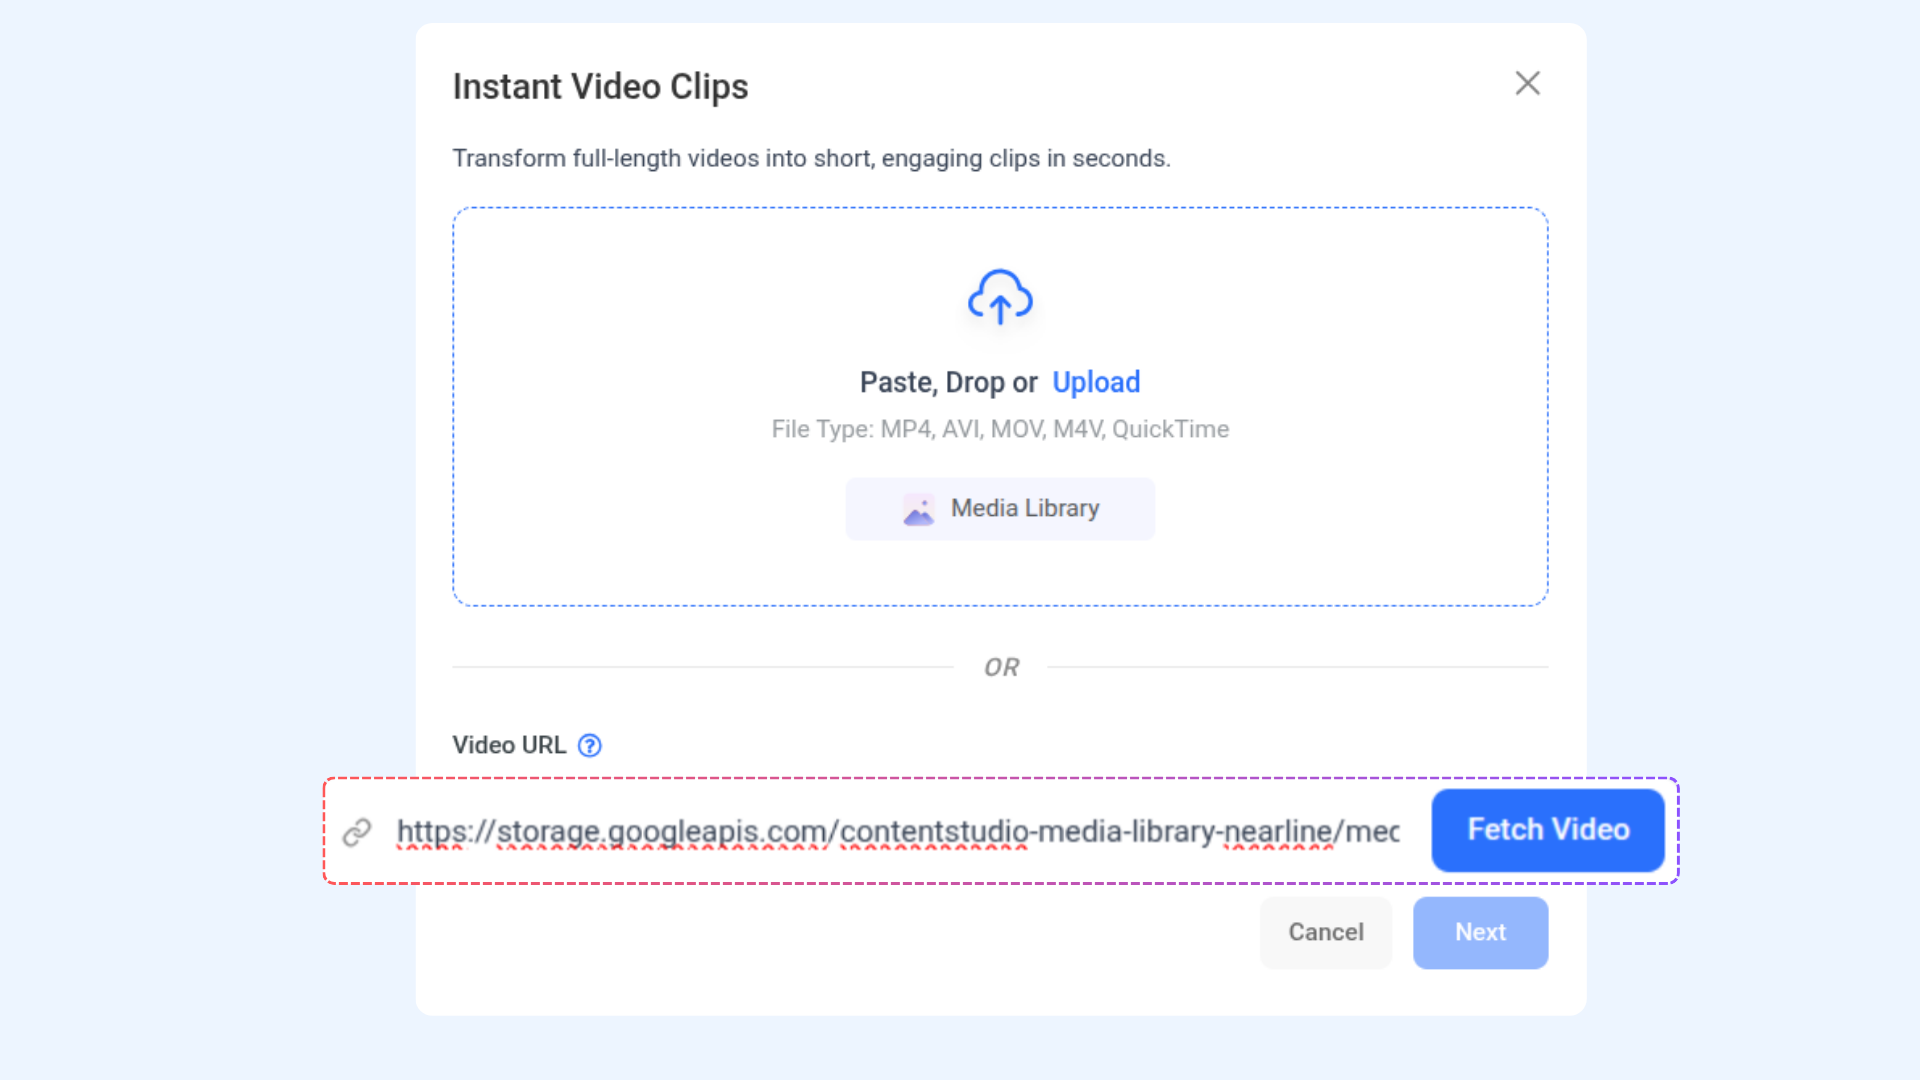
Upload the video you want to convert into short clips. You can:
Upload a video file directly
Drag and drop a video
Select a video from the Media Library
Paste a video URL and click Fetch Video
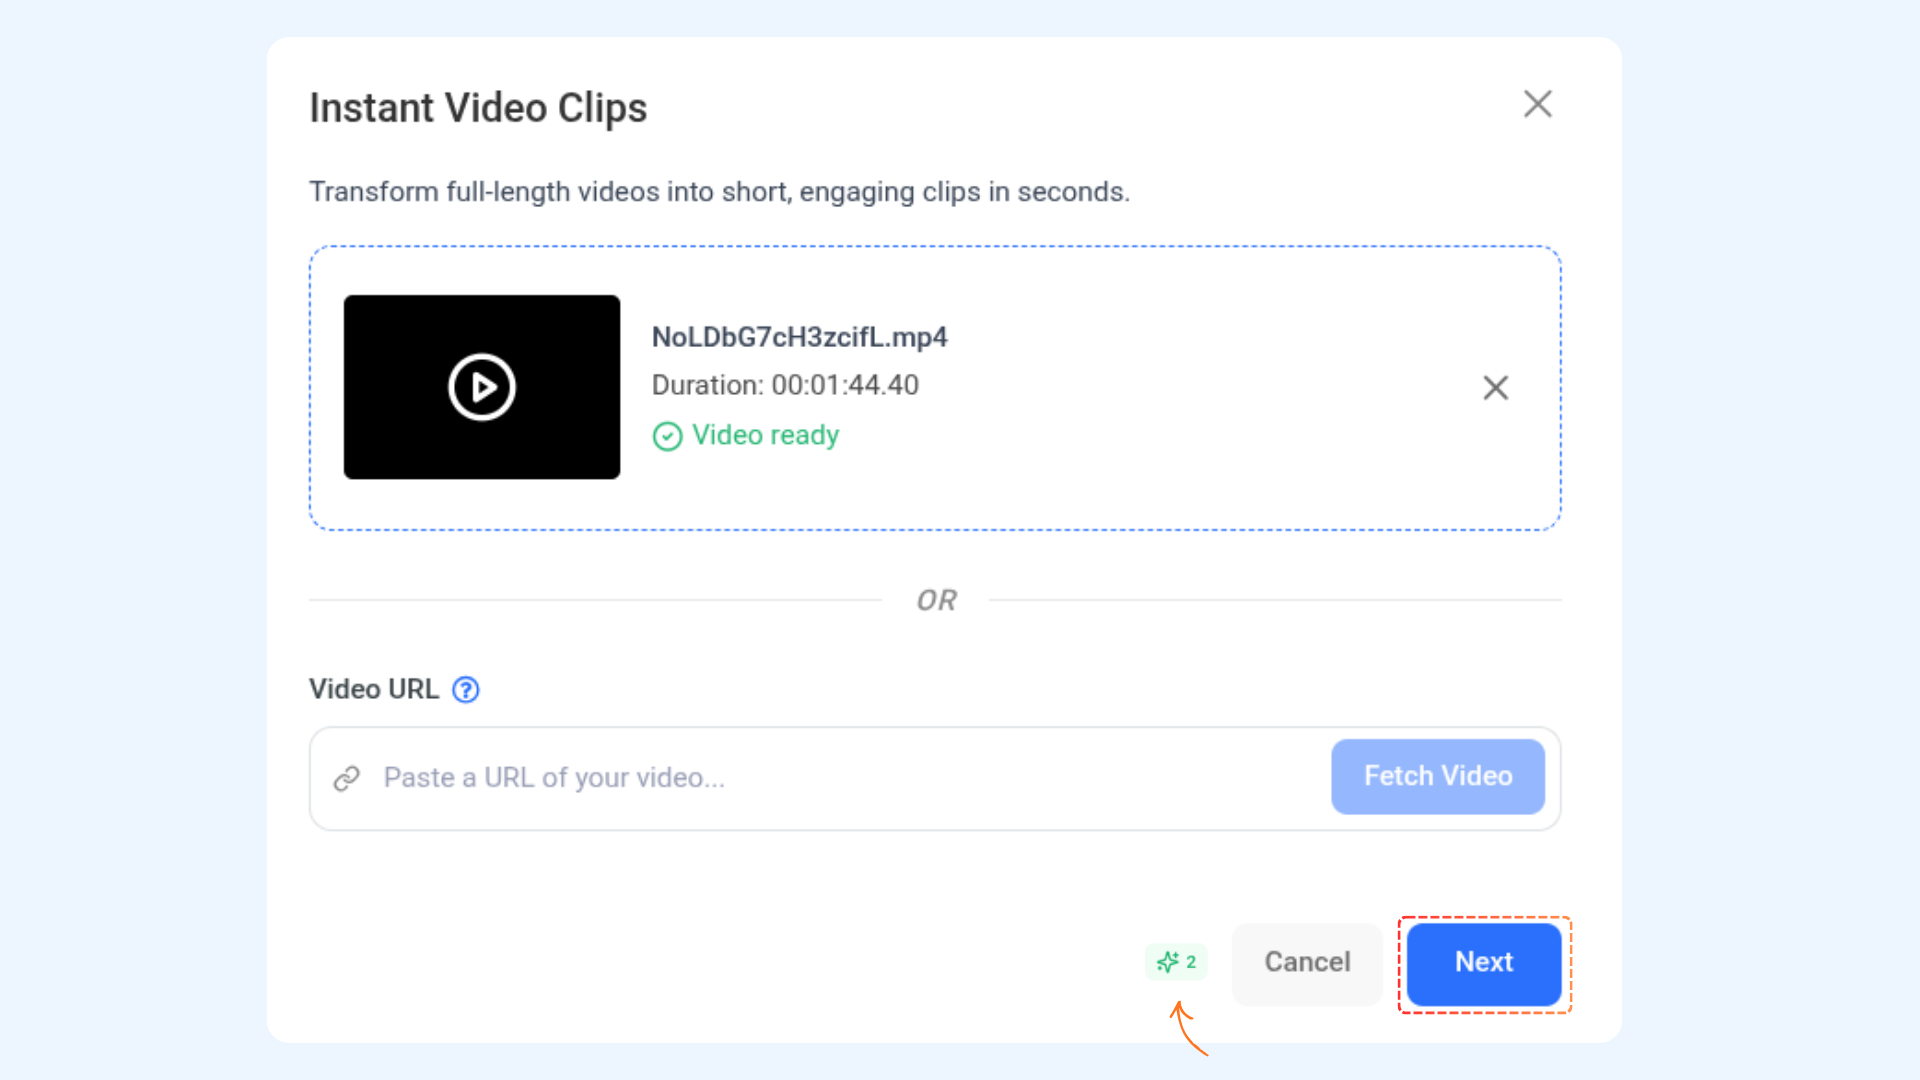
Once the video is uploaded or fetched successfully, click Next.
Clip Generation Settings
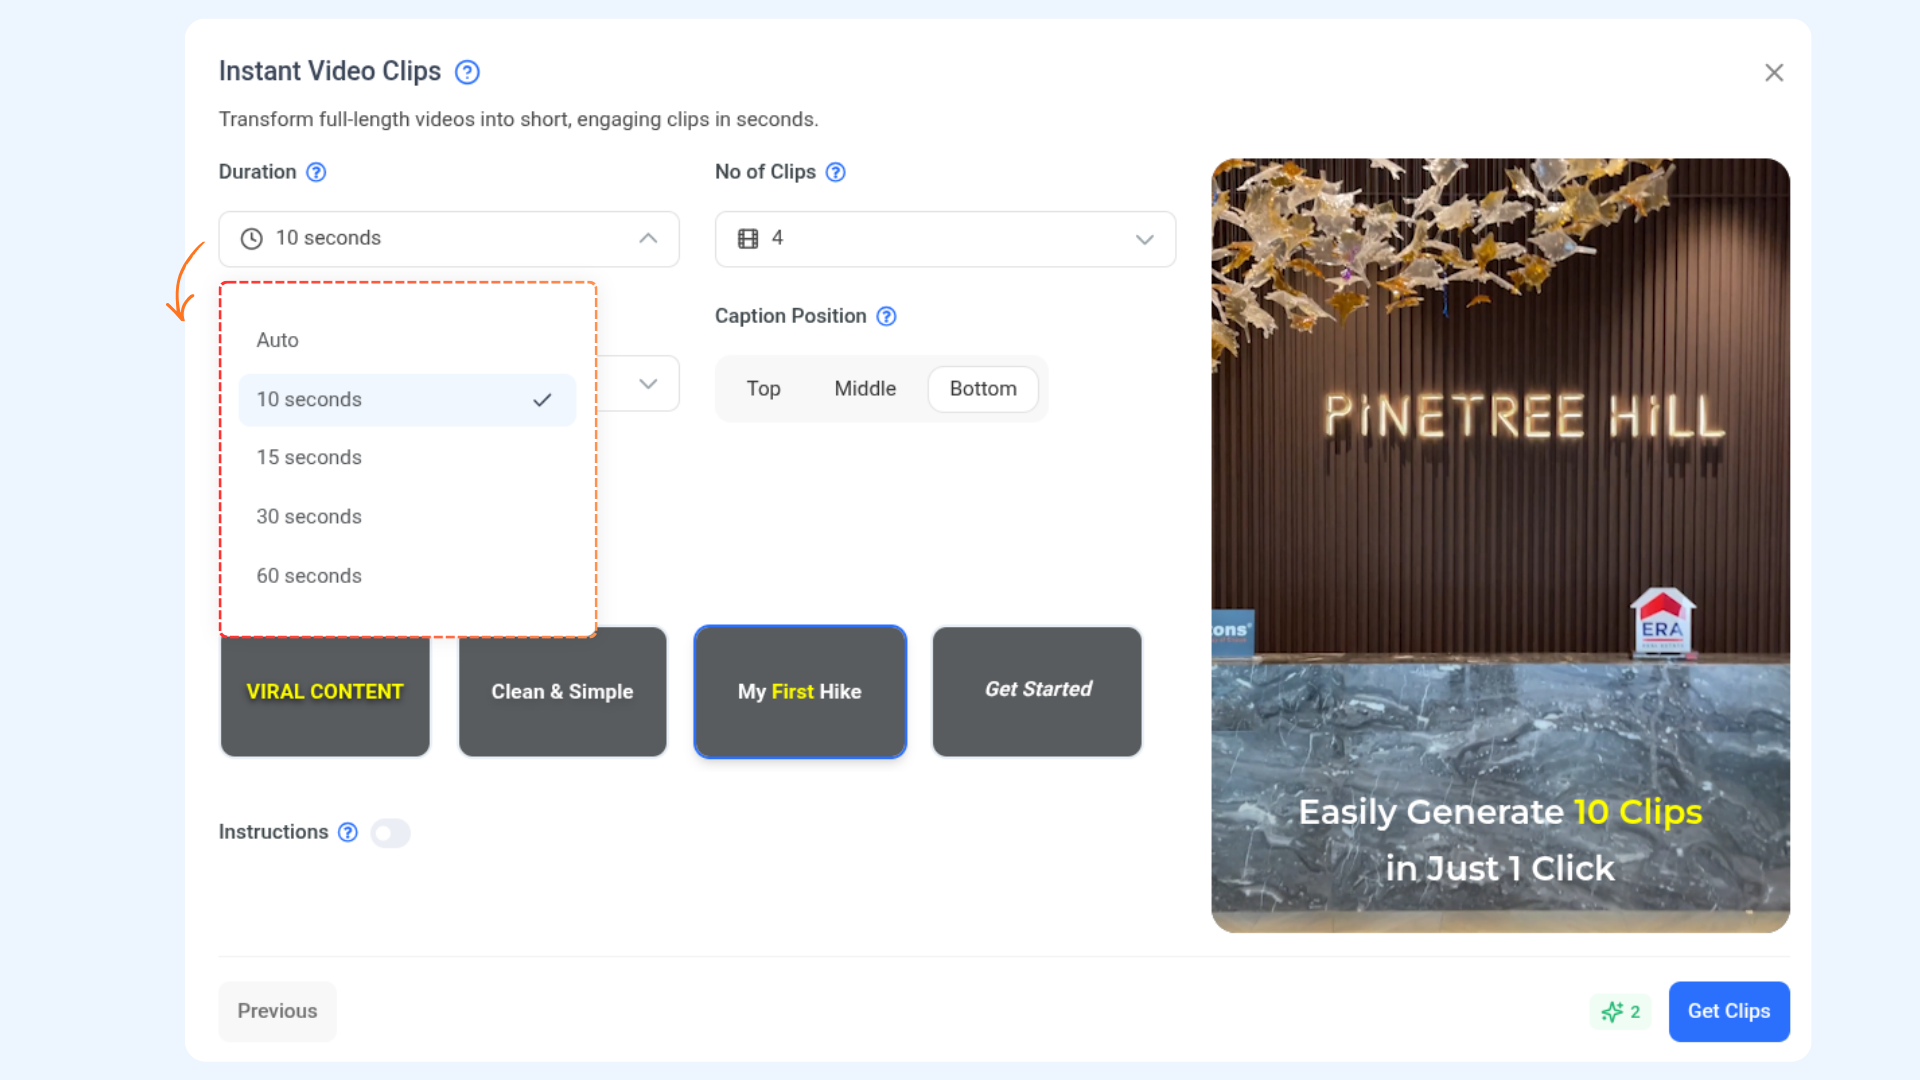
Customize how AI generates your clips using the following options:
Duration
Select the desired length of each clip.
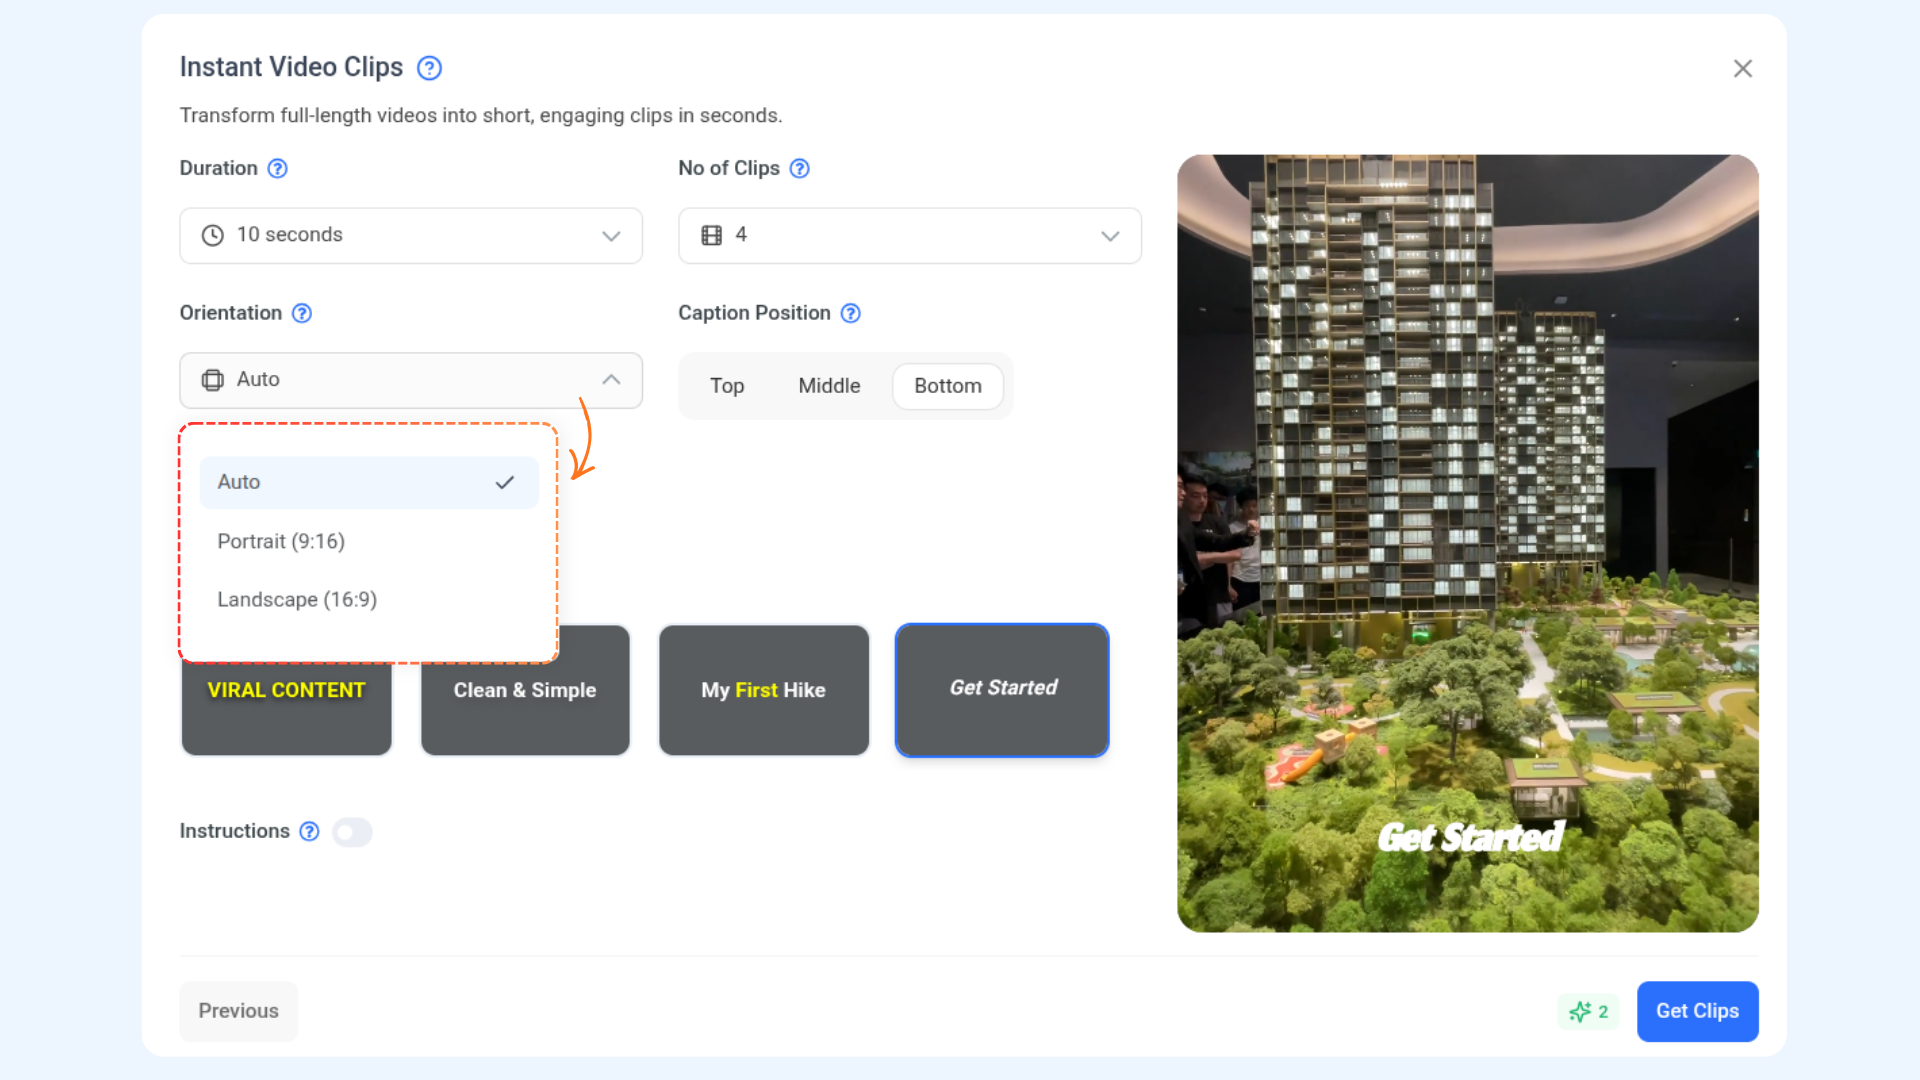
Orientation
Choose how the clip should be framed:
Portrait
Landscape
Auto
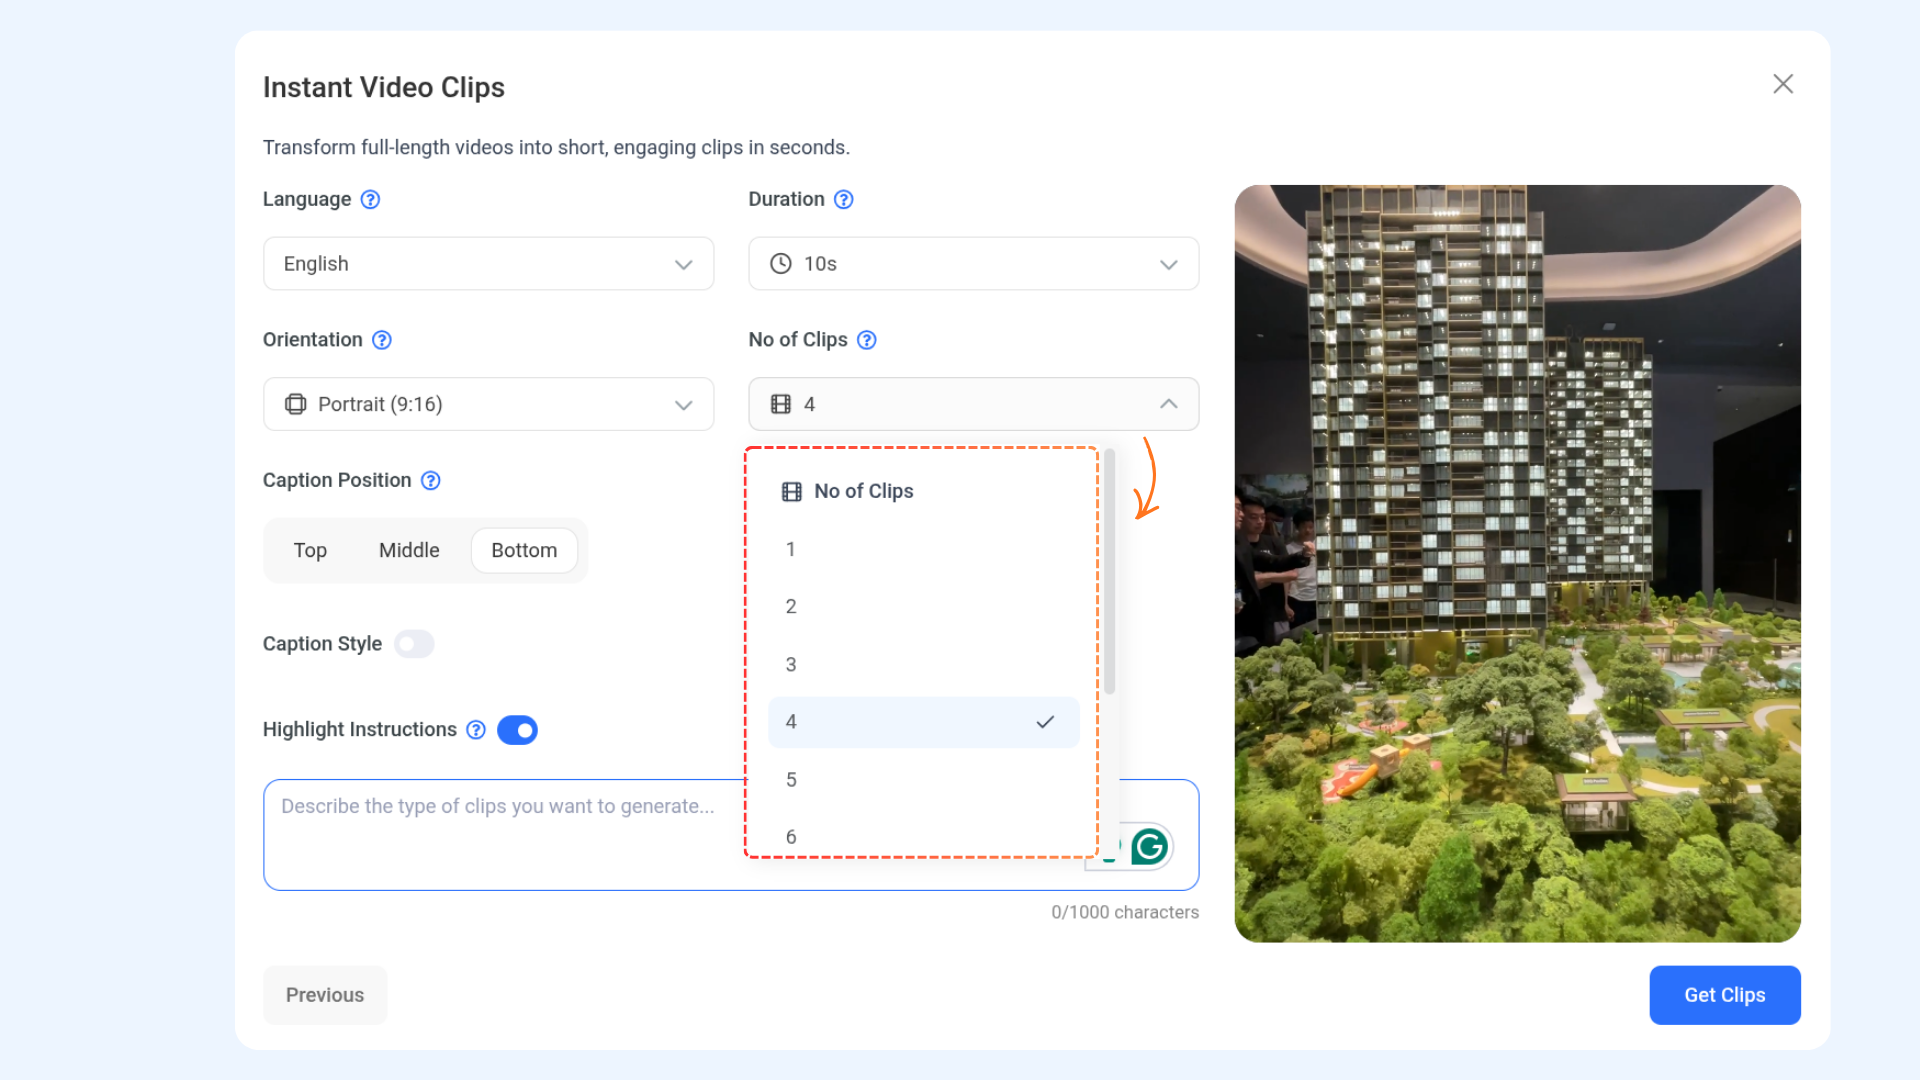
Number of Clips
Select how many clips you want AI to extract (from 1 to 10).
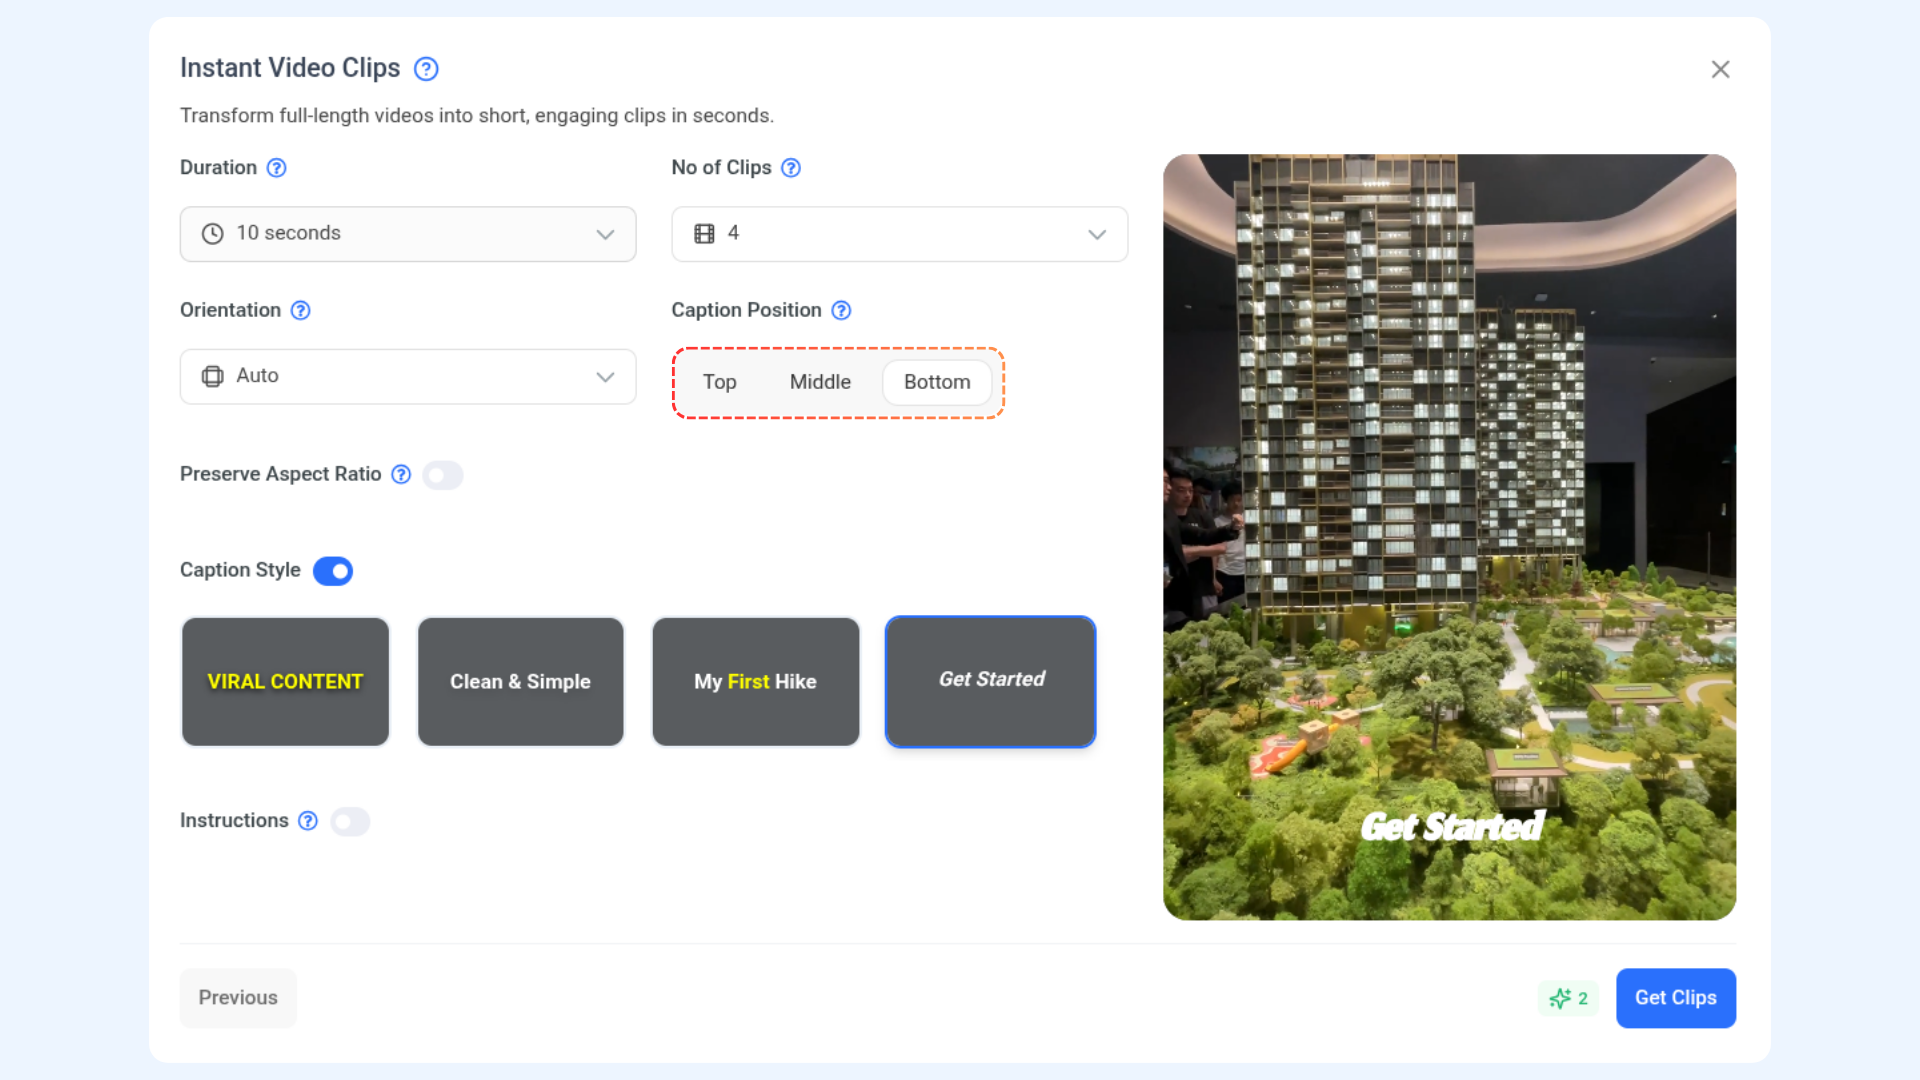
Caption Position
Choose where captions should appear:
Top
Middle
Bottom
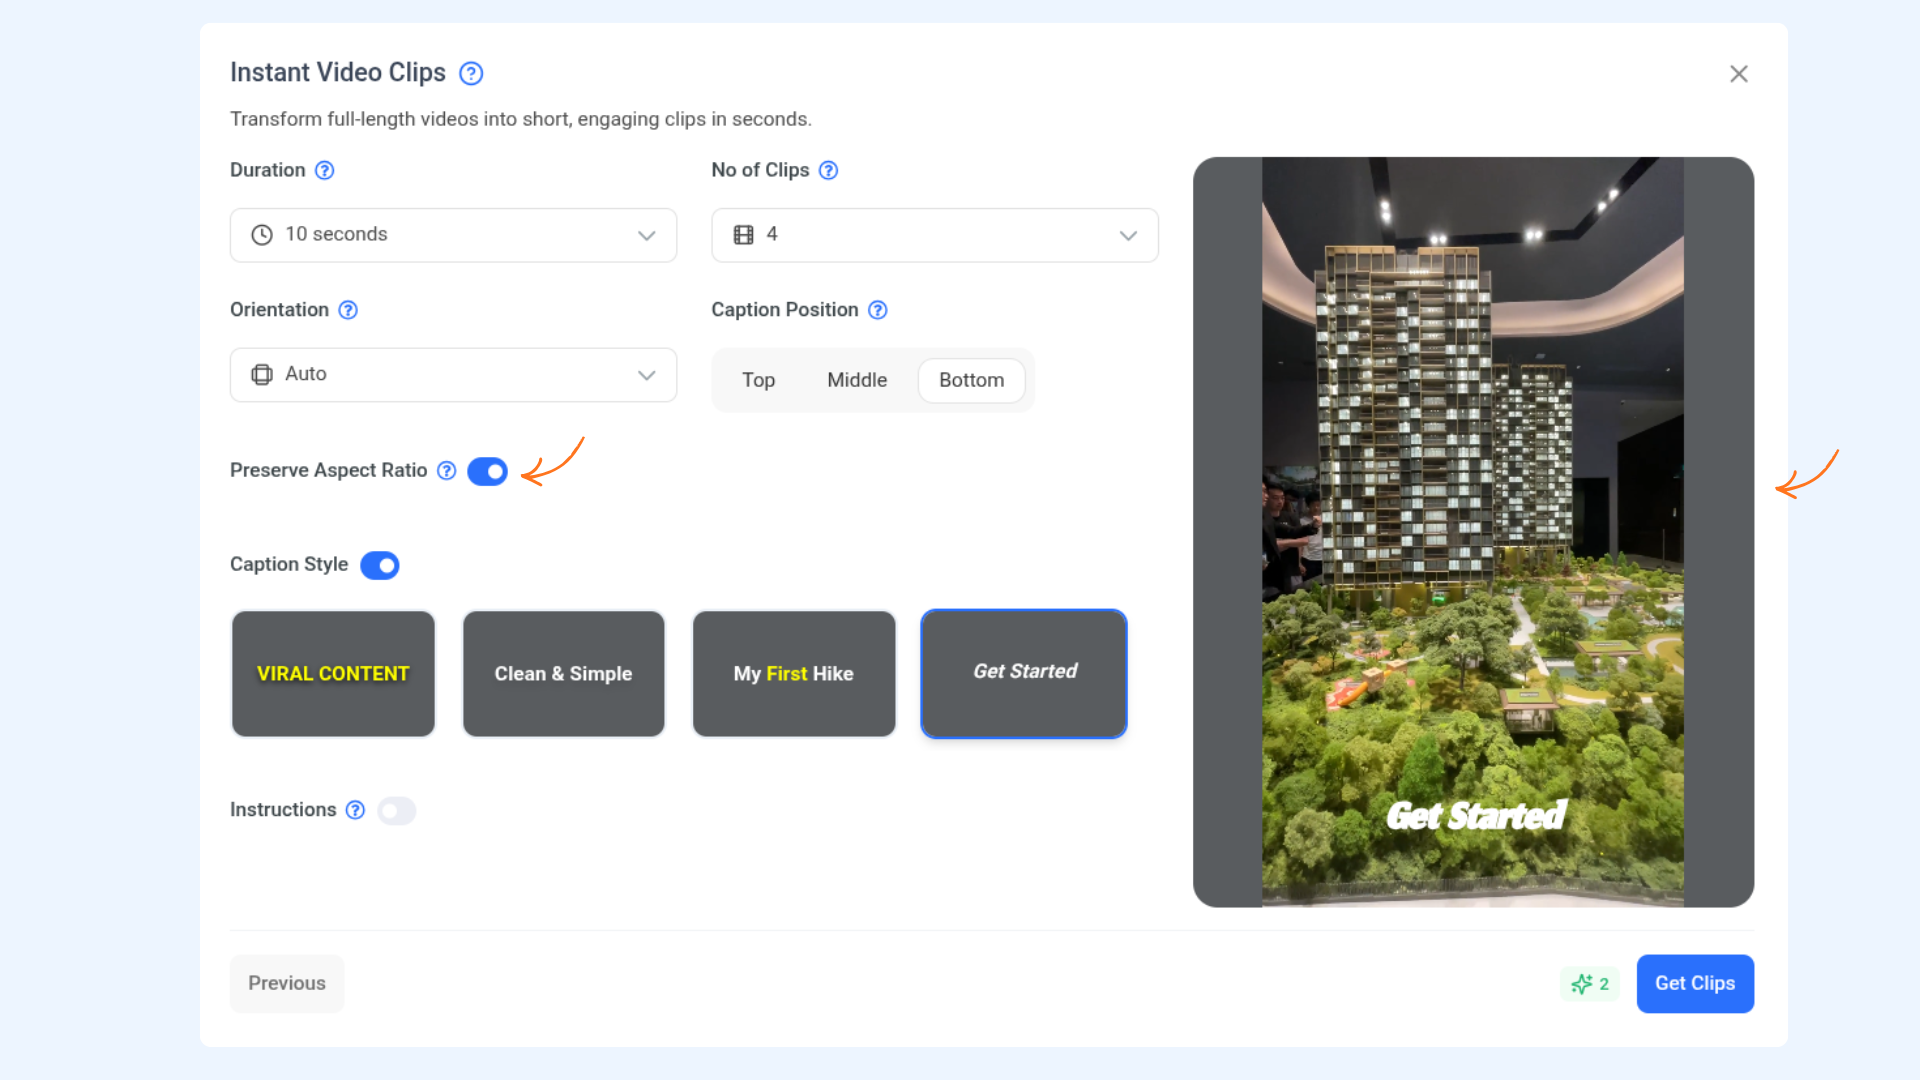
Preserve Aspect Ratio
Enable this toggle to maintain the original aspect ratio of the video.
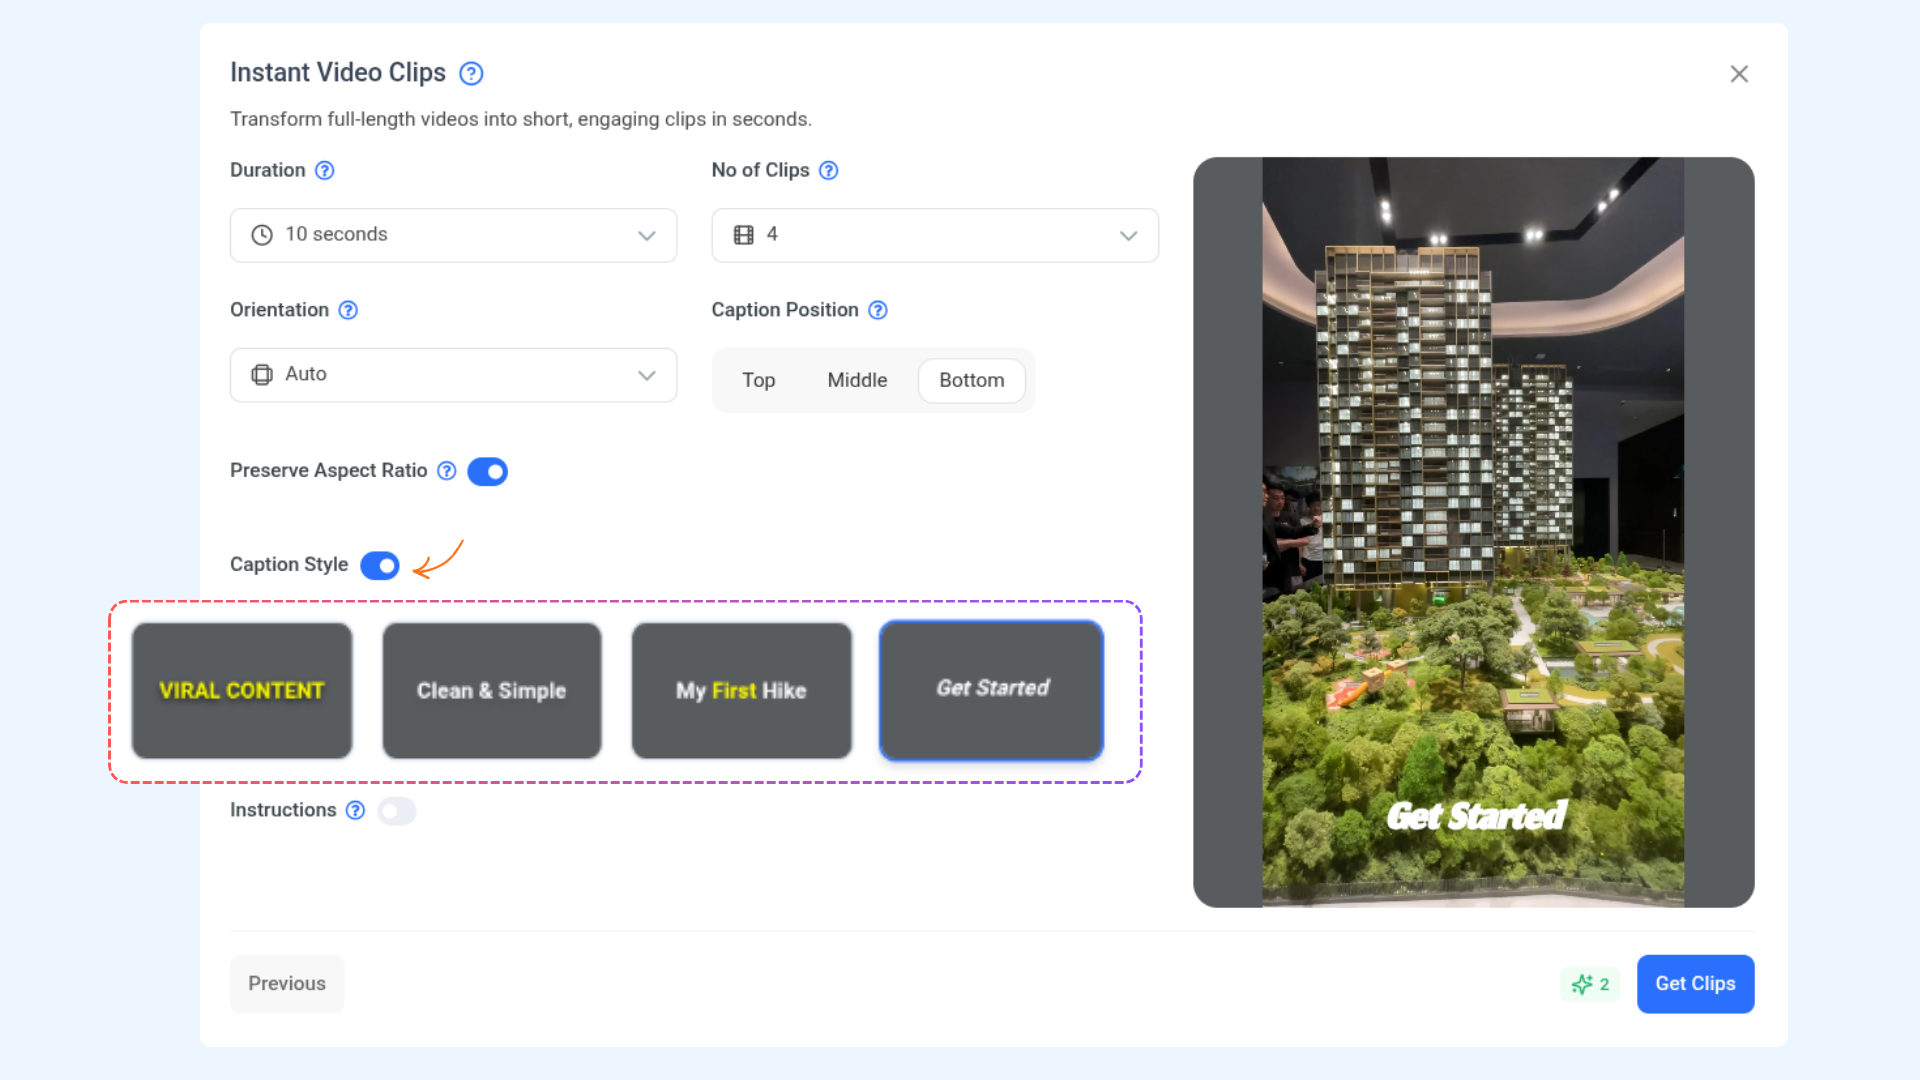
Caption Style
Enable the caption style toggle to choose from different visual styles.
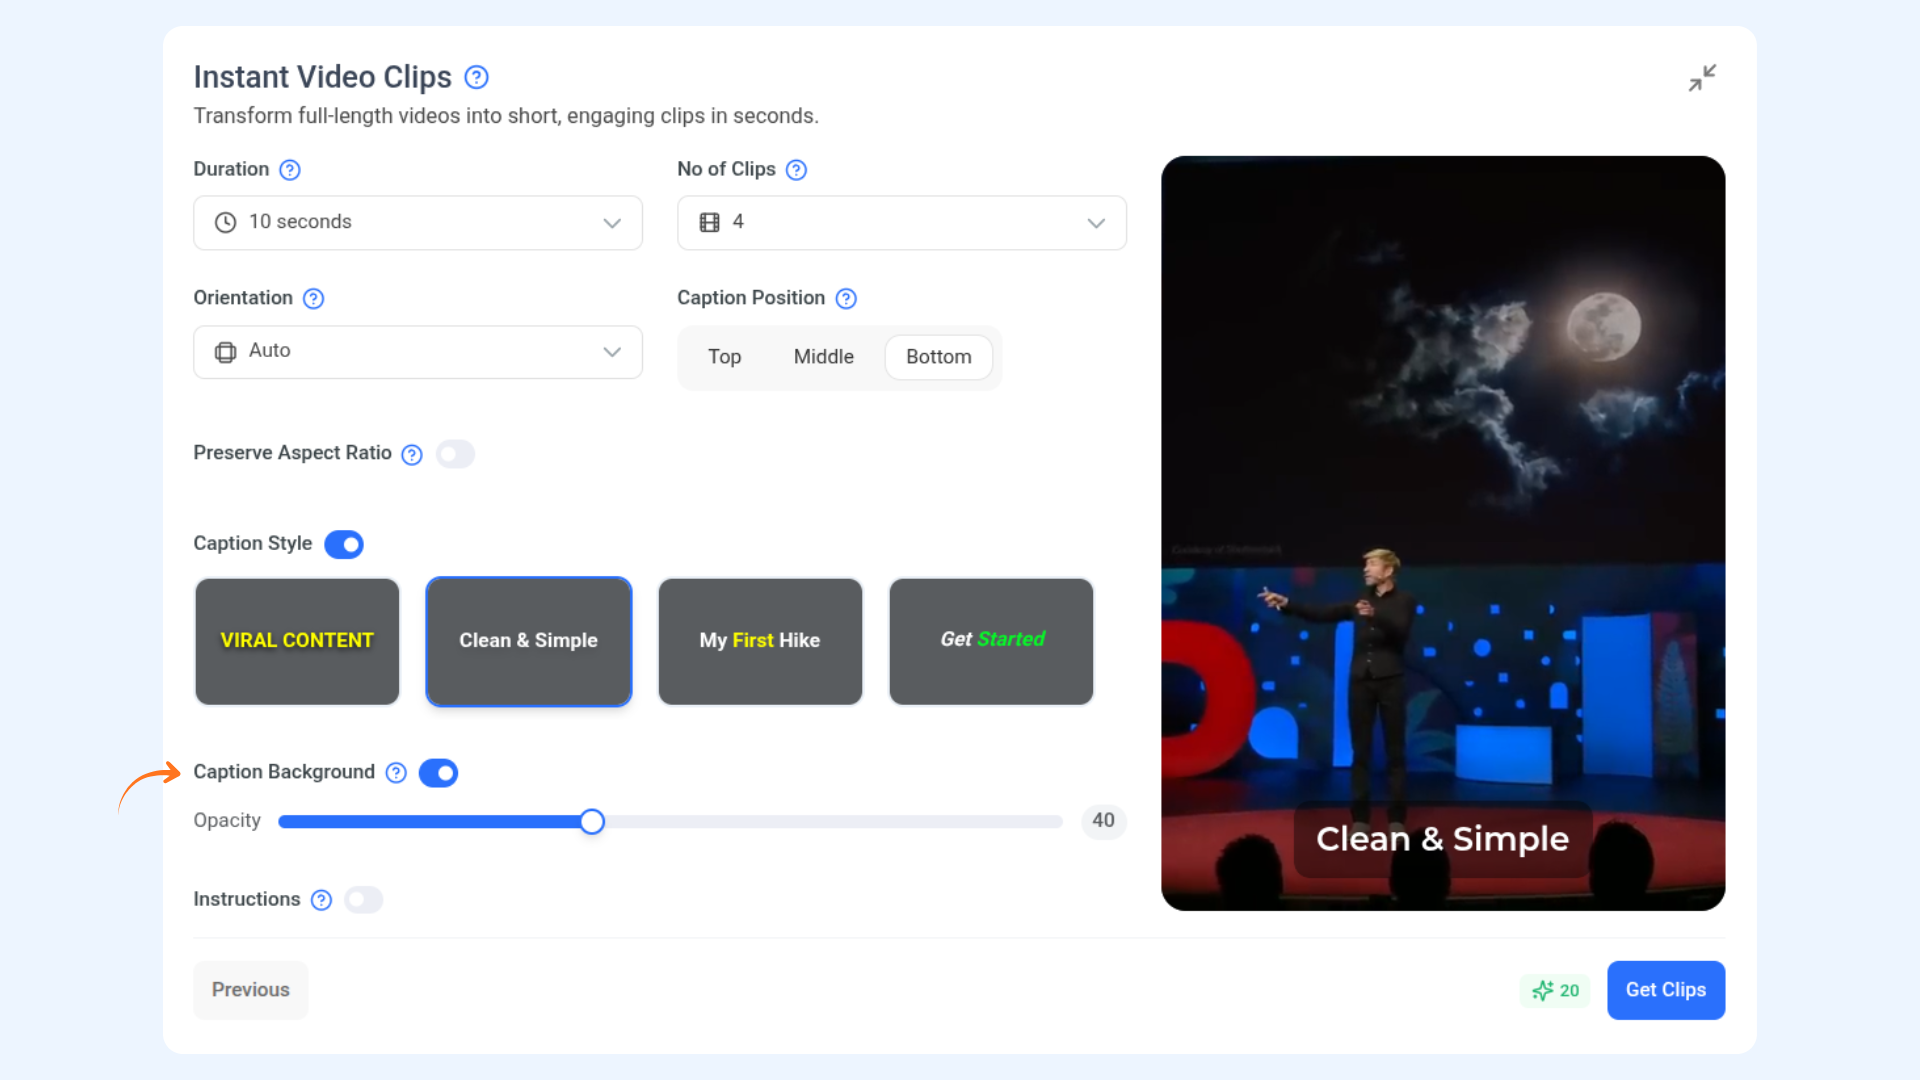
Caption Background
Control the opacity of your captions’ background while the video plays. Adjusting this helps make the text more readable without obscuring the video content.
Slide the opacity control to make the caption background more or less transparent
Helps maintain readability while keeping video visuals visible
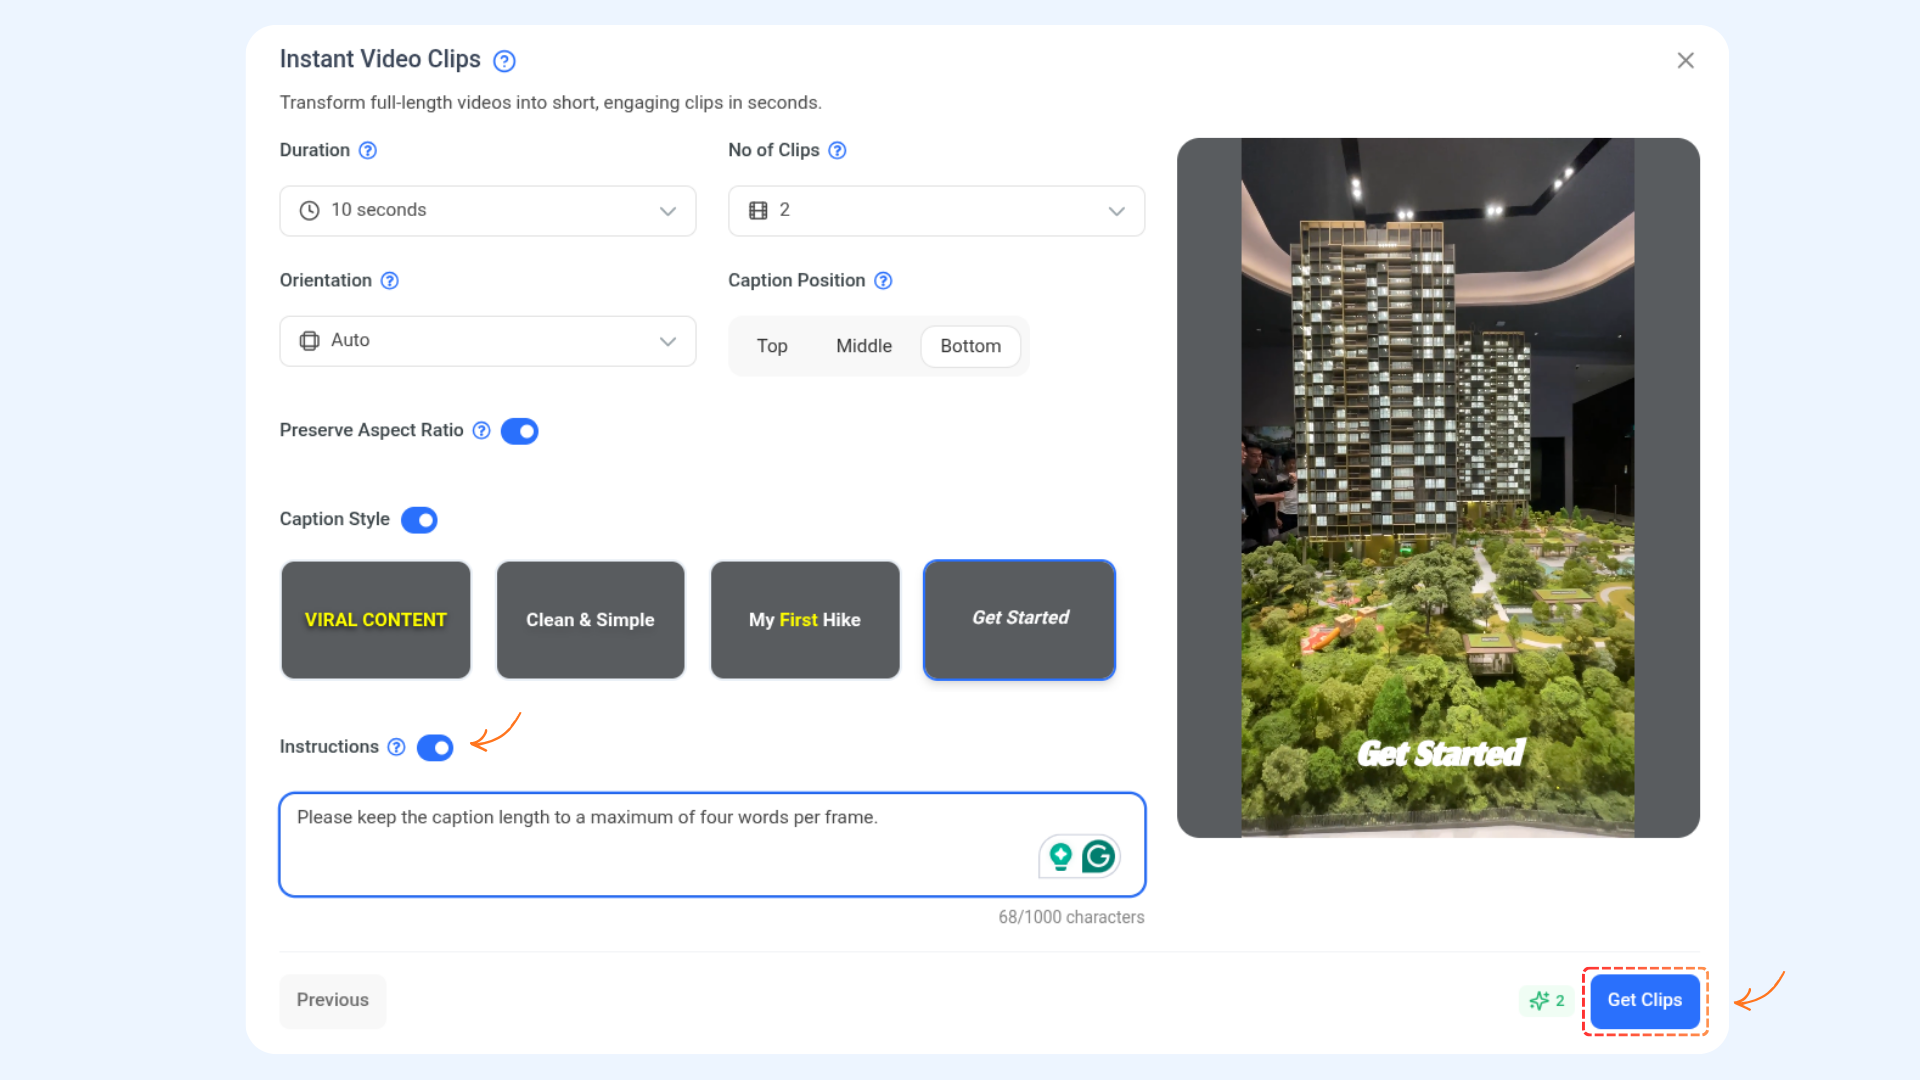
Instructions (Optional)
Enable this toggle to guide AI on the type of moments you want, such as:
Hooks
Tips
Funny moments
Key insights
You can also add a short description to help AI extract more relevant clips.
Get Clips
When everything is set, click Get Clips. AI will process your video and generate highlights.
Review Generated Clips
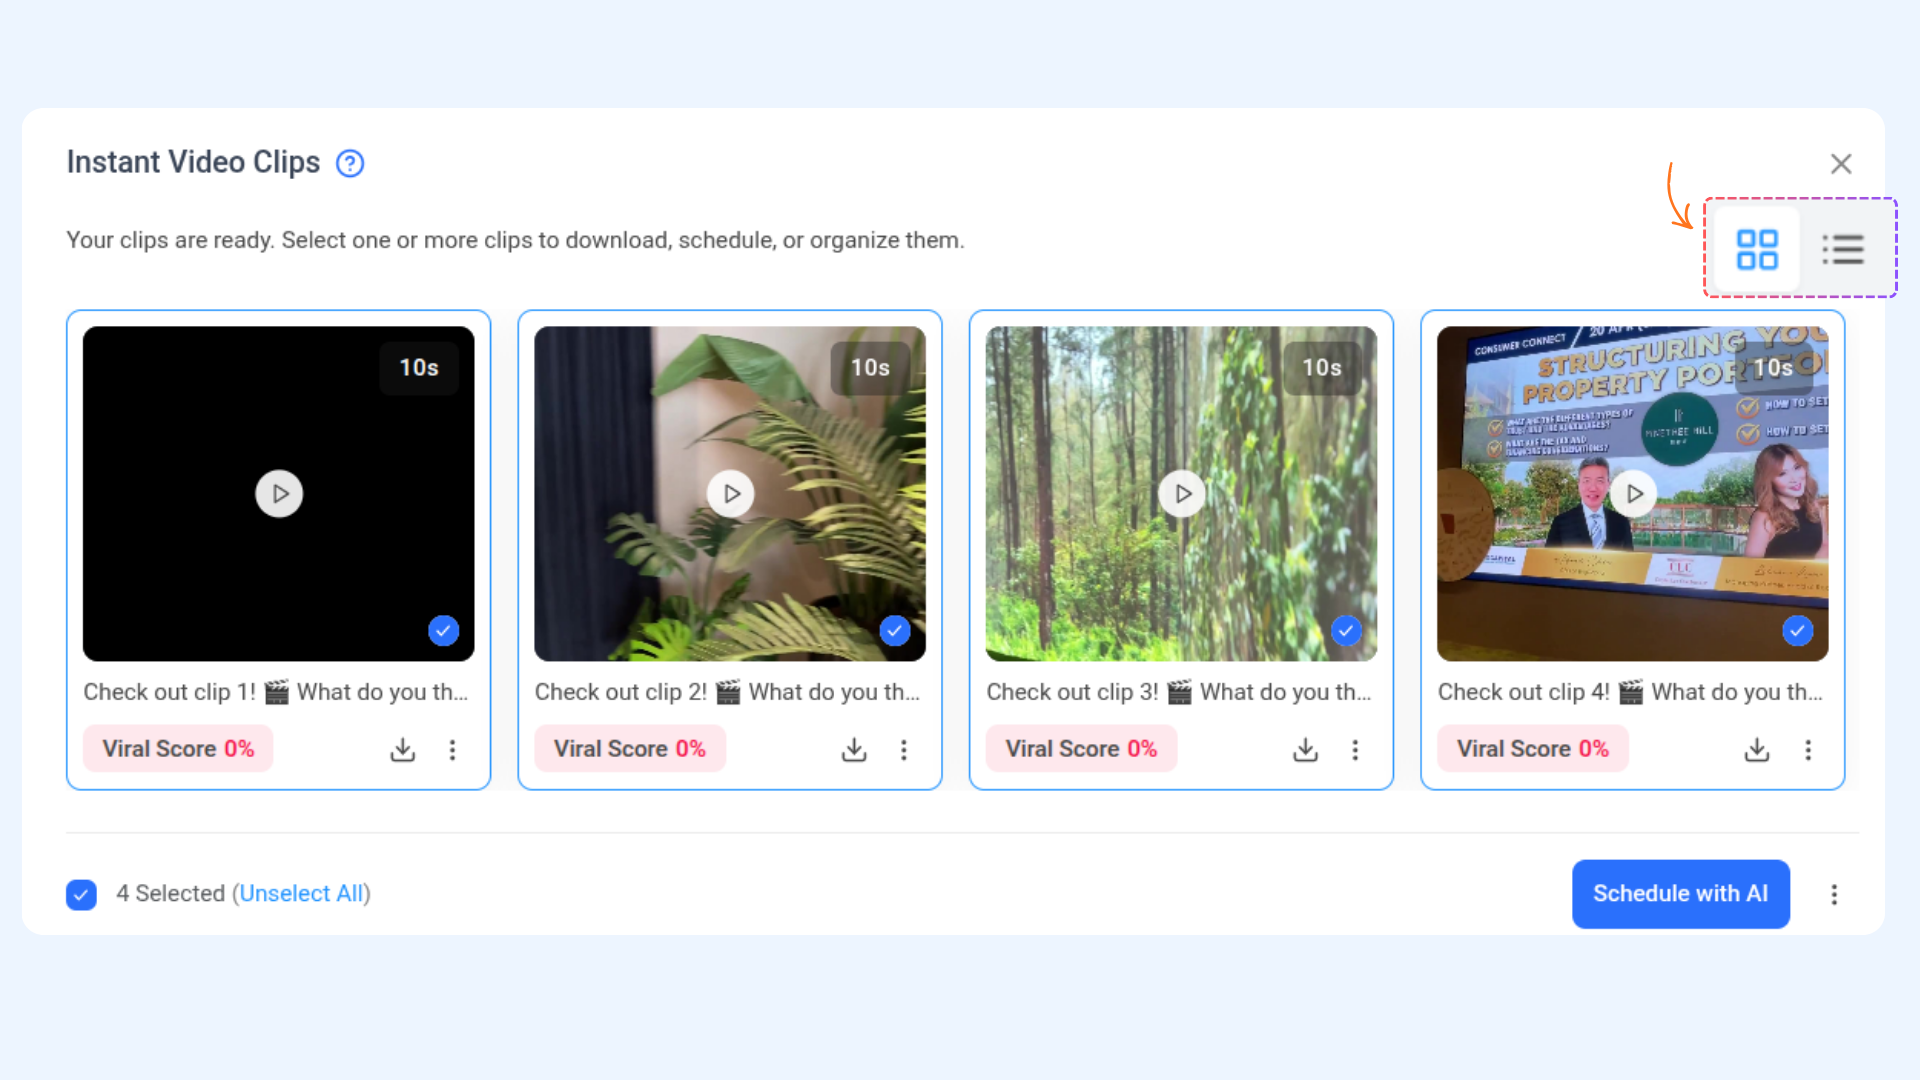
Once processing is complete, the generated clips are displayed on the results screen.
Switch Between Views
You can switch between the following views to review your clips:
Grid View – Ideal for visual previews of each clip
List View – Displays clips in a more detailed, structured layout
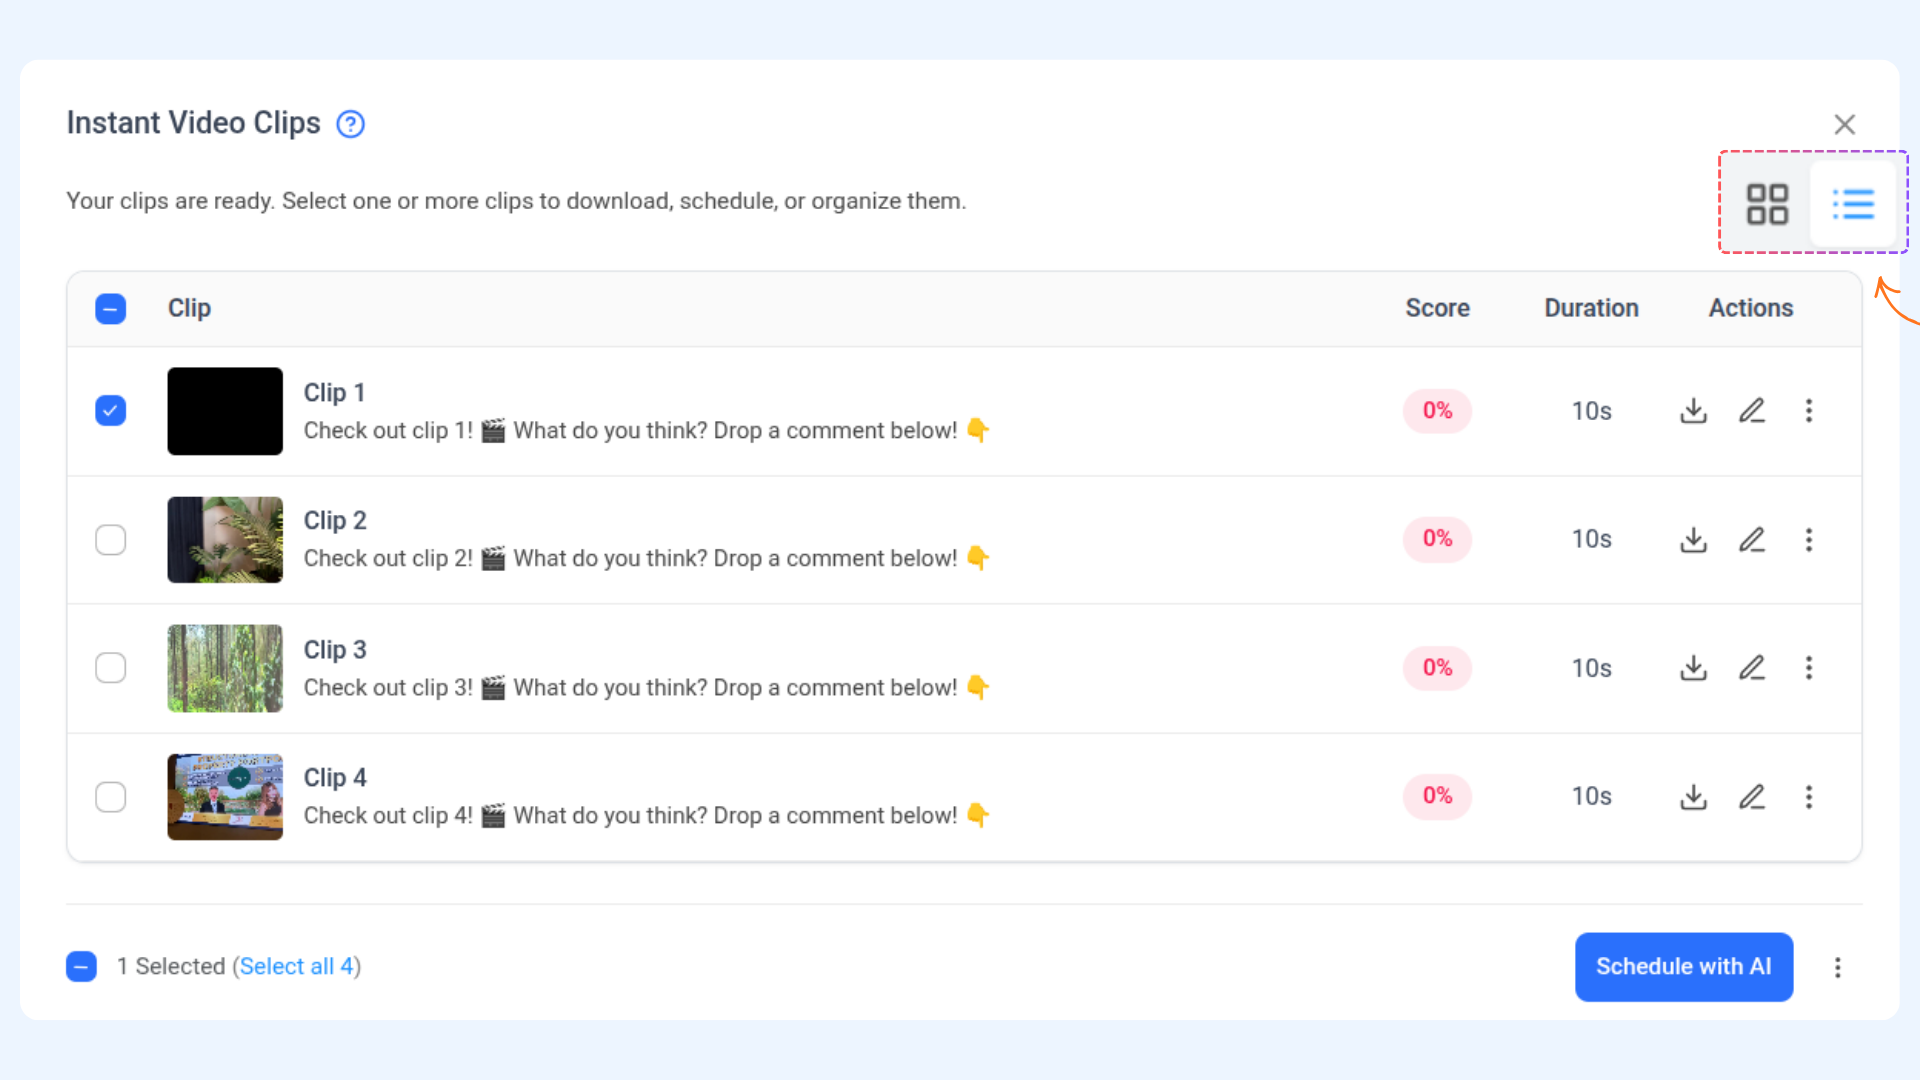
Clip Details
Each generated clip includes:
An AI-generated title
A suggested caption
A virality score to help estimate potential performance
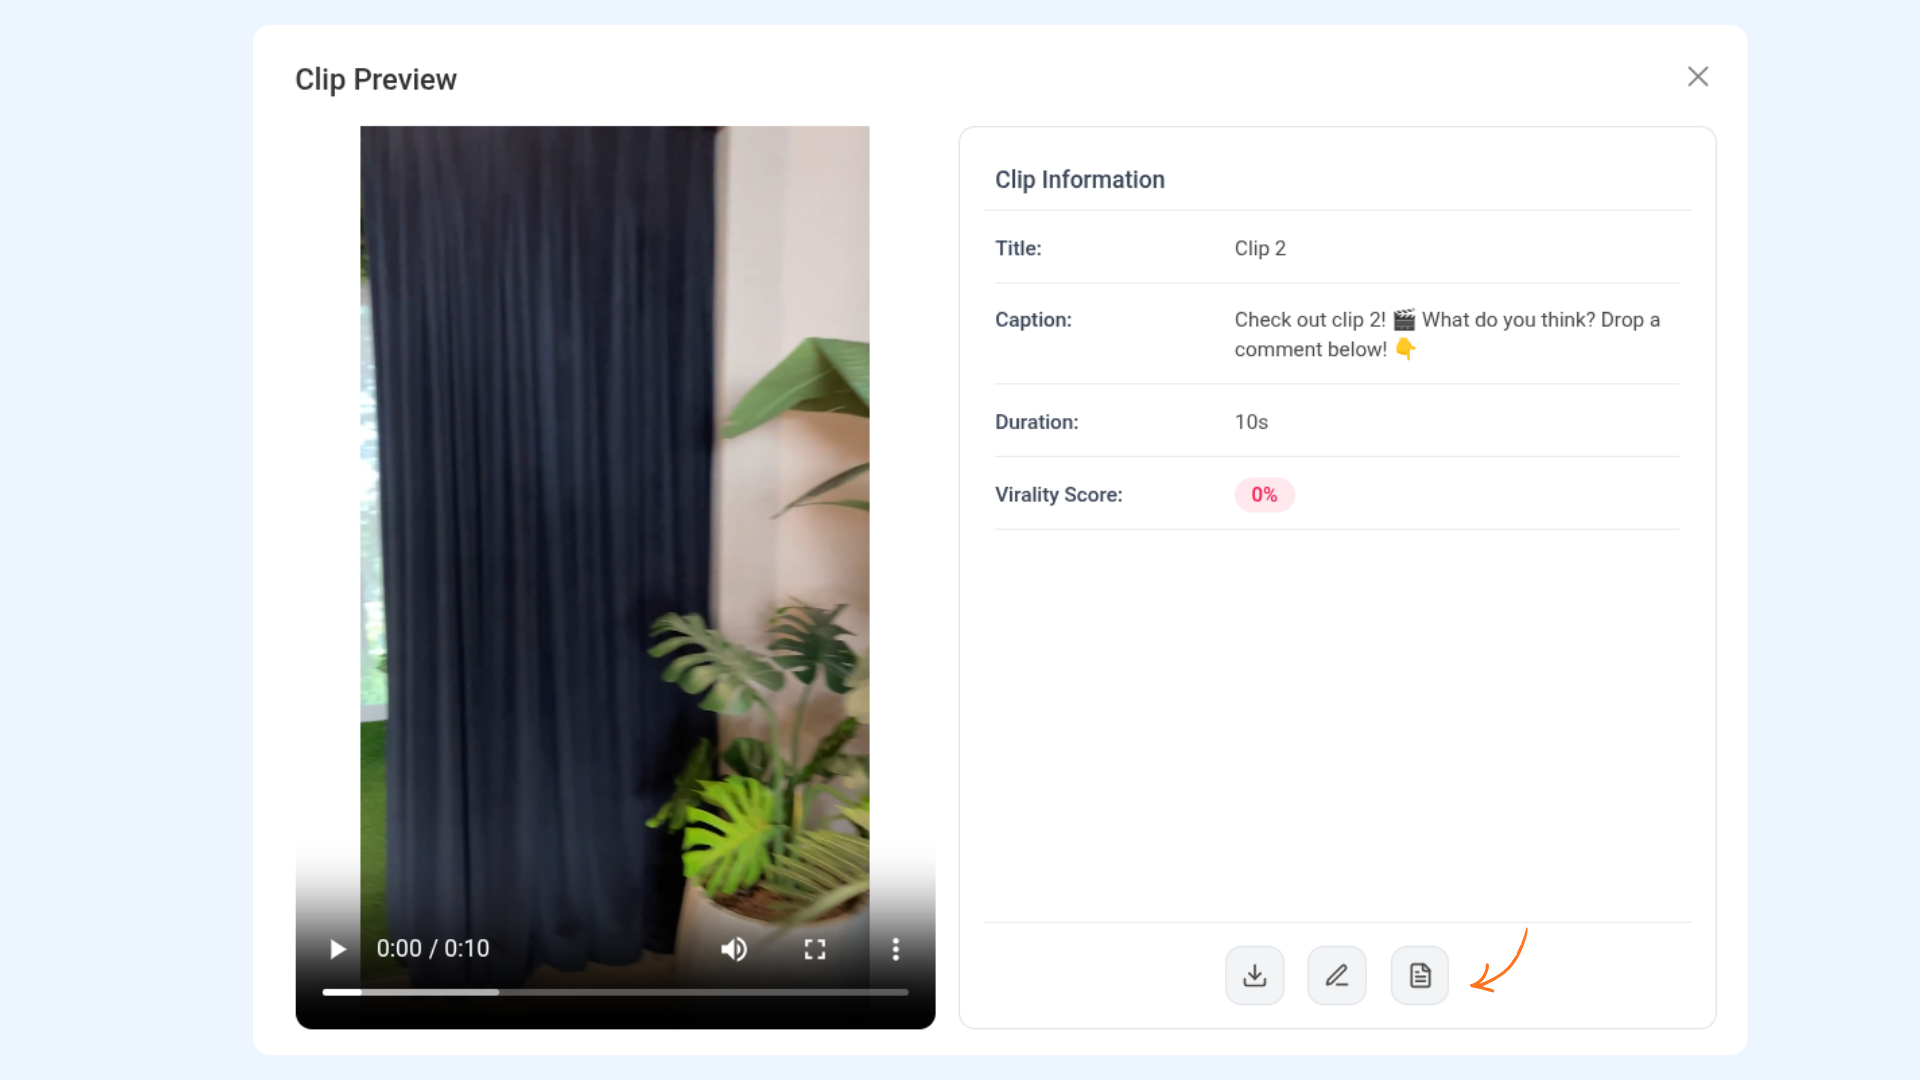
Manage, Schedule, or Download Clips
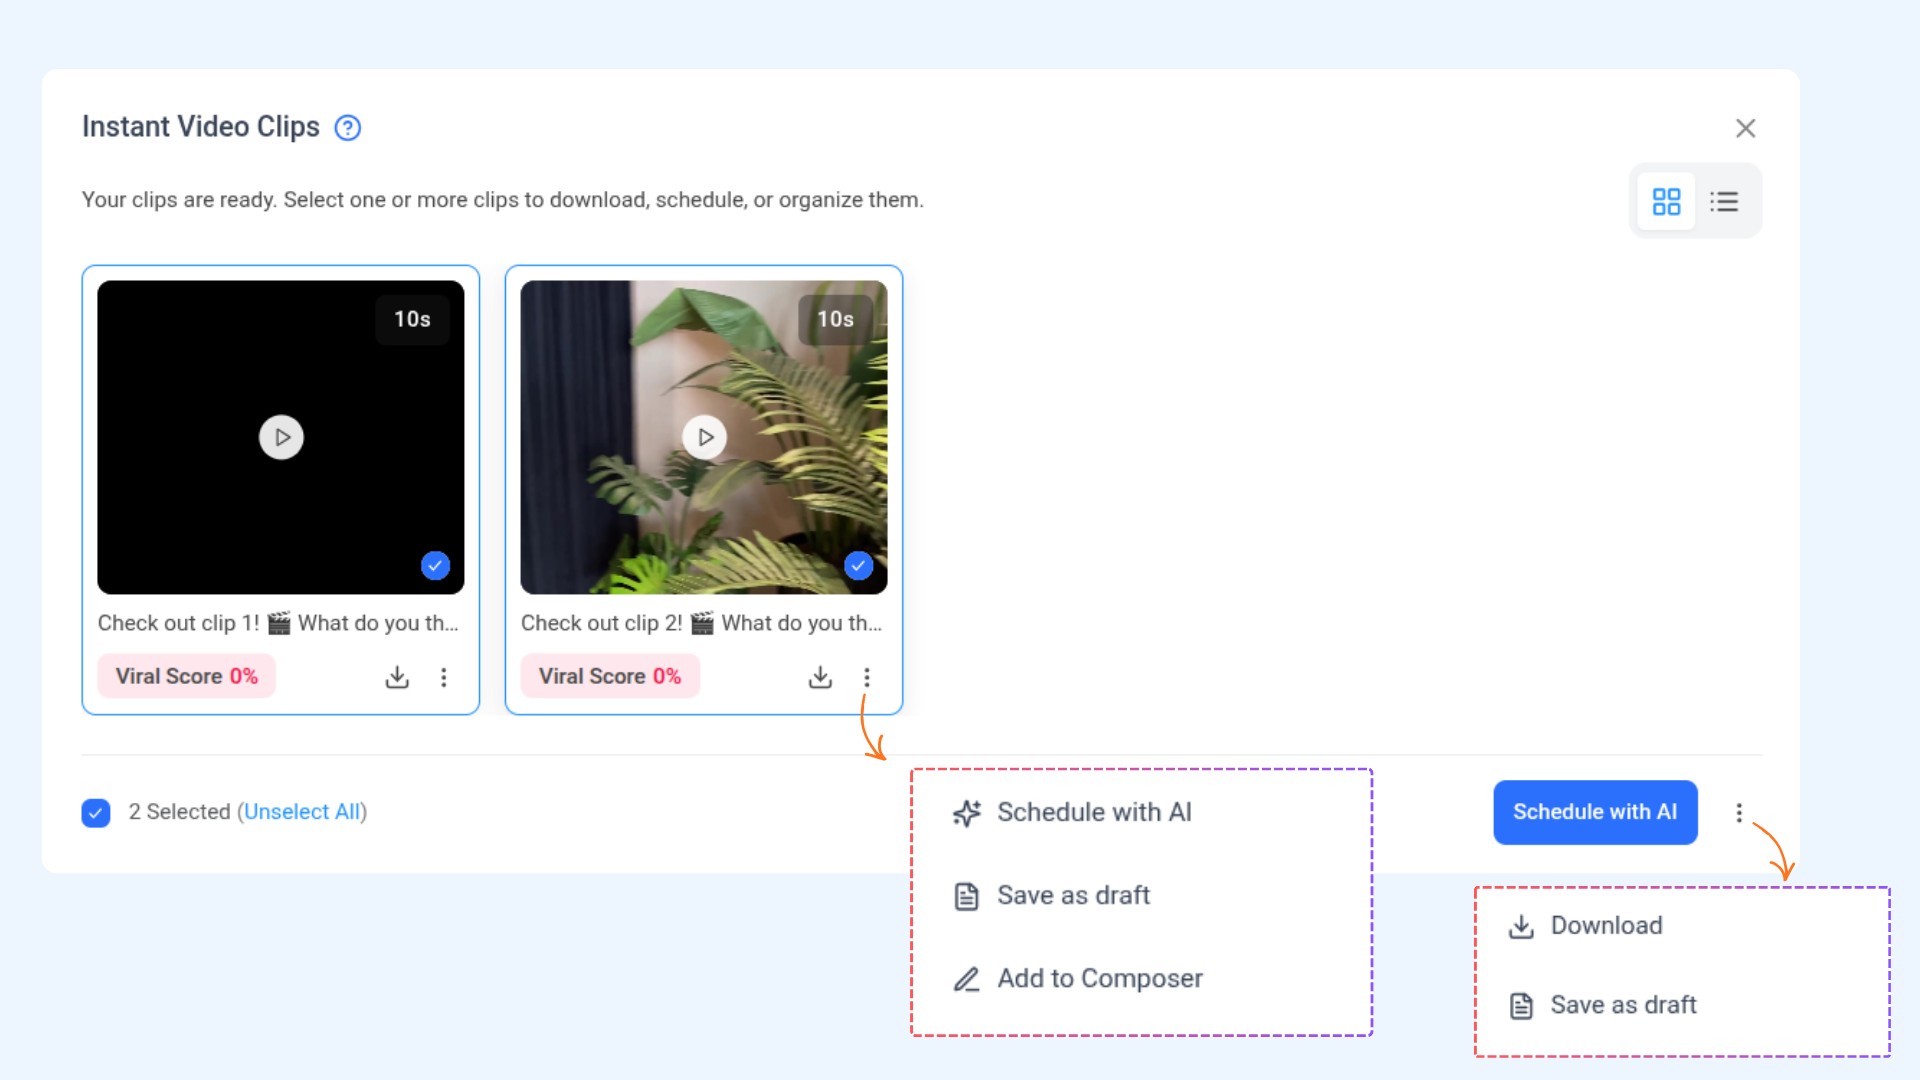
Individual Clip Actions
For each clip, you can:
Schedule with AI
Add it to the Composer
Save it as a draft
Download it
Bulk Actions
You can also select multiple clips at once and perform actions in bulk, such as:
Downloading multiple clips
Saving selected clips as drafts
Schedule with AI
FAQs
What type of videos work best for Video Clips / Highlights?
Videos with clear dialogue or speech work best. Clips with strong hooks, tips, or key moments usually generate better results.
Is there a minimum video length required?
Yes. Videos must be at least 30 seconds long to generate clips.
Are videos without audio supported?
No. Videos must include audio. Audio-less videos are not supported.
Can I use YouTube links to generate clips?
No. YouTube links are currently not supported.
How many clips can be generated from one video?
You can generate between 1 and 10 clips from a single video.
Can I edit or change the clips after they are generated?
You can review, download, schedule, save, or add clips to the Composer. Manual editing of the video itself is not supported within this flow.
Where are generated clips saved?
All generated stitched clips are automatically saved in the Media Library, under the Reels section.
Can I schedule clips immediately after they’re generated?
Yes. You can schedule clips individually, schedule them with AI, or save them as drafts for later use.
Was this article helpful?