

How to Manage Reports in Content Studio
At ContentStudio, managing your reports has never been easier! 🎯 Stay on top of your performance, make smarter decisions, and take full control of your analytics. This guide will walk you through everything you need to know to master your reports.
In this Article:
Accessing Reports
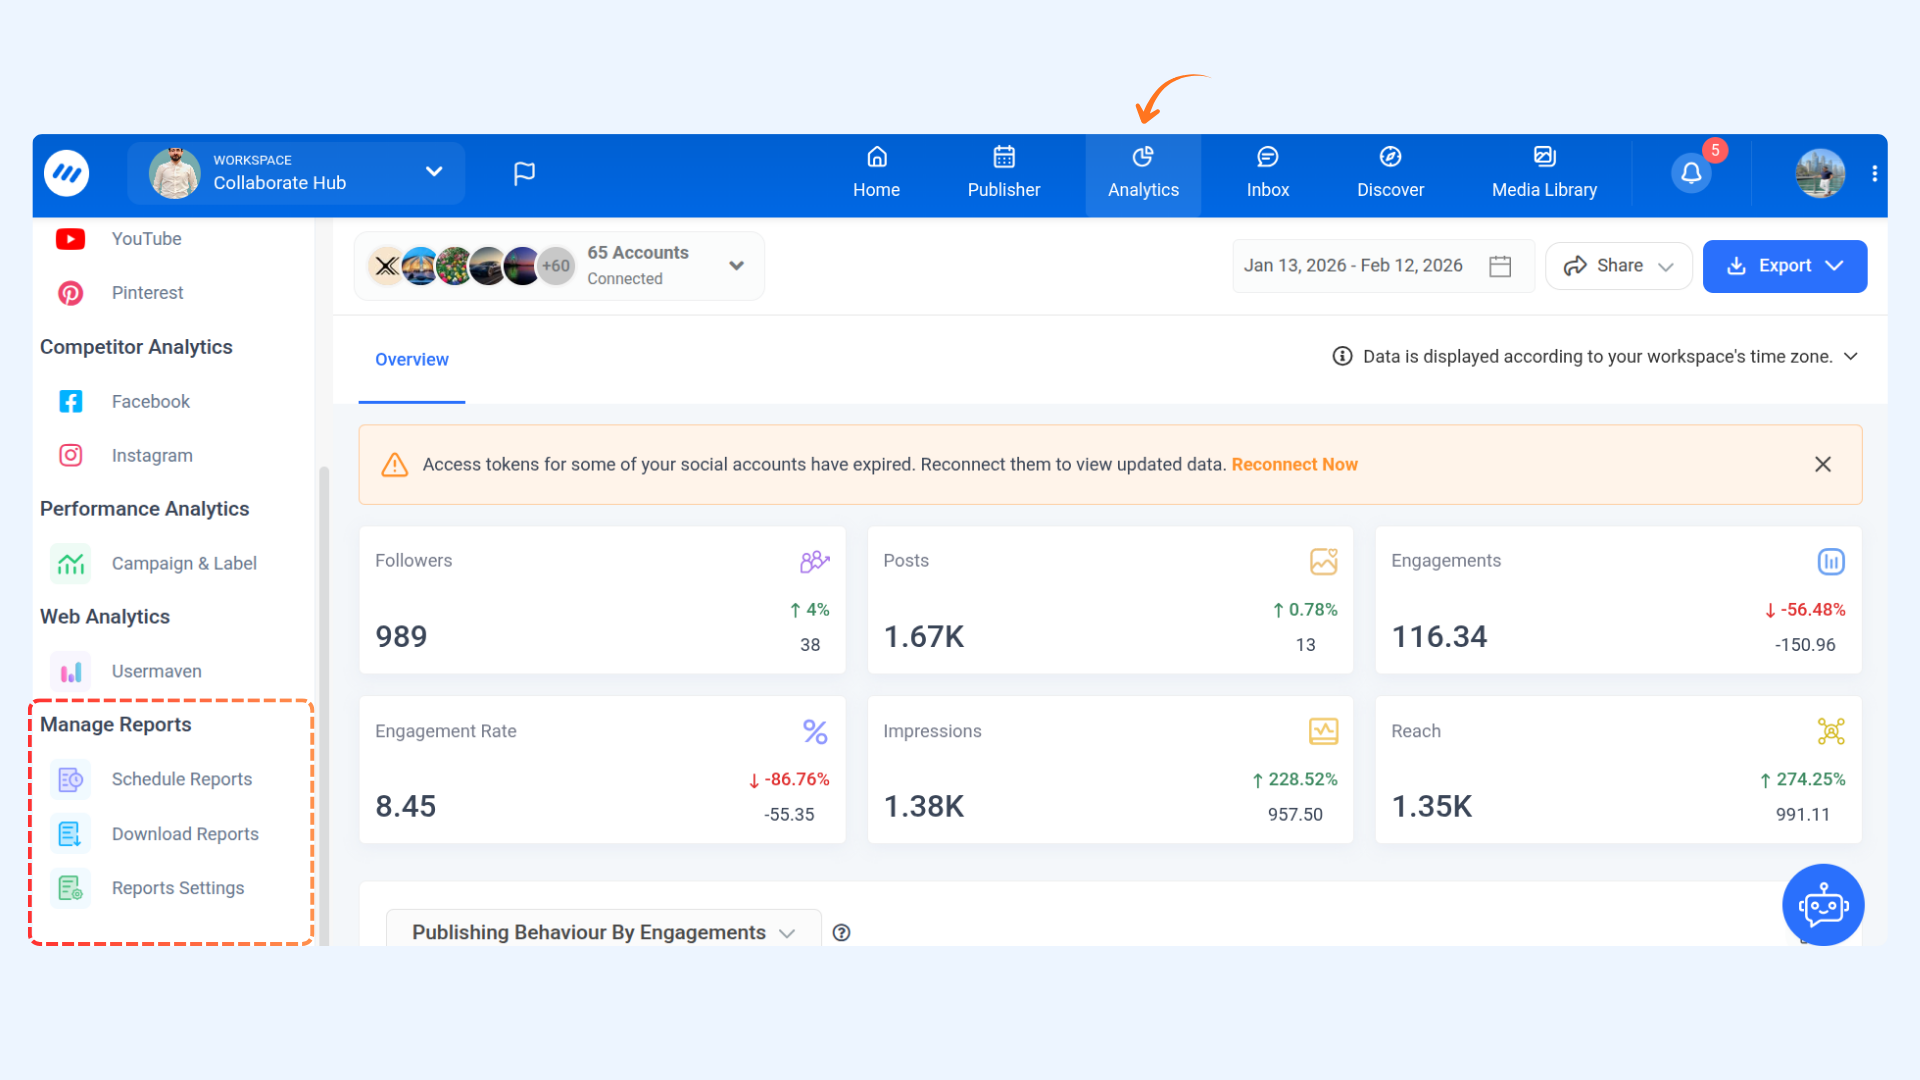
Go to the Analytics section. The left panel will show Manage Reports with three features:
Scheduled Reports
Download Reports
Reports Settings
These features give you full control over your report management.
Scheduled Reports
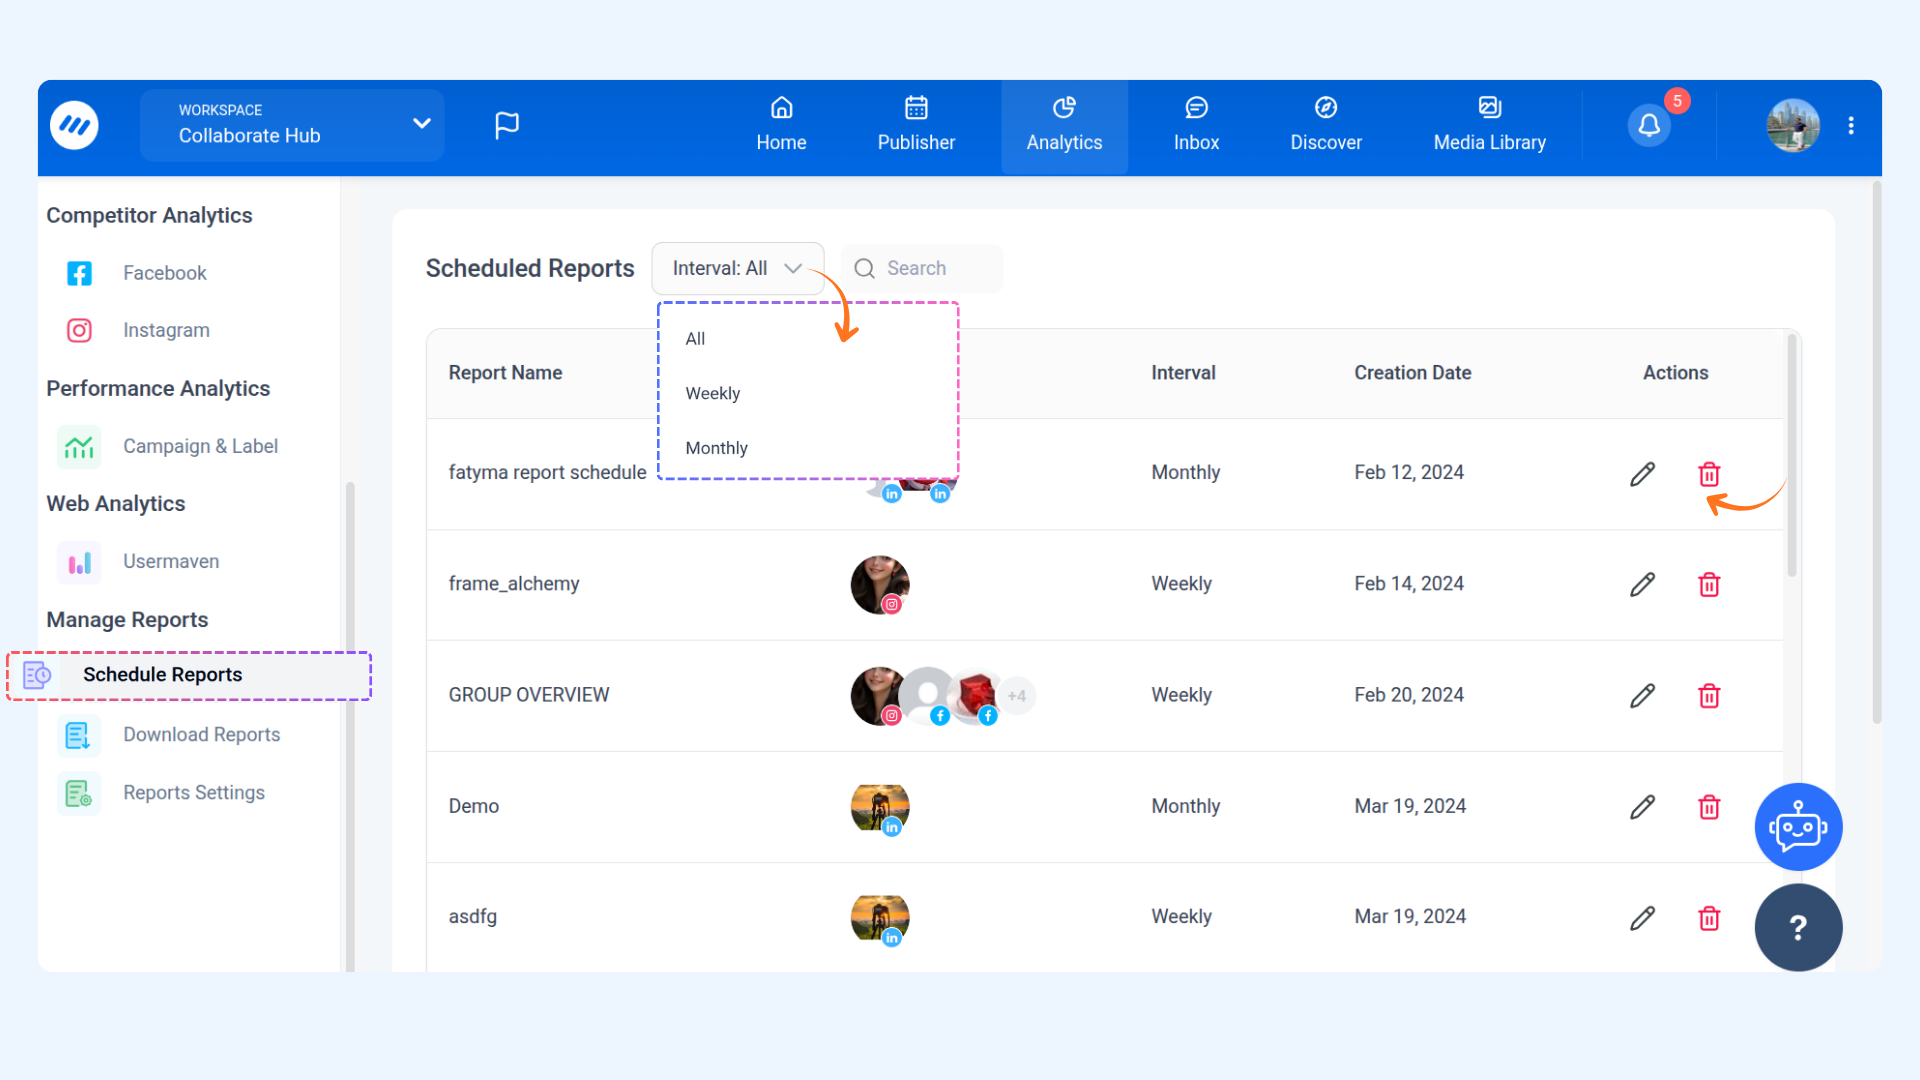
Click Scheduled Reports to see all scheduled reports. You can view:
Report Name
Social Accounts (with profile icons)
Created Date
Time Interval
Download Reports
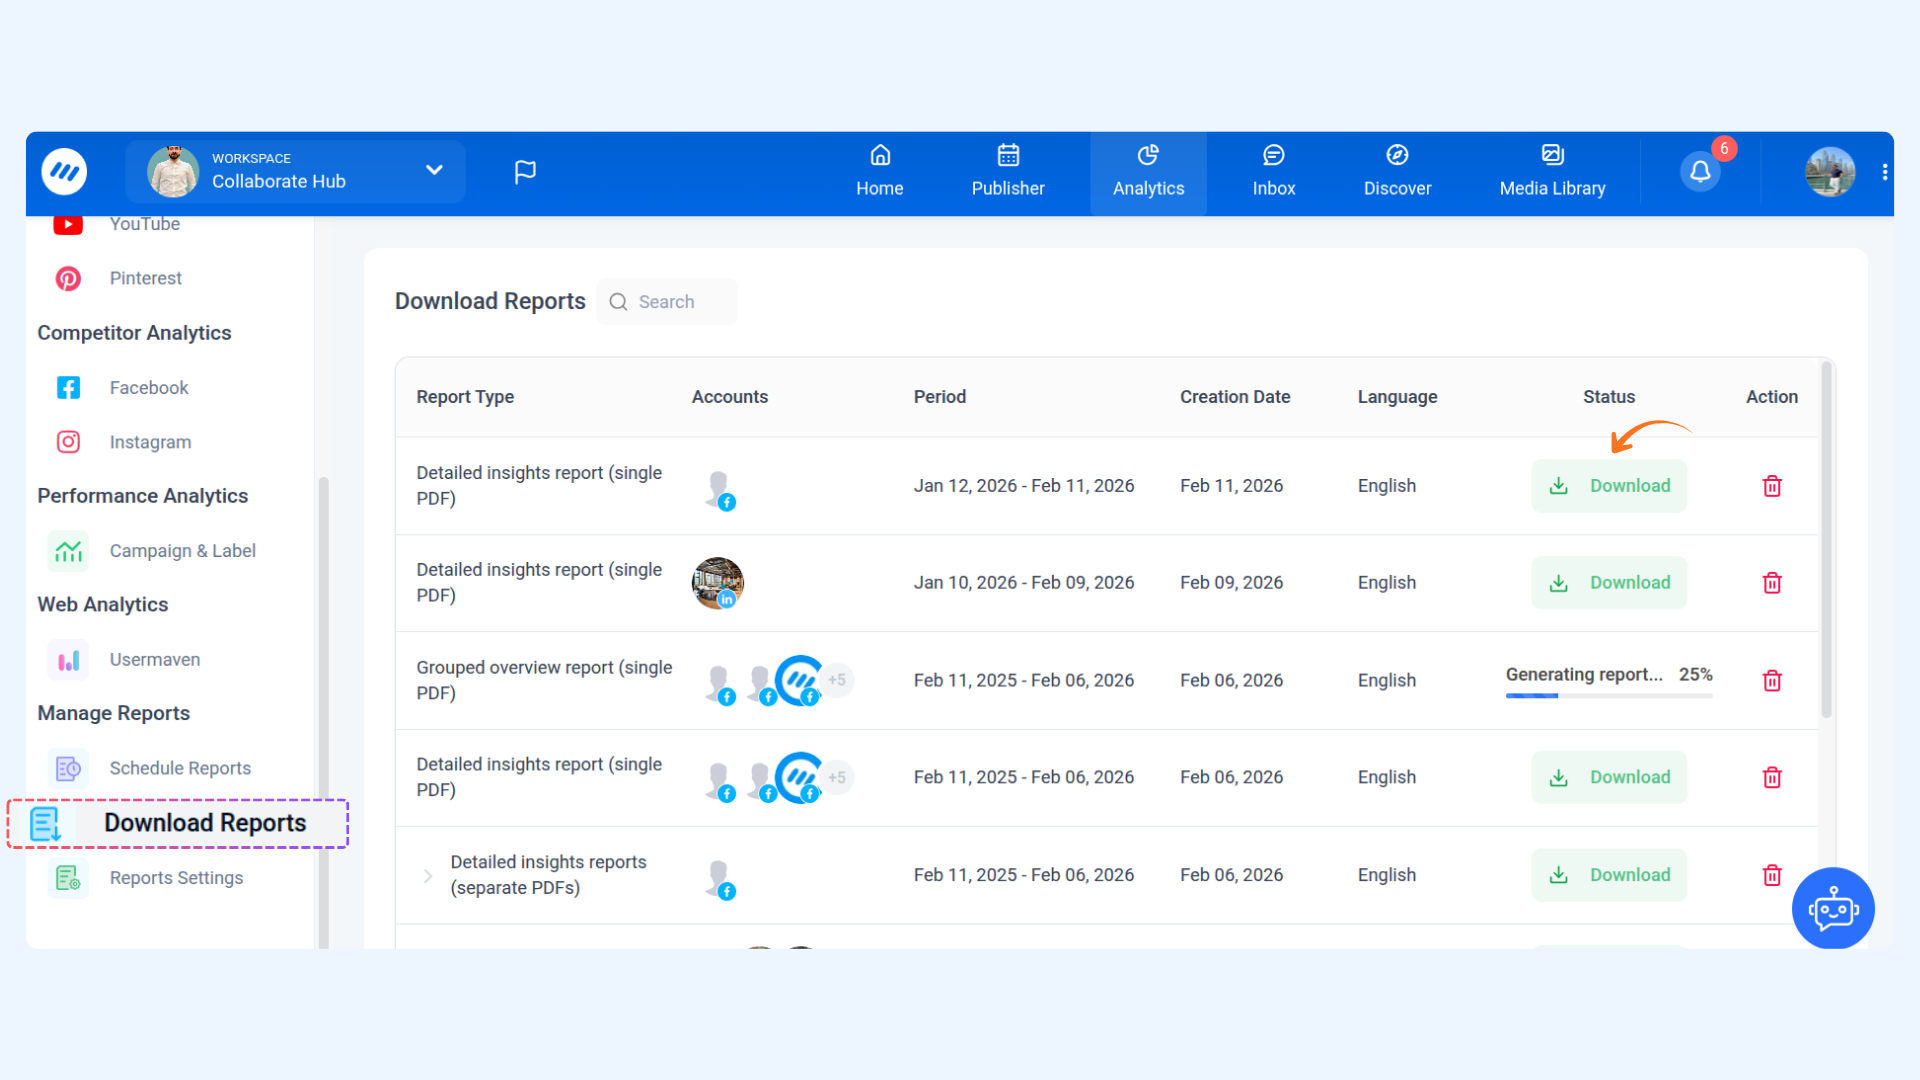
Click Downloaded Reports to see a list of your downloaded reports. You can view:
Social Accounts
Report Type
Report Format
Time Period
Creation Date
Reports Settings
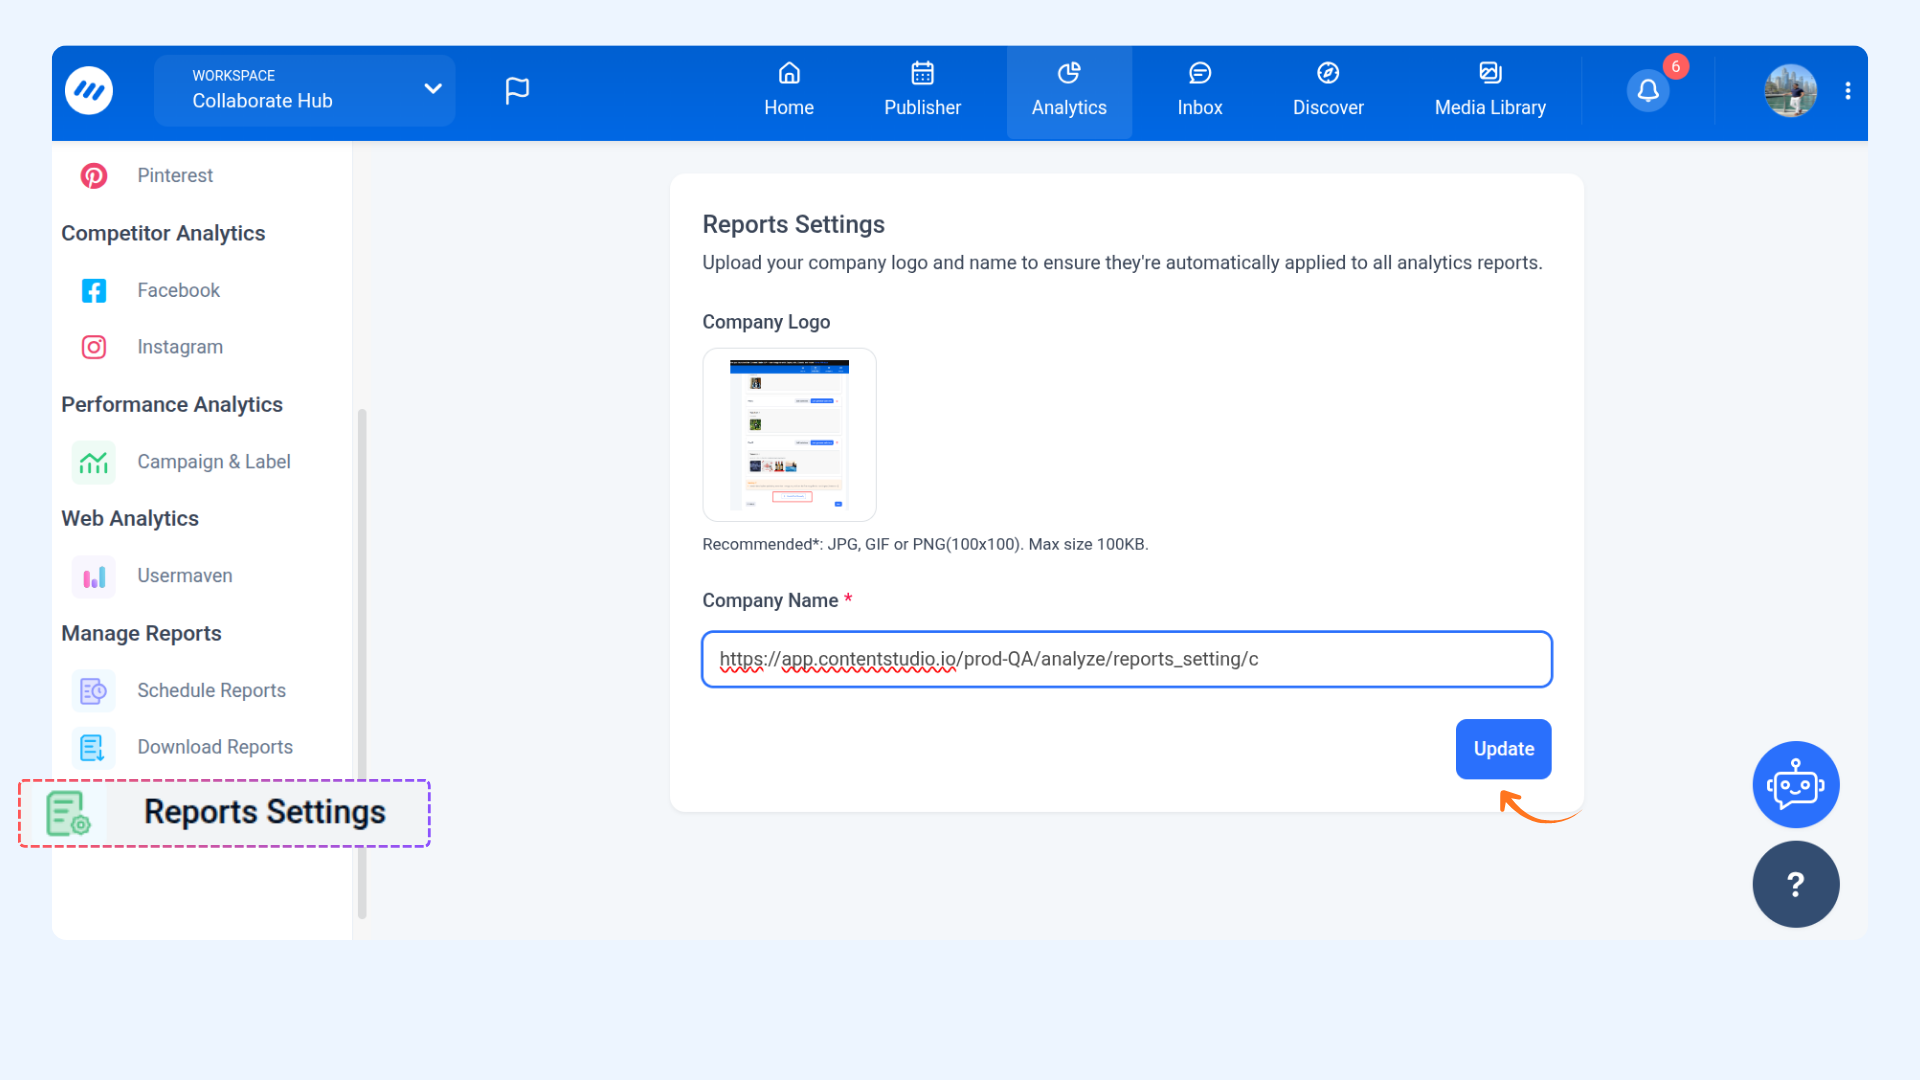
Click Reports Settings to customize:
Modify Company Name: Click the current name and type the new one; this appears on your report’s front page.
Upload Company Logo: Hover and click Upload (PNG, JPG, GIF supported).
Save Changes: Click Update after editing.
You now know how to manage your reports in ContentStudio 😎 Keep your reports scheduled, downloaded, and branded with ease.
FAQs
Q1: Can I schedule multiple reports at once?
A1: Yes! Click “Scheduled Reports” and use the scheduling interface to set up multiple reports.
Q2: What file formats are supported for the company logo?
A2: PNG, JPG, and GIF.
Q3: How do I remove a downloaded report?
A3: Click the Remove icon next to the report in “Downloaded Reports”.
Q4: Will changes in Reports Settings affect all users?
A4: No, the settings apply only to your analytics reports unless you’re an admin with workspace-wide access.
Q5: Can I search for a report by social account?
A5: Yes, use the search bar in “Scheduled Reports” or “Downloaded Reports” to filter by report name or social account.
Was this article helpful?