

Schedule PDF Reports
Schedule PDF emails your analytics report automatically every week or month, so clients and teammates get fresh insights without you exporting anything. Set up a schedule from the Export menu on an analytics page, such as the Overview, or from the Schedule Reports page in the Analytics sidebar. Each scheduled email covers the previous week or month, and you can send it to up to 25 email addresses.
How to Access Schedule PDF
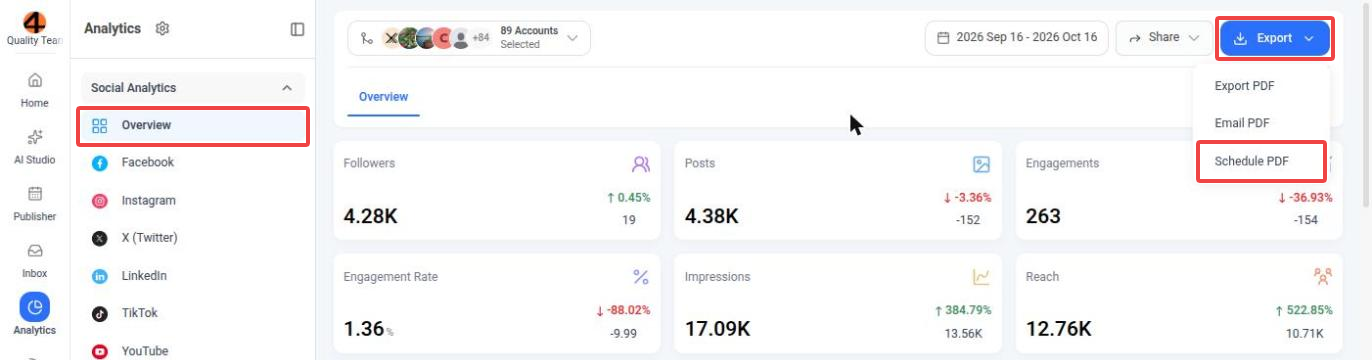
Schedule PDF is also in the Export menu on the platform pages, such as Facebook or Instagram, and on Meta Ads and Campaign & Label. On Campaign & Label, select at least one campaign or label first.
Scheduling a Report from an Analytics Page
The Schedule PDF as Email window opens with the accounts from the page already selected. Fill in the details and schedule the report:
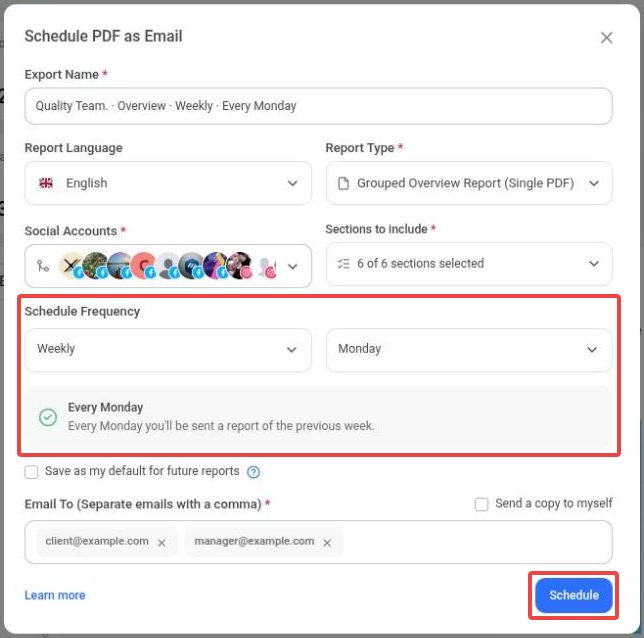
Your report is added to the Schedule Reports page, and ContentStudio emails it on the day you chose.
Scheduling a Report from Schedule Reports
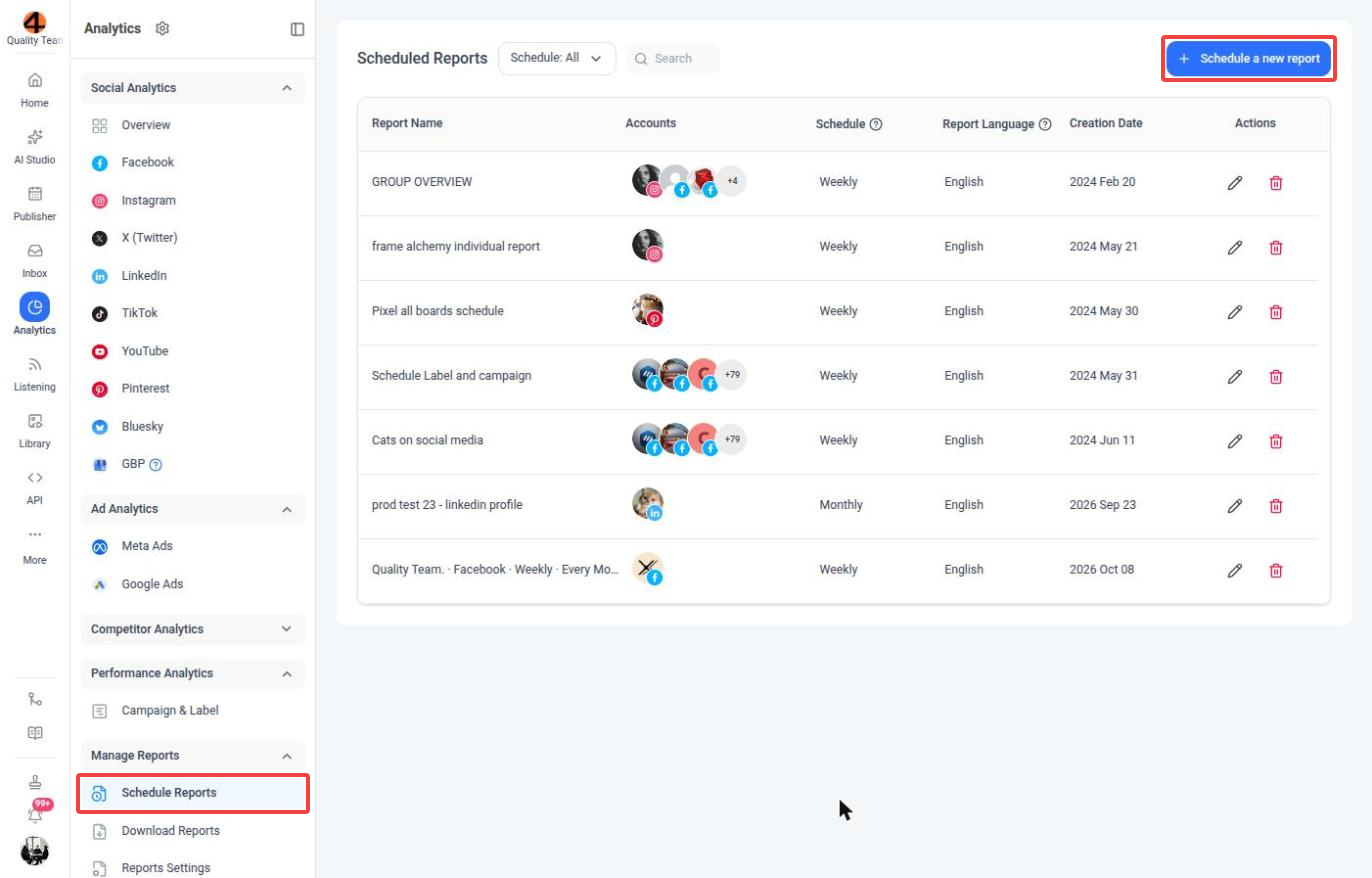
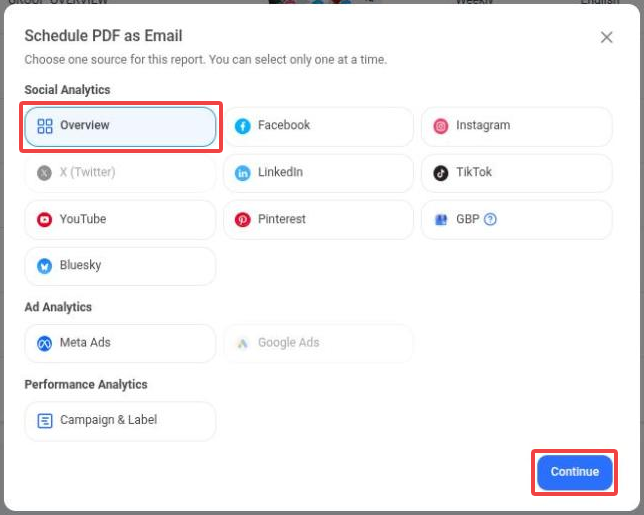
You can also set up a schedule from the Schedule Reports page without opening an analytics page first.
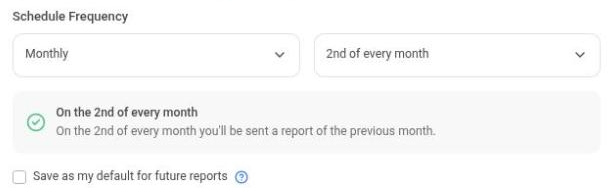
Schedule Frequency
- Weekly: choose a day of the week. On that day, you'll receive a report of the previous week.
- Monthly: choose a day from the 1st to the 28th. On that day, you'll receive a report of the previous month.
- Save as my default for future reports: the next time you schedule a report, the same day is filled in for you. You can change it any time.
Report Options
Reports can be generated in English, French, German, Italian, Spanish, Polish, Swedish, Czech, Chinese and Greek.
Choose how your PDF is put together:
- Grouped overview report (single PDF): combined insights for all selected accounts in one PDF with an overview layout.
- Individual overview reports (single PDF): an overview report for each account, one after the other in a single PDF.
- Individual overview reports (separate PDFs): an overview report for each account, each in its own PDF.
- Detailed insights report (single PDF): detailed insights for each account, one after the other in a single PDF.
- Detailed insights reports (separate PDFs): detailed insights for each account, each in its own PDF.
The overview report types are available for Overview reports. Platform and Meta Ads reports use the two detailed insights types.
Pick the sections that appear in your report. Use Select all to include everything, or search for a section.
- Overview reports: Overview cards, Engagement vs publishing behaviour, Platforms engagement breakdown, Performance comparison, Top posts and Account insights.
- Platform reports list the sections of that platform's analytics, such as Audience Growth, Top Posts or AI Insights.
- Campaign & Label reports: Overview cards, Daily Post Impressions Trend, Daily Post Engagements Trend, Post Breakdown, Top posts per platform and Top posts by engagement.
- Detailed insights reports scheduled from the Overview always include every section. To choose specific sections, schedule the report from that platform's analytics page or pick the platform as the source on Schedule Reports.
Managing Scheduled Reports
All your scheduled reports are listed on the Schedule Reports page, with their accounts, schedule, report language and creation date.
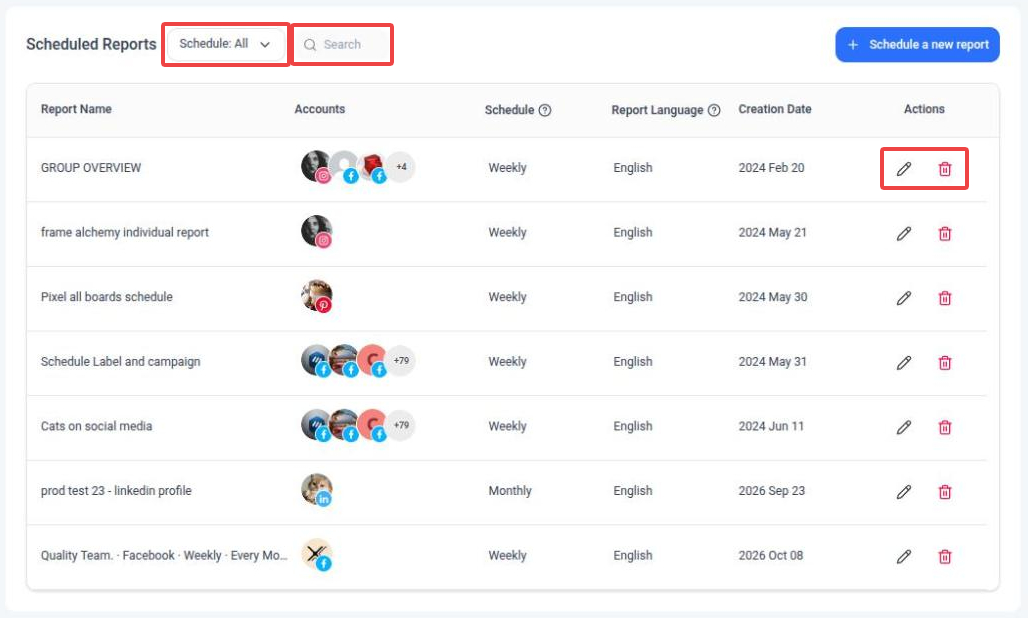
- Filter: use Schedule to show all, weekly or monthly reports.
- Search: find a scheduled report by its name or an account name.
- Edit: click the pencil icon to open the report's settings, make your changes and click Schedule to save them.
- Delete: click the trash icon and confirm to stop sending the report.
Good to Know
- Each weekly email covers the previous week, and each monthly email covers the previous month.
- You can send a scheduled report to up to 25 email addresses.
- The company logo and name you add under Analytics → Manage Reports → Reports Settings are applied to your reports.
- Need a one-off report instead? Use Export PDF to download it or Email PDF to send it right away.
FAQs
How often can I receive scheduled reports?
Weekly or monthly. For weekly reports, choose the day of the week. For monthly reports, choose a day from the 1st to the 28th.
Which period does a scheduled report cover?
A weekly report covers the previous week, and a monthly report covers the previous month.
How many email addresses can I add?
Up to 25 per scheduled report. Separate the addresses with commas.
Why can't I choose the 29th, 30th or 31st?
Monthly reports can be sent on any day from the 1st to the 28th, so they go out every month, including February.
How do I change a scheduled report?
Go to Analytics → Manage Reports → Schedule Reports, click the pencil icon next to the report, update the settings and click Schedule.
How do I stop a scheduled report?
Delete it from the Schedule Reports page by clicking the trash icon next to the report and confirming.
Can I schedule competitor reports?
Competitor reports aren't available as a source for scheduled reports. You can still export them as PDFs from the competitor report or from Download Reports.
Which languages are available?
English, French, German, Italian, Spanish, Polish, Swedish, Czech, Chinese and Greek.
Was this article helpful?