

Post approval workflow in ContentStudio
Streamline your content approval process with ContentStudio's Workflow Approver feature. This powerful tool allows teams to automate client approvals, receive instant feedback, and ensure a seamless workflow.
Let’s walk through the process🤩
In this article:
Add clients as team members
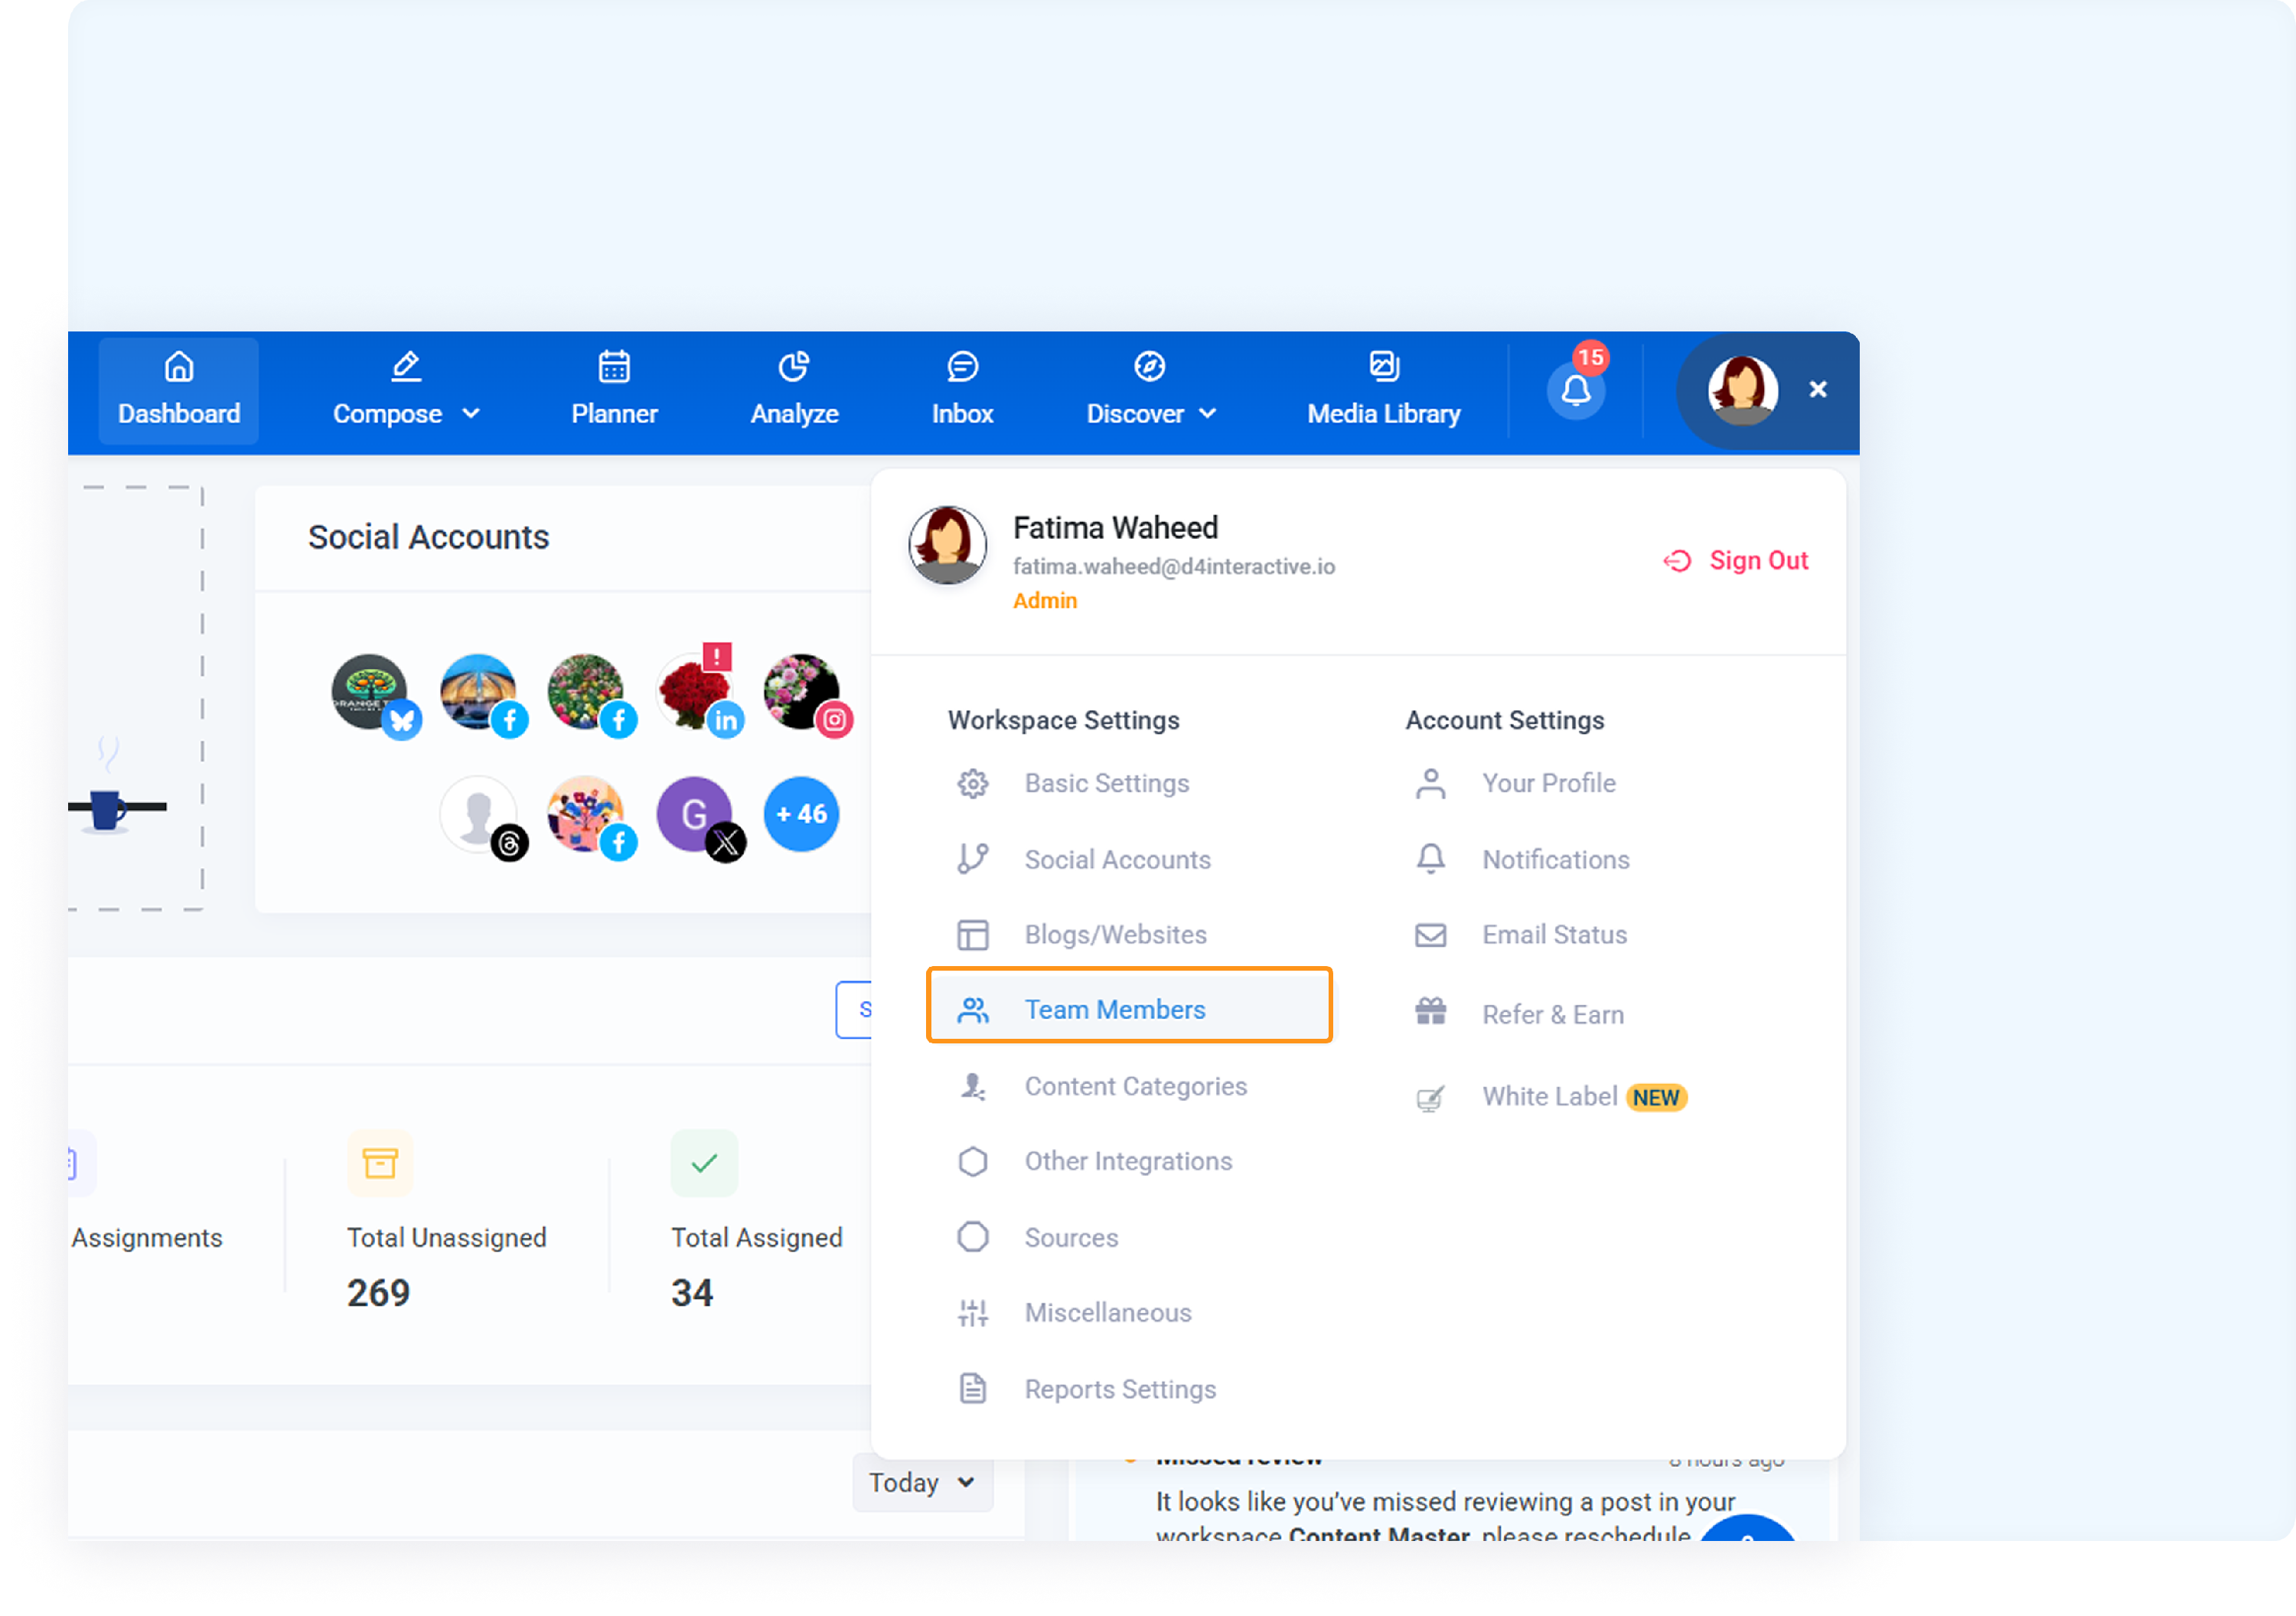
Navigate to Your Profile -> Team Members.
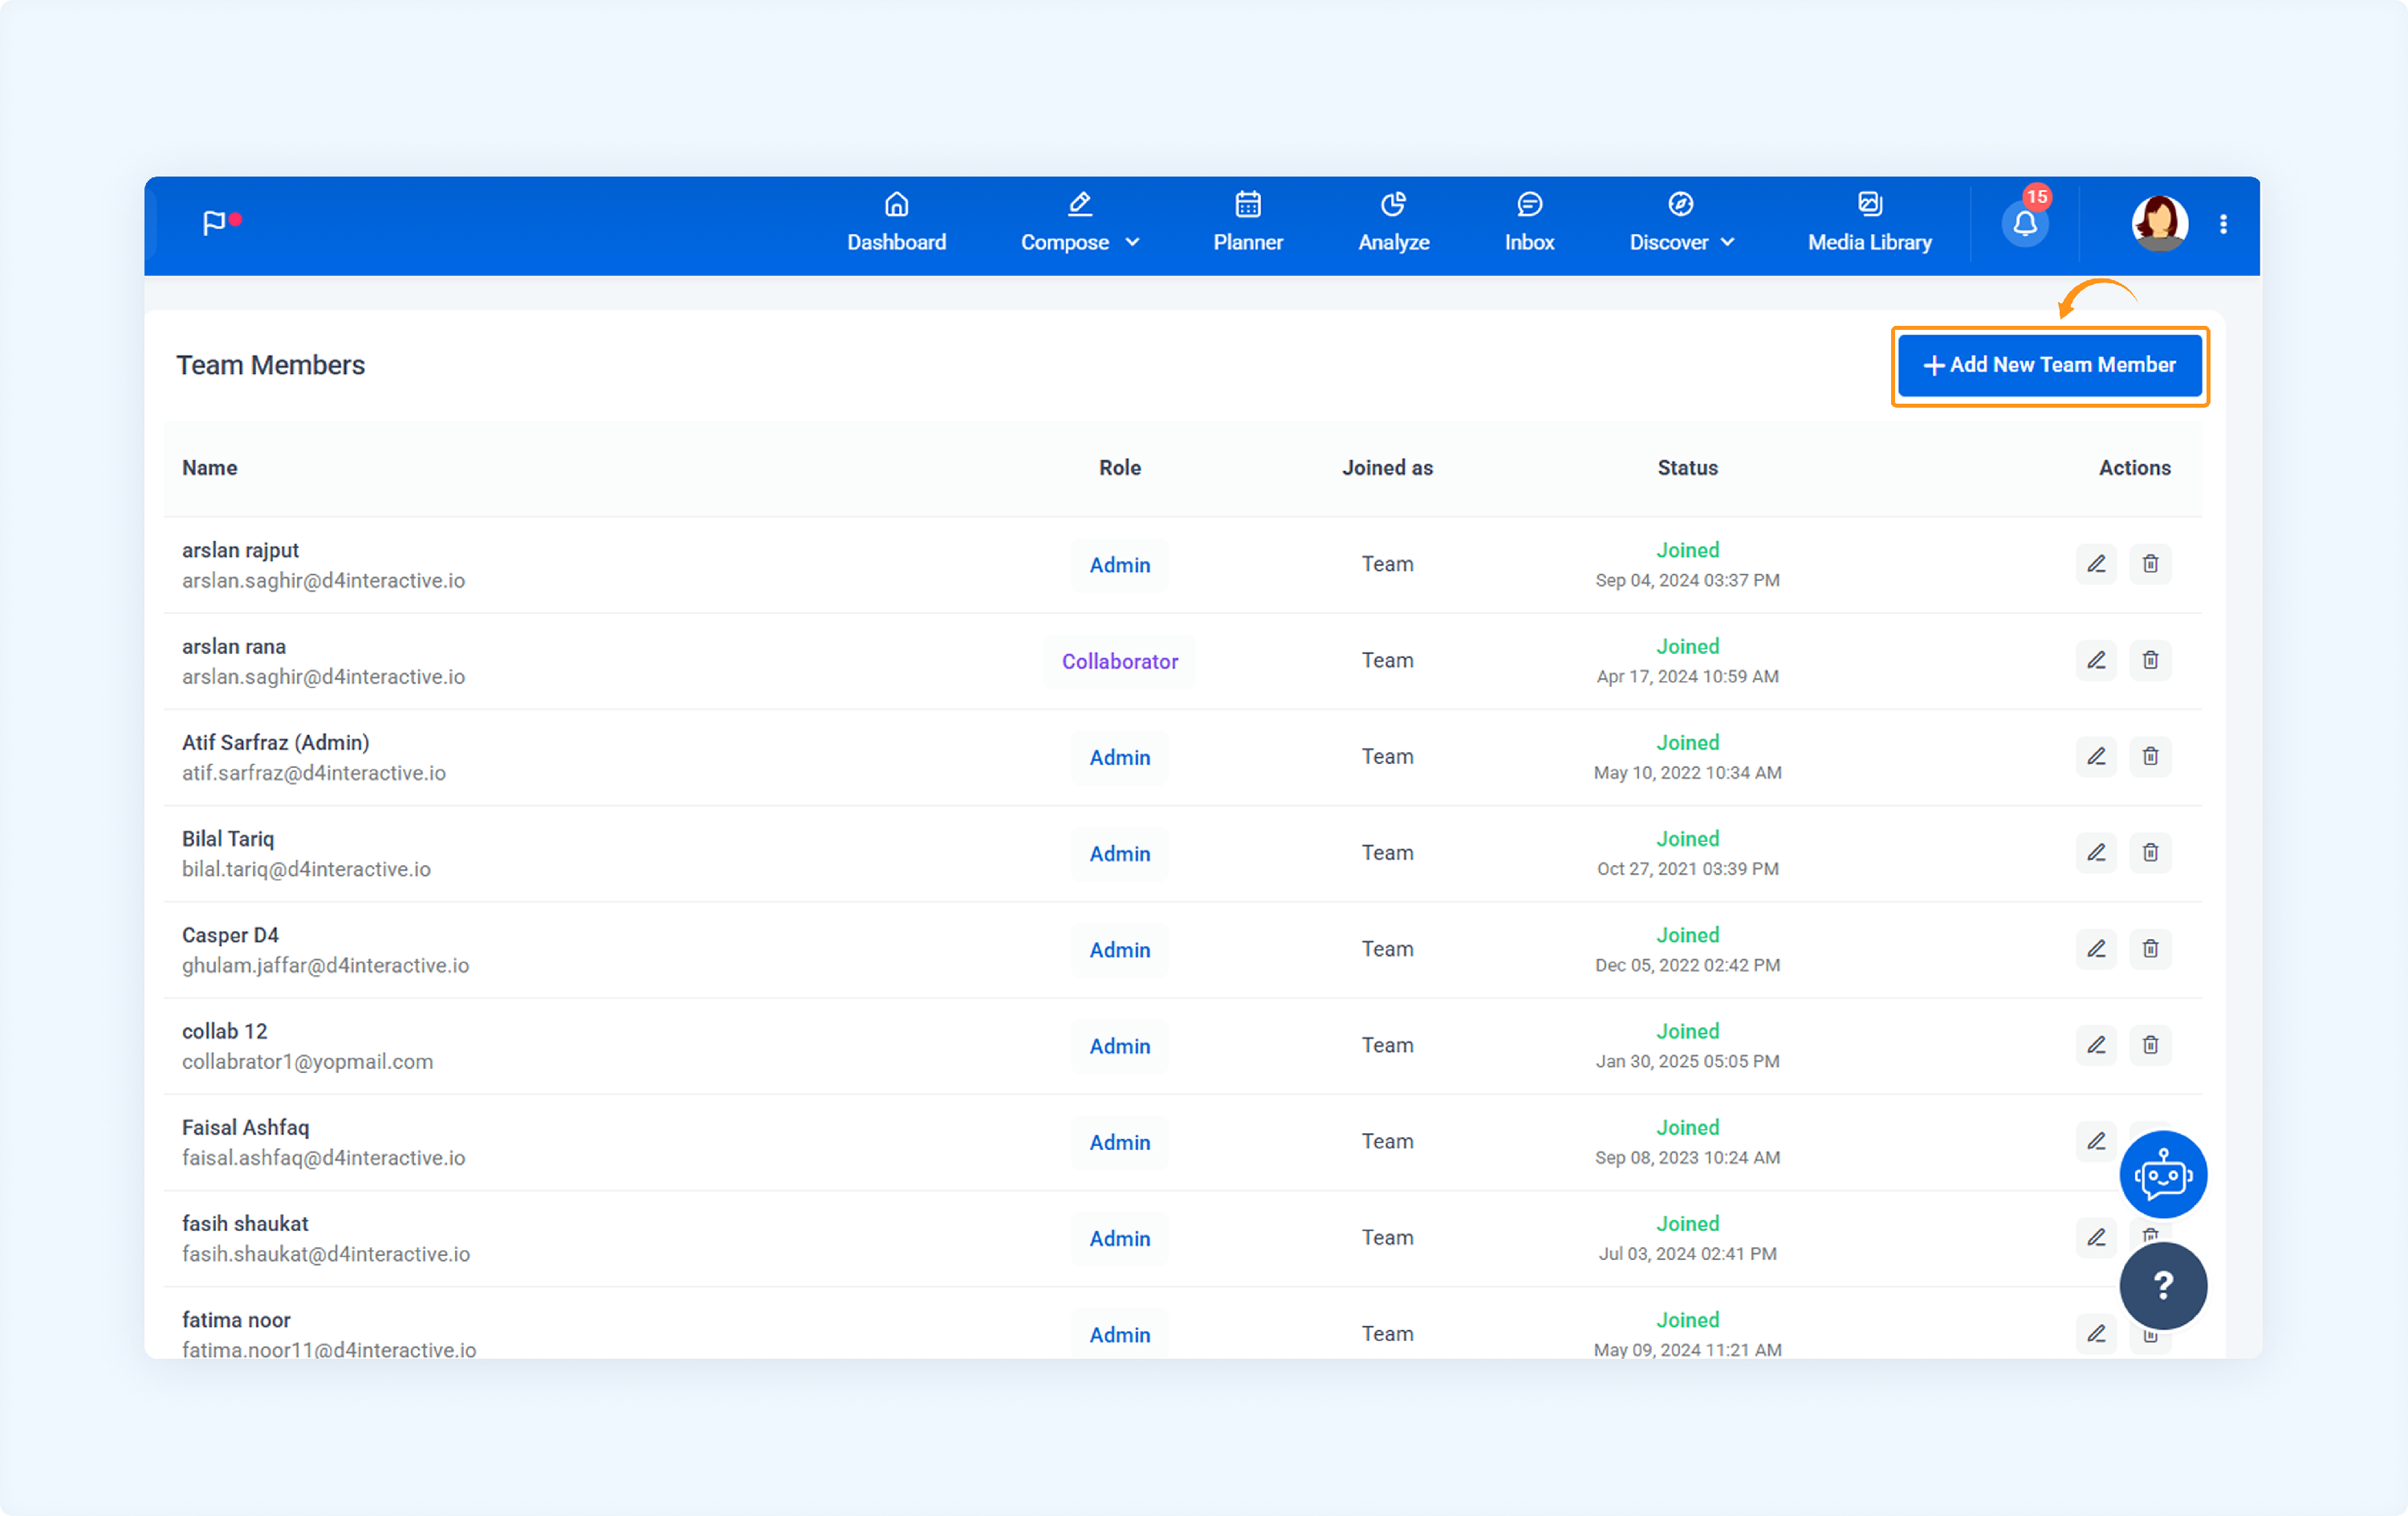
Click Add New Team Member.
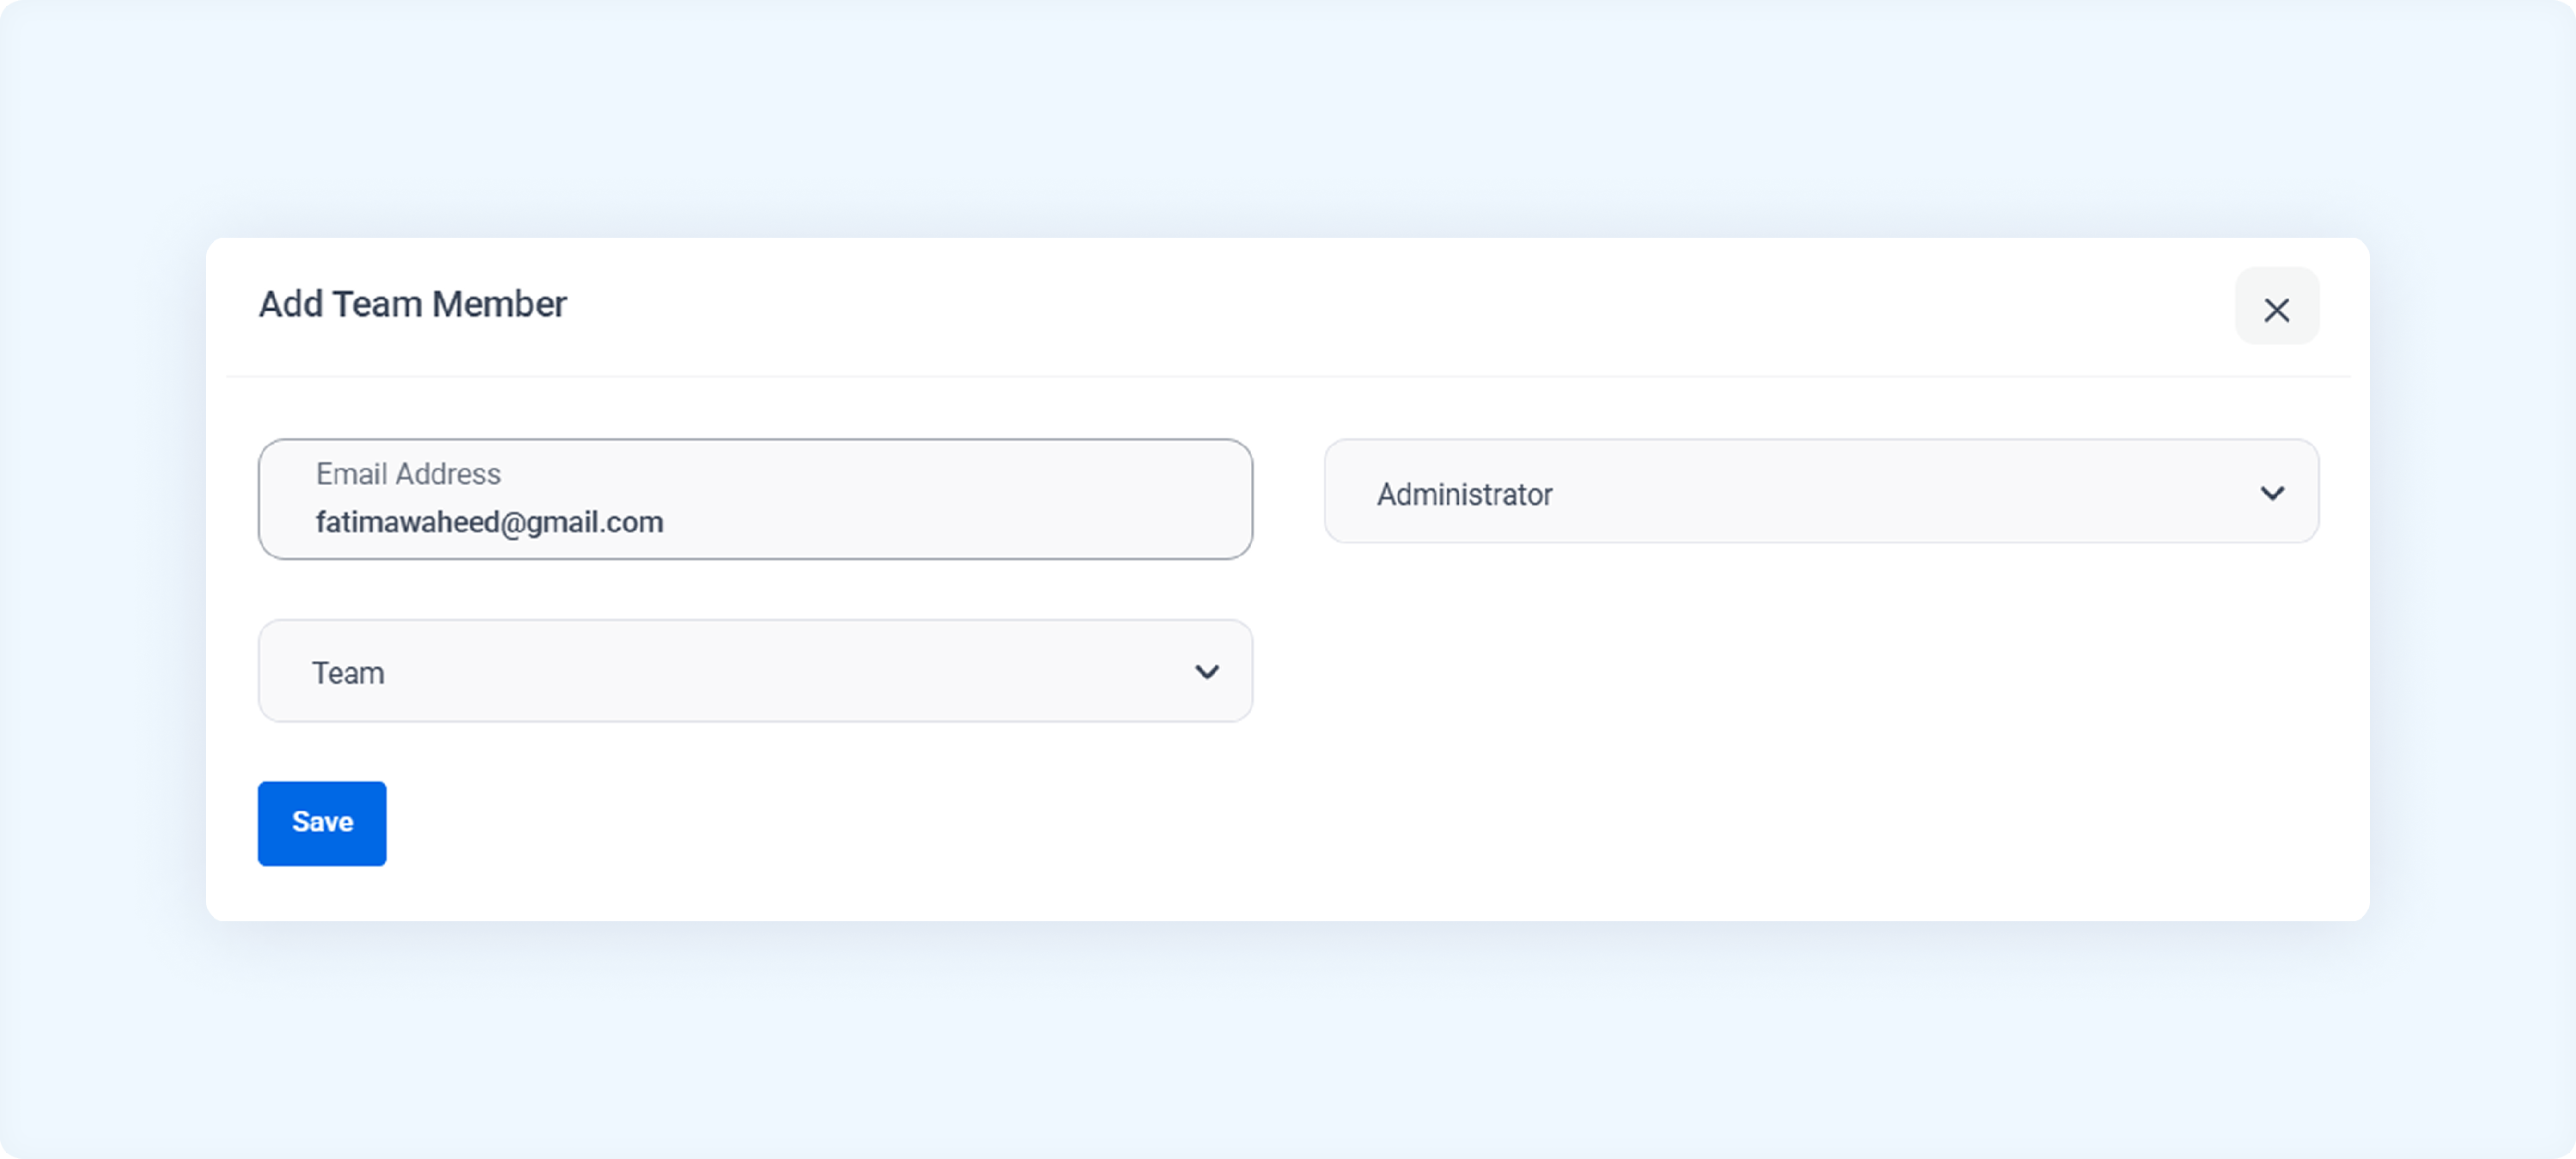
A pop-up will appear requesting basic details. Fill in the information and click Save.
Send a post for approval
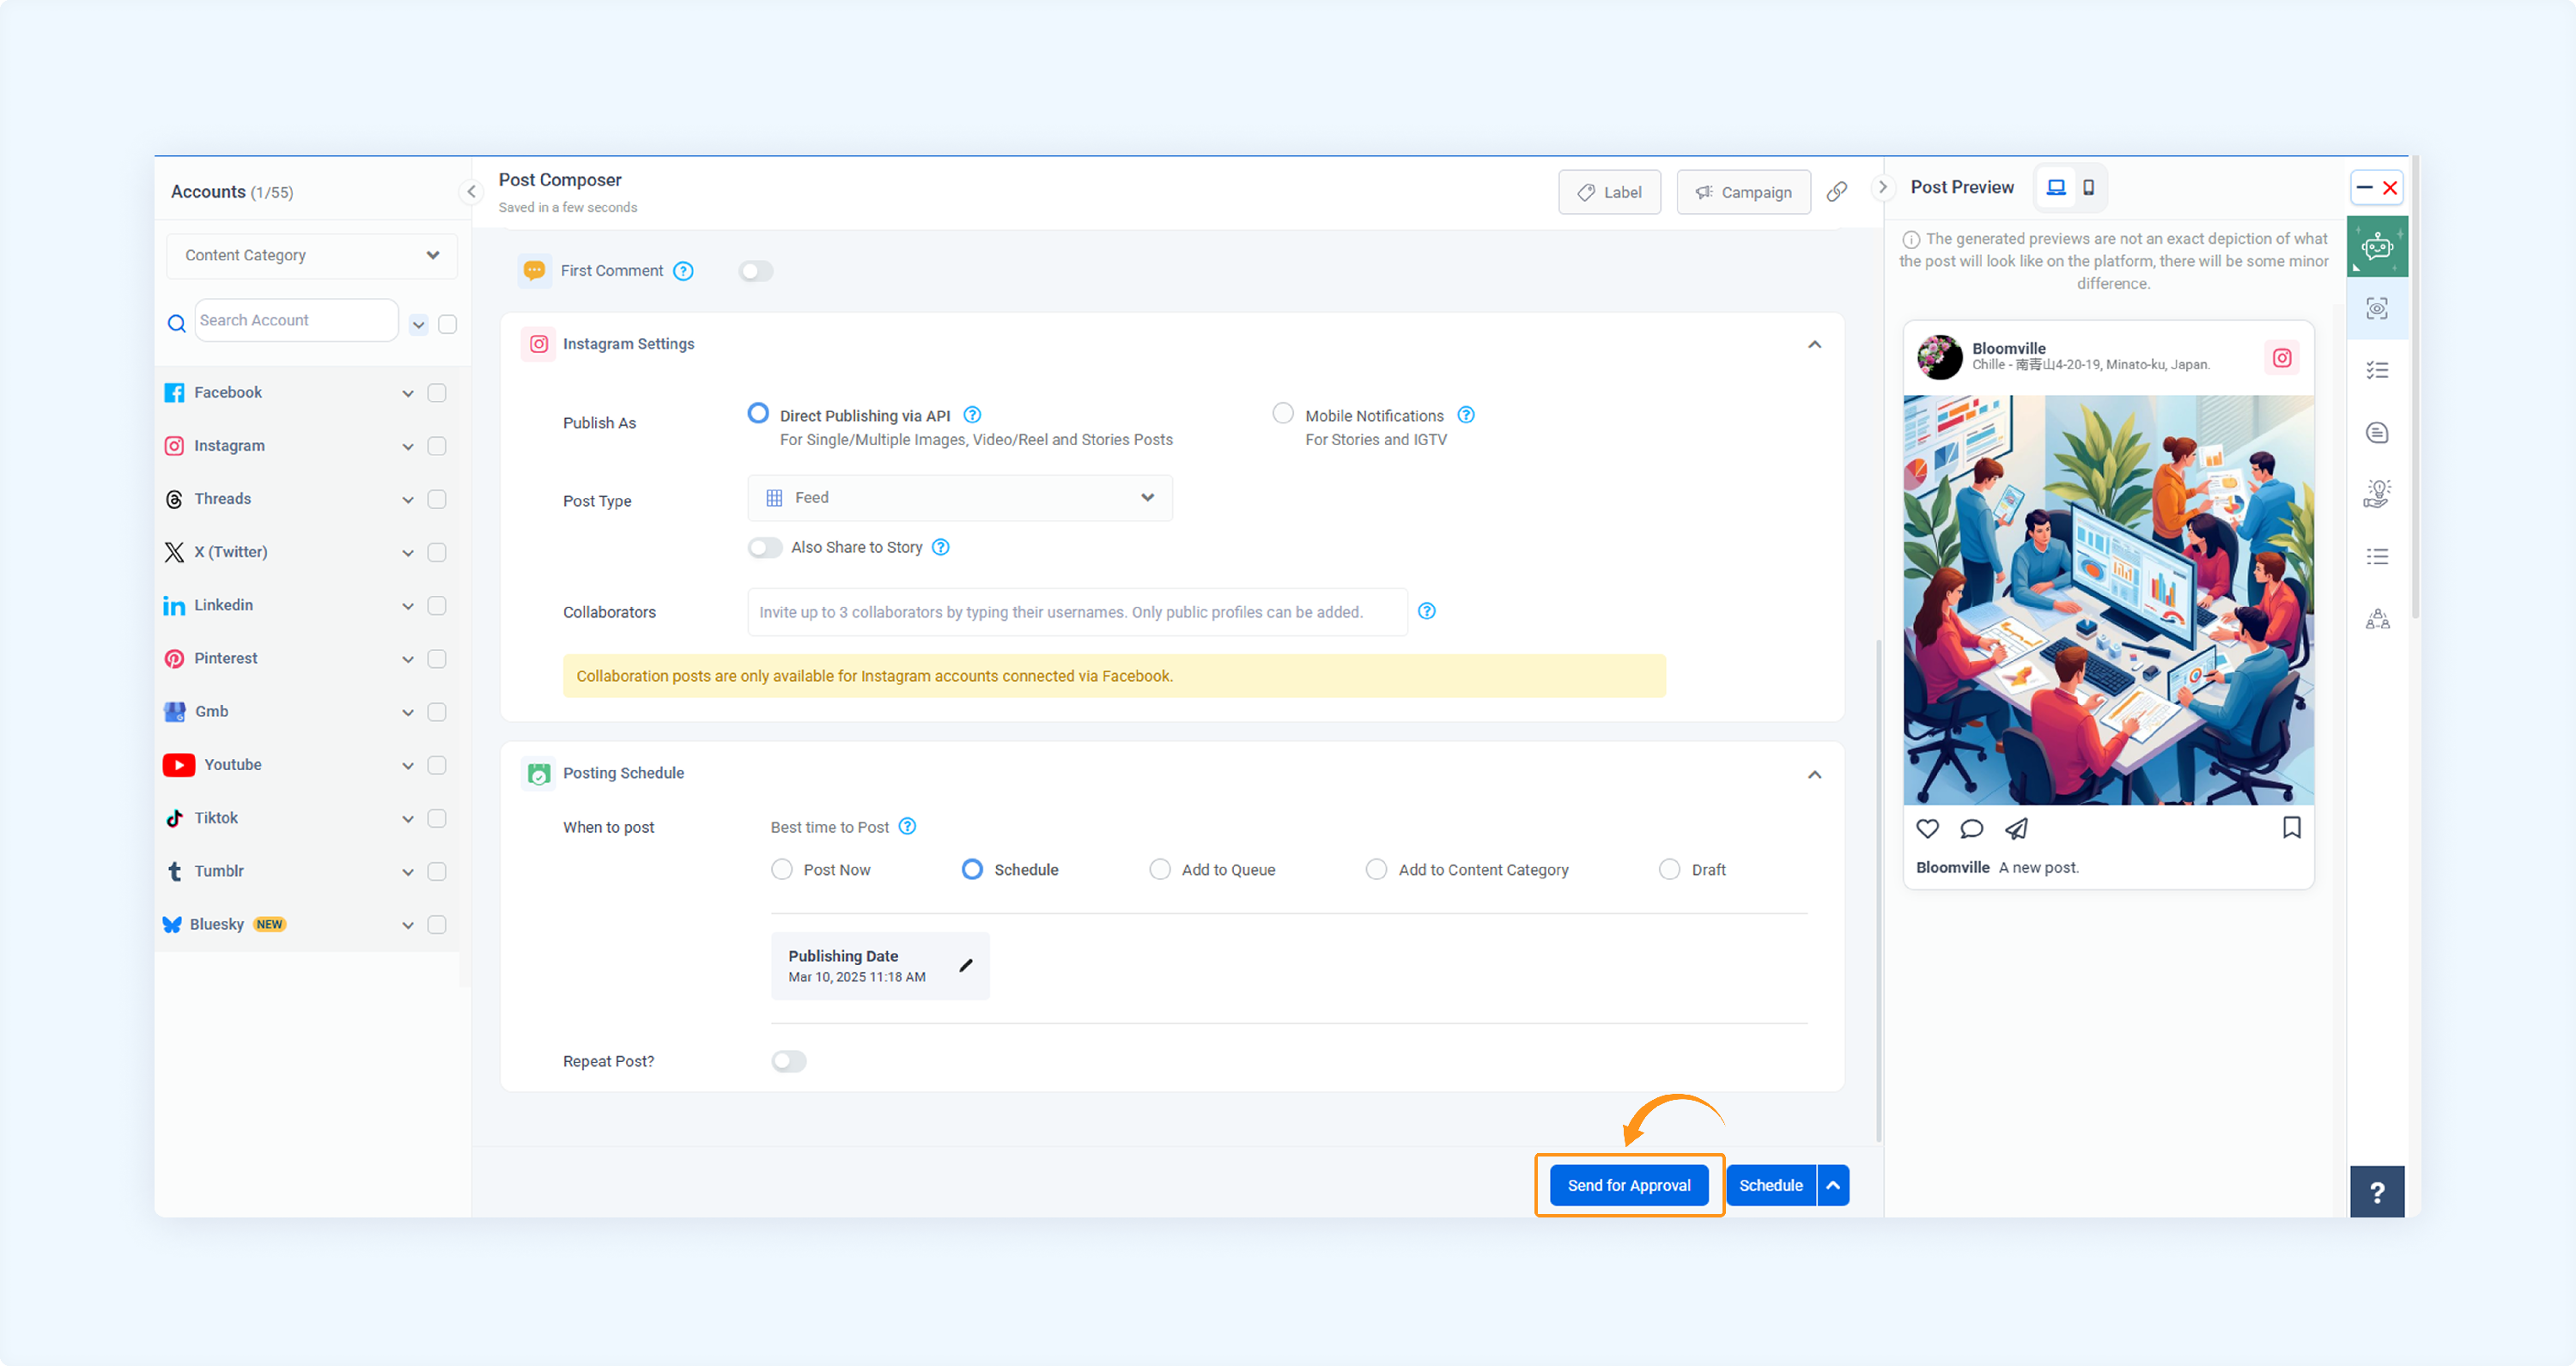
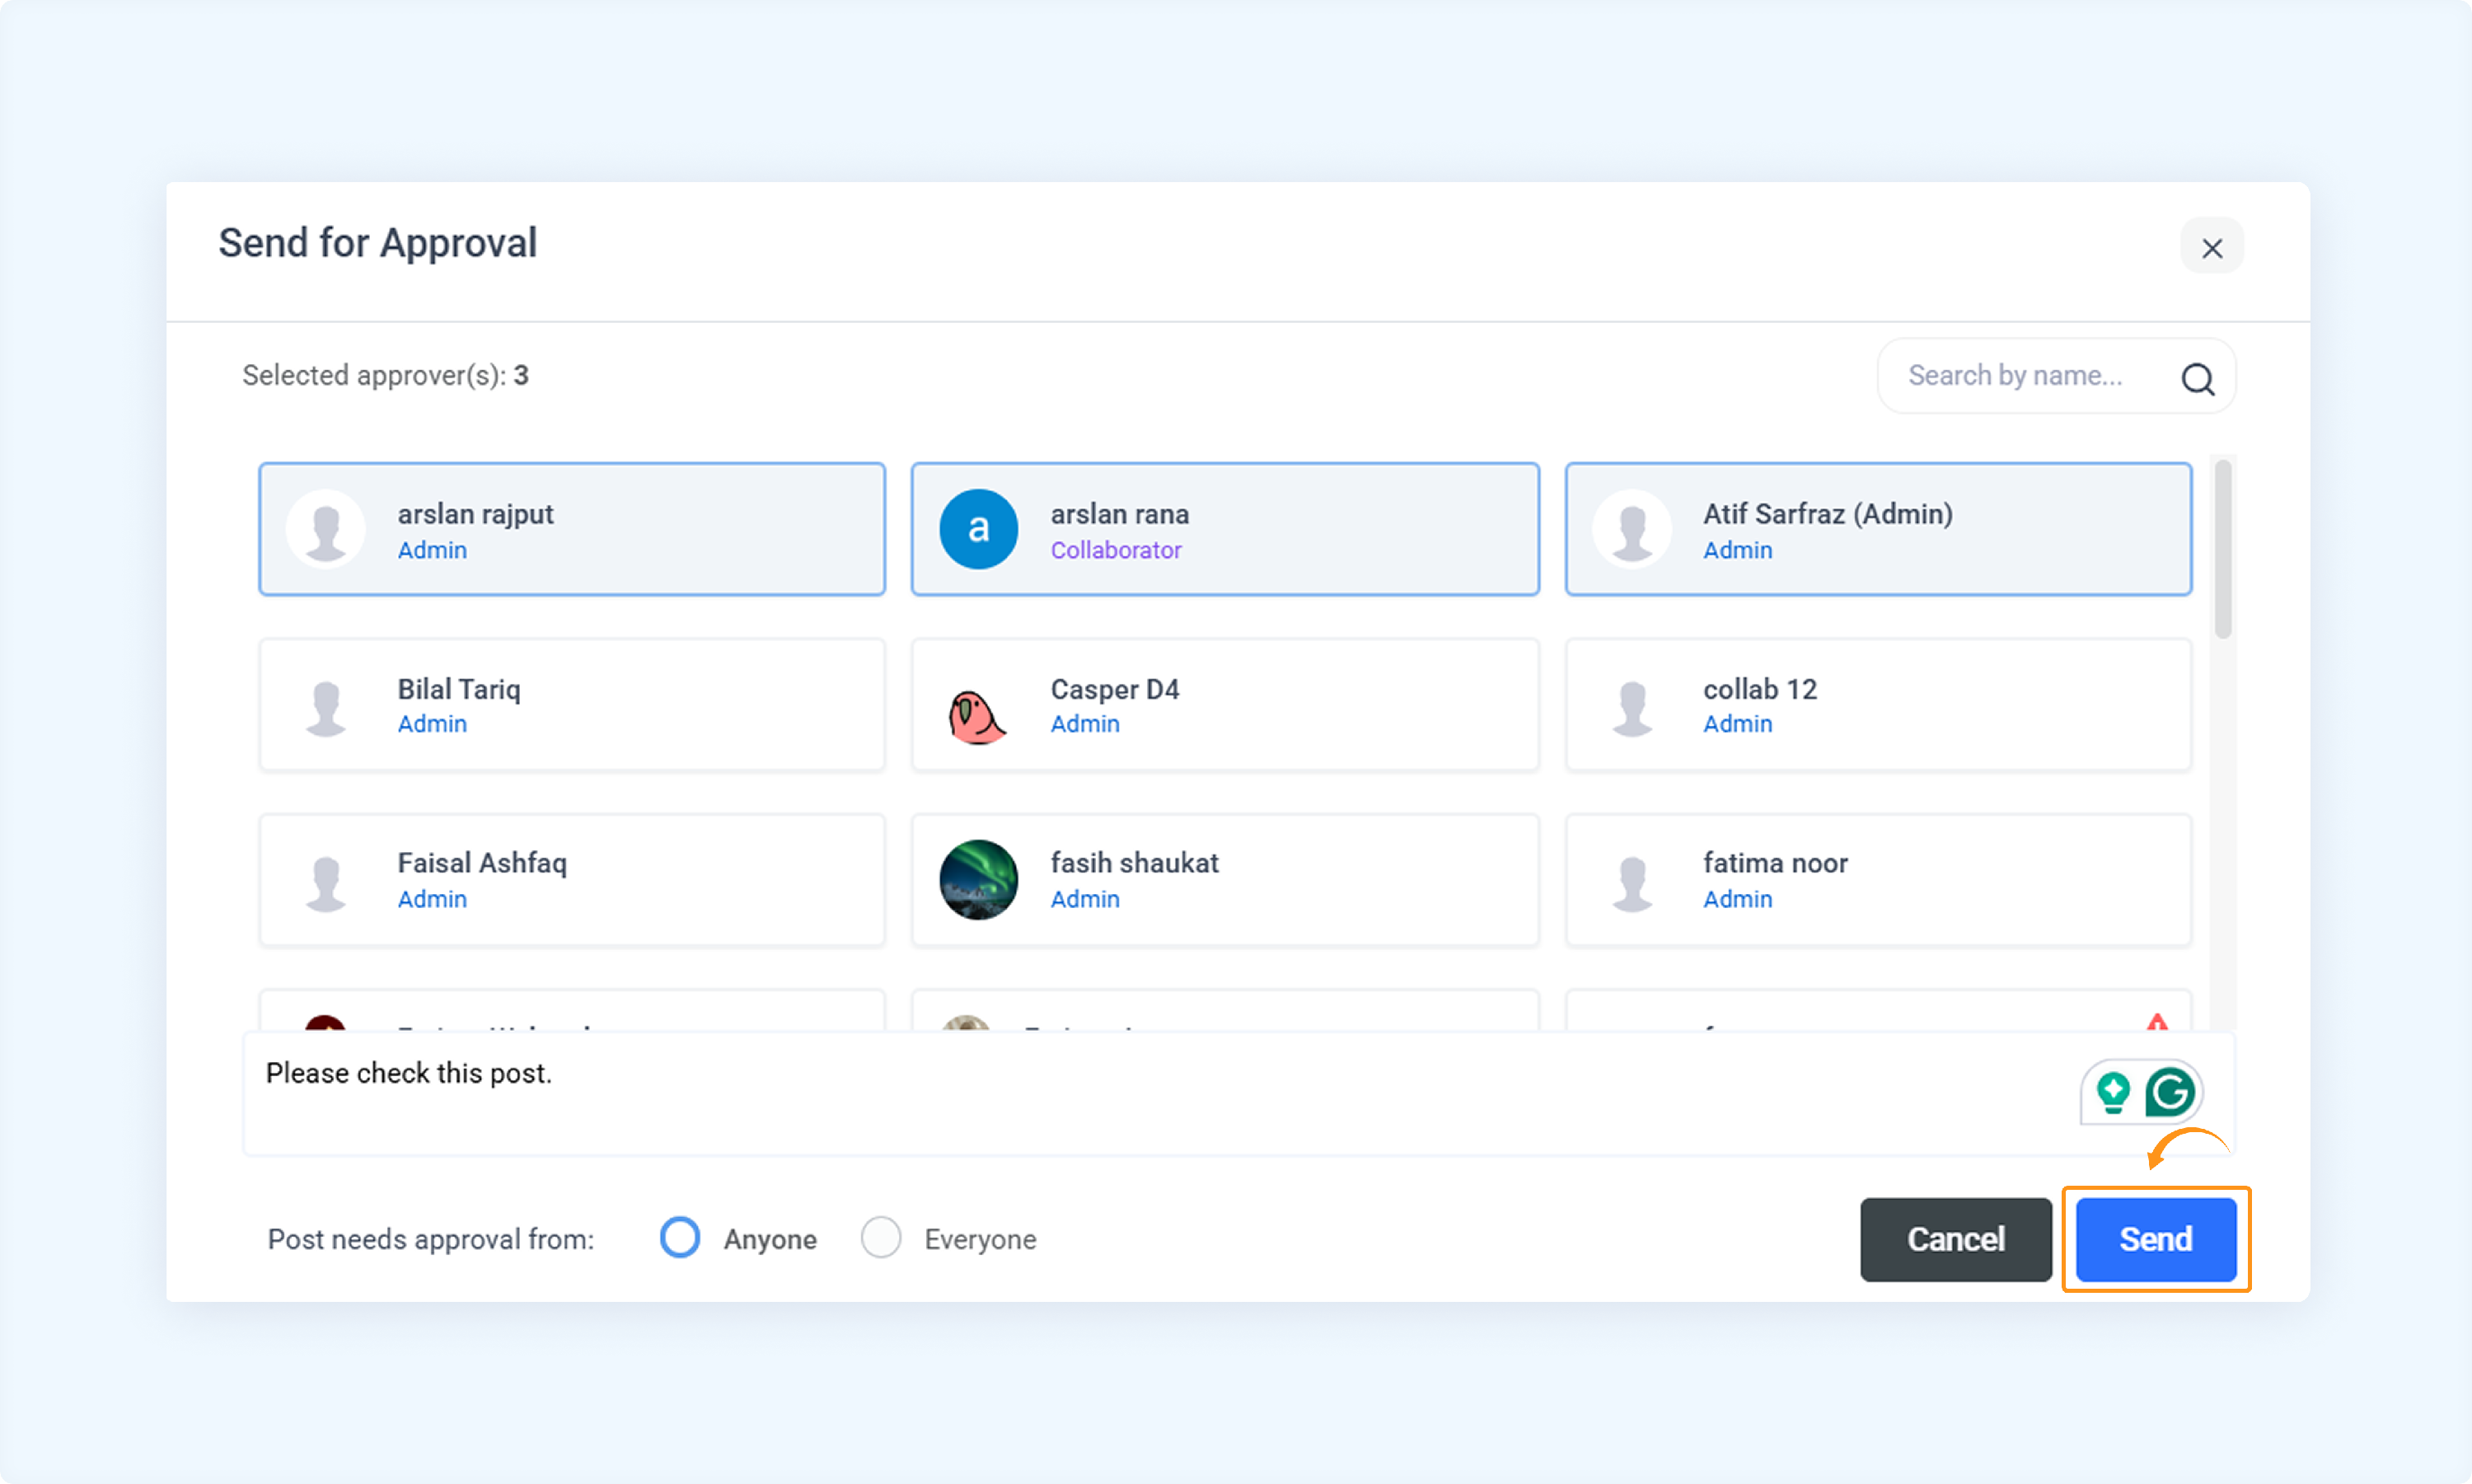
Compose your post as usual. Click Send to Approval.
A dialog box will appear—choose the Approvers for the workspace and profile. Optionally, add helpful notes for the approver. Click Send to submit the request.

Approver actions
The approver receives a Review Content request.
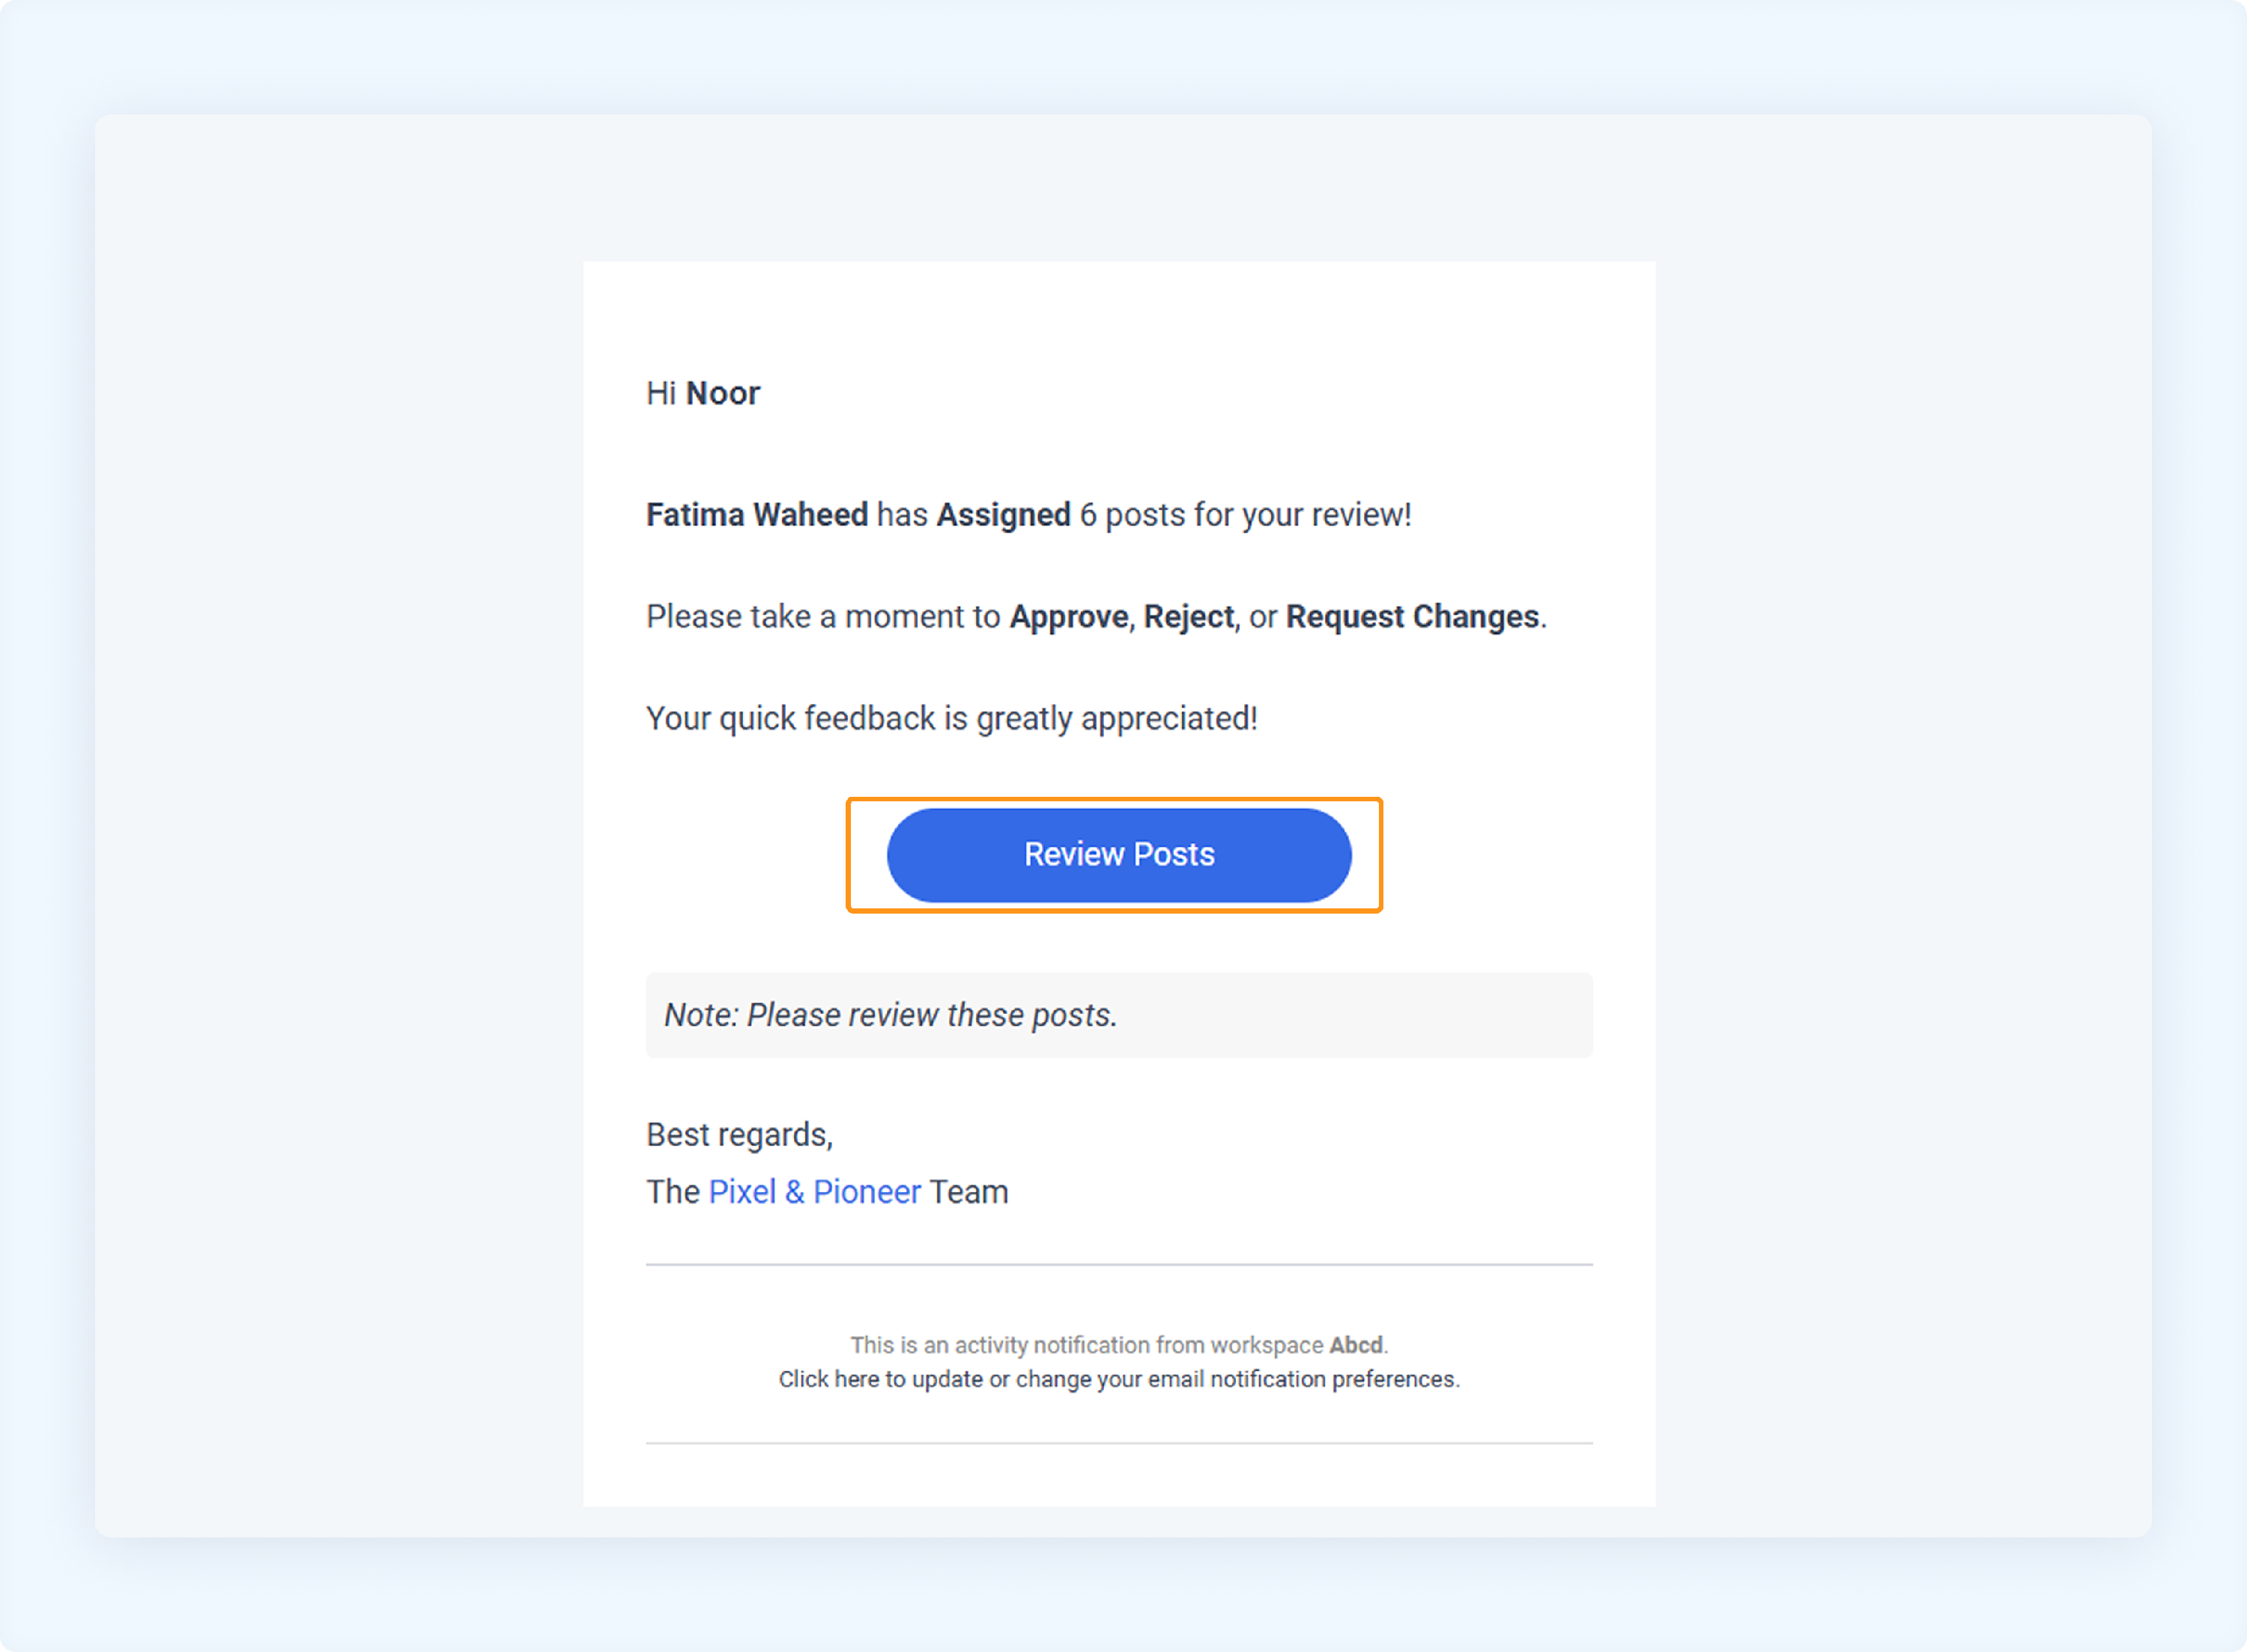
They can approve or reject the post, with or without comments. Approvers can also attach files, mention other team members, and add internal notes.
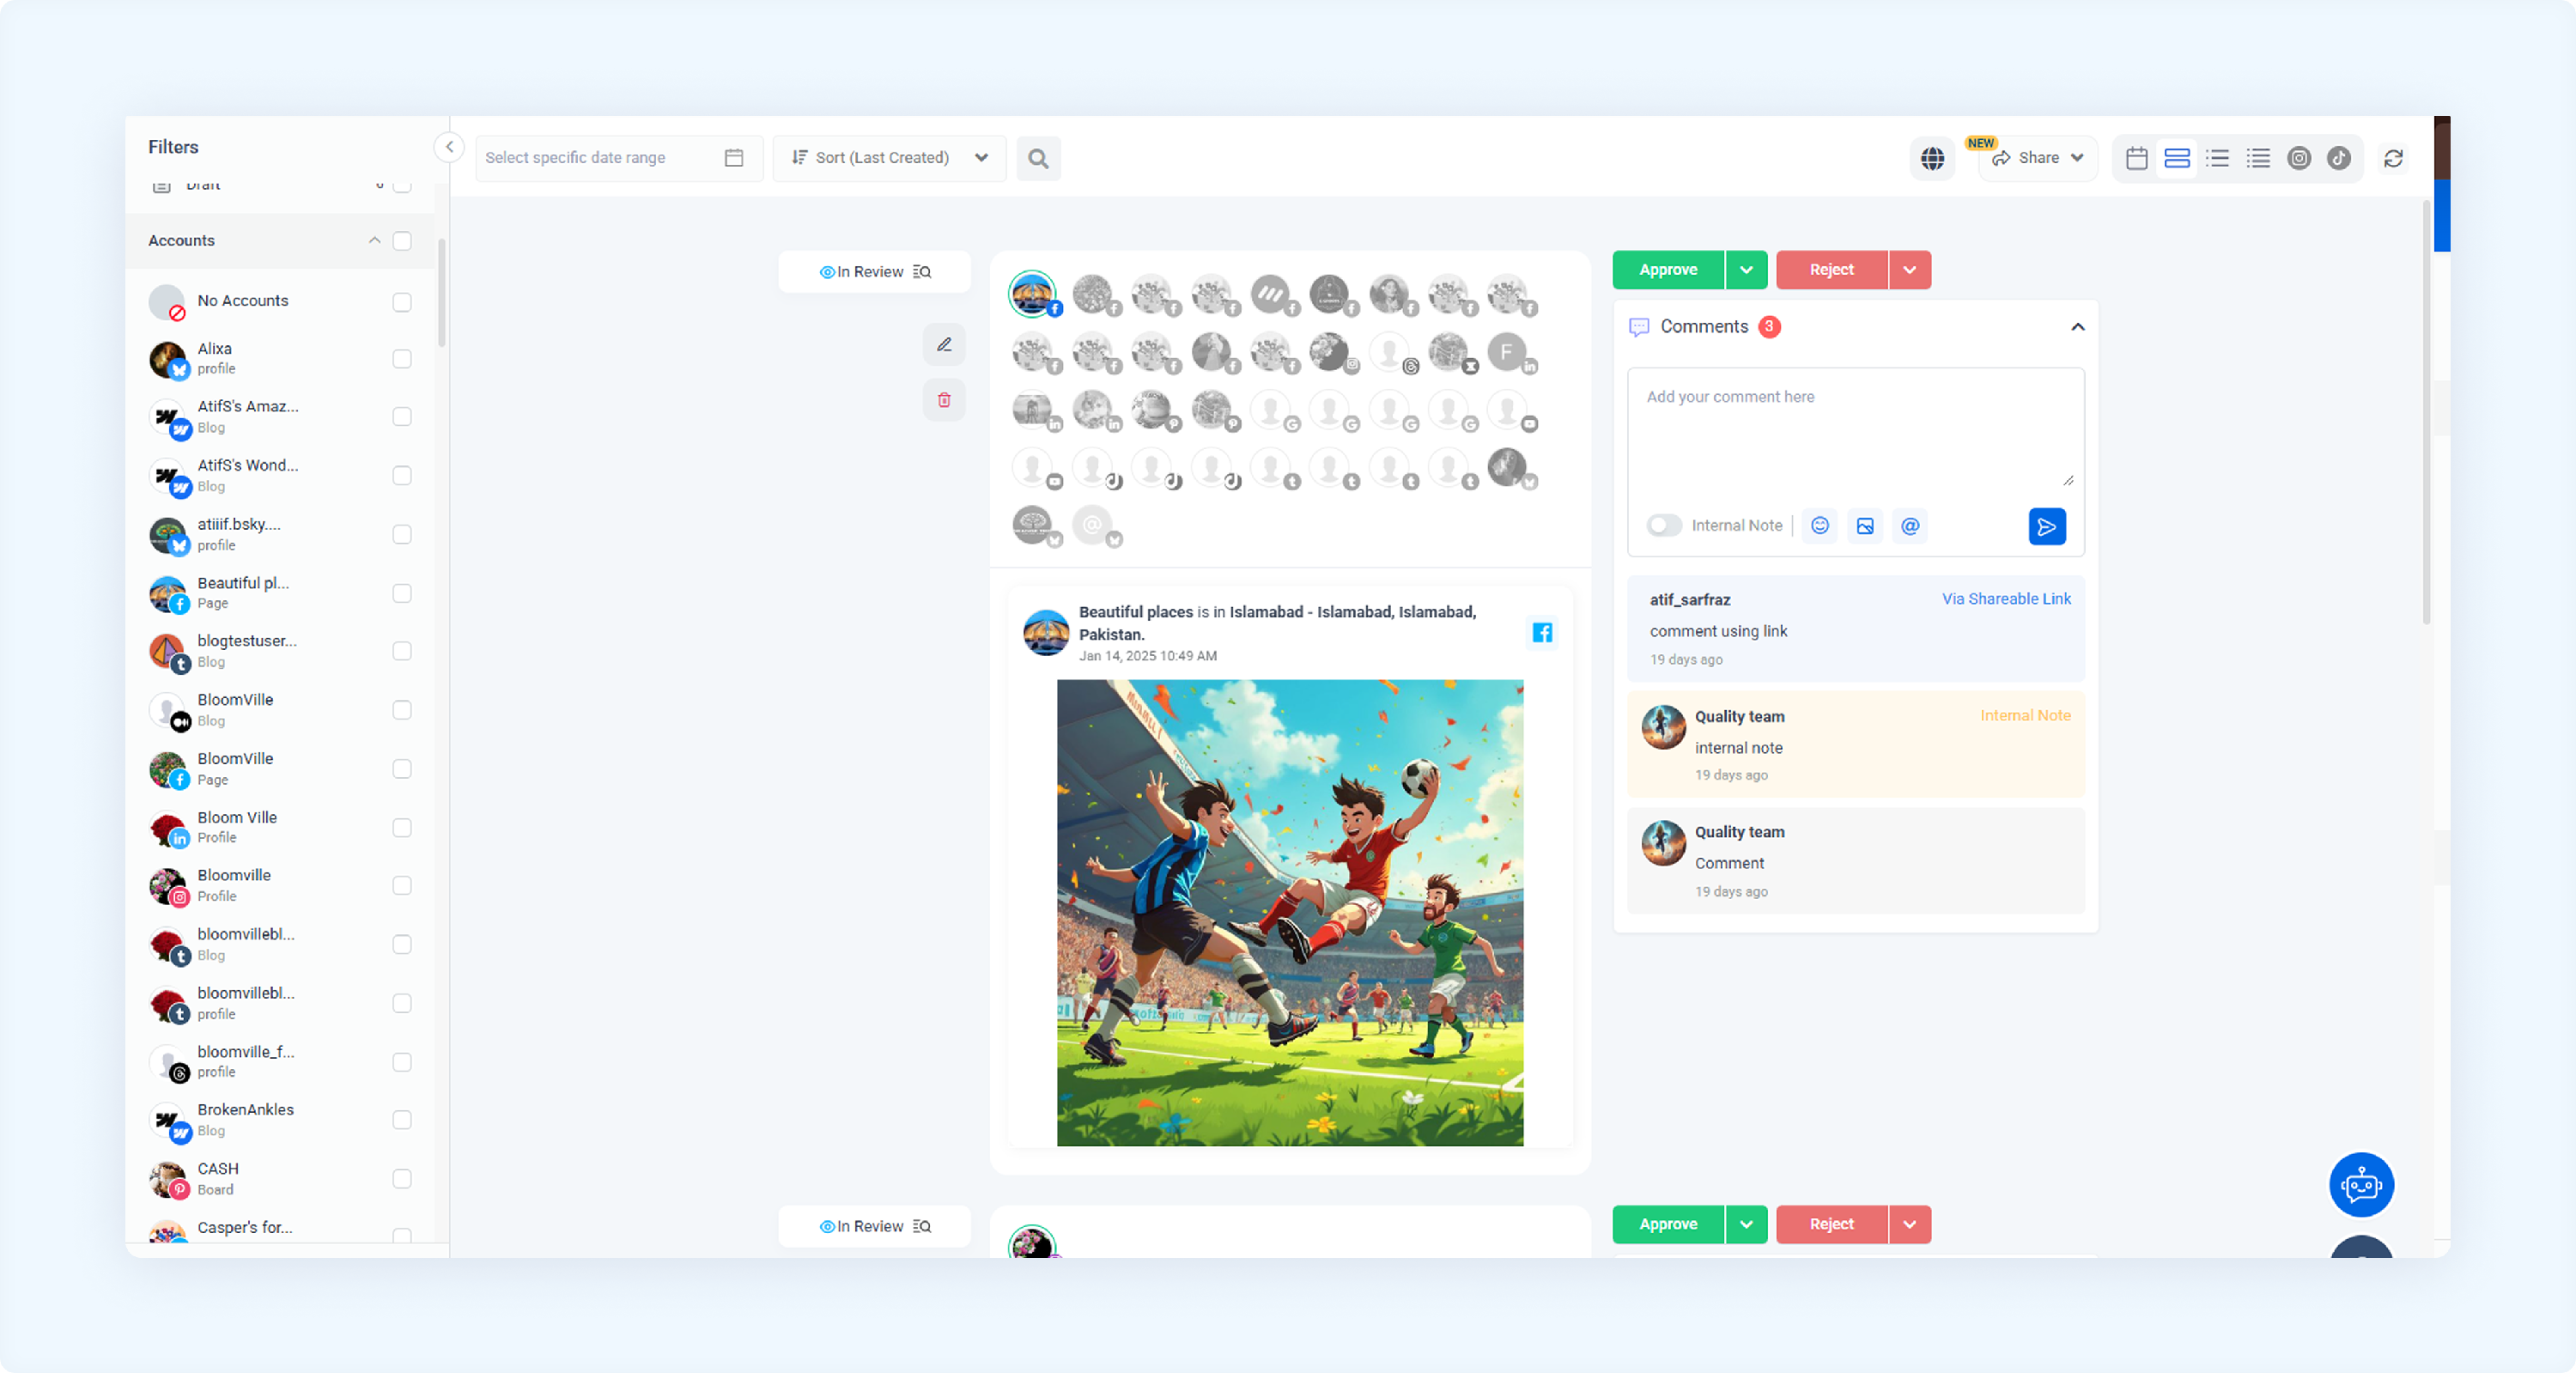
Approval status updates
The post status updates in real-time:
"In Review" when sent for approval.
"Accepted" if approved.
"Rejected" if declined.
Once approved, the post status changes to "Scheduled" and is ready for publishing.
This workflow makes managing content approvals effortless, ensuring smooth collaboration and timely publishing. 🚀
FAQs
Q1: How will I know if my post has been approved or rejected?
A: You will receive a status update, changing from "In Review" to either "Approved" or "Rejected".
Q2: Can approvers add internal notes during the review process?
A: Yes, approvers can add internal notes that are visible to the team but not external clients.
Q3: If a post is rejected, can I resubmit it for approval?
A: Yes, you can edit the post and resend it for approval.
Was this article helpful?